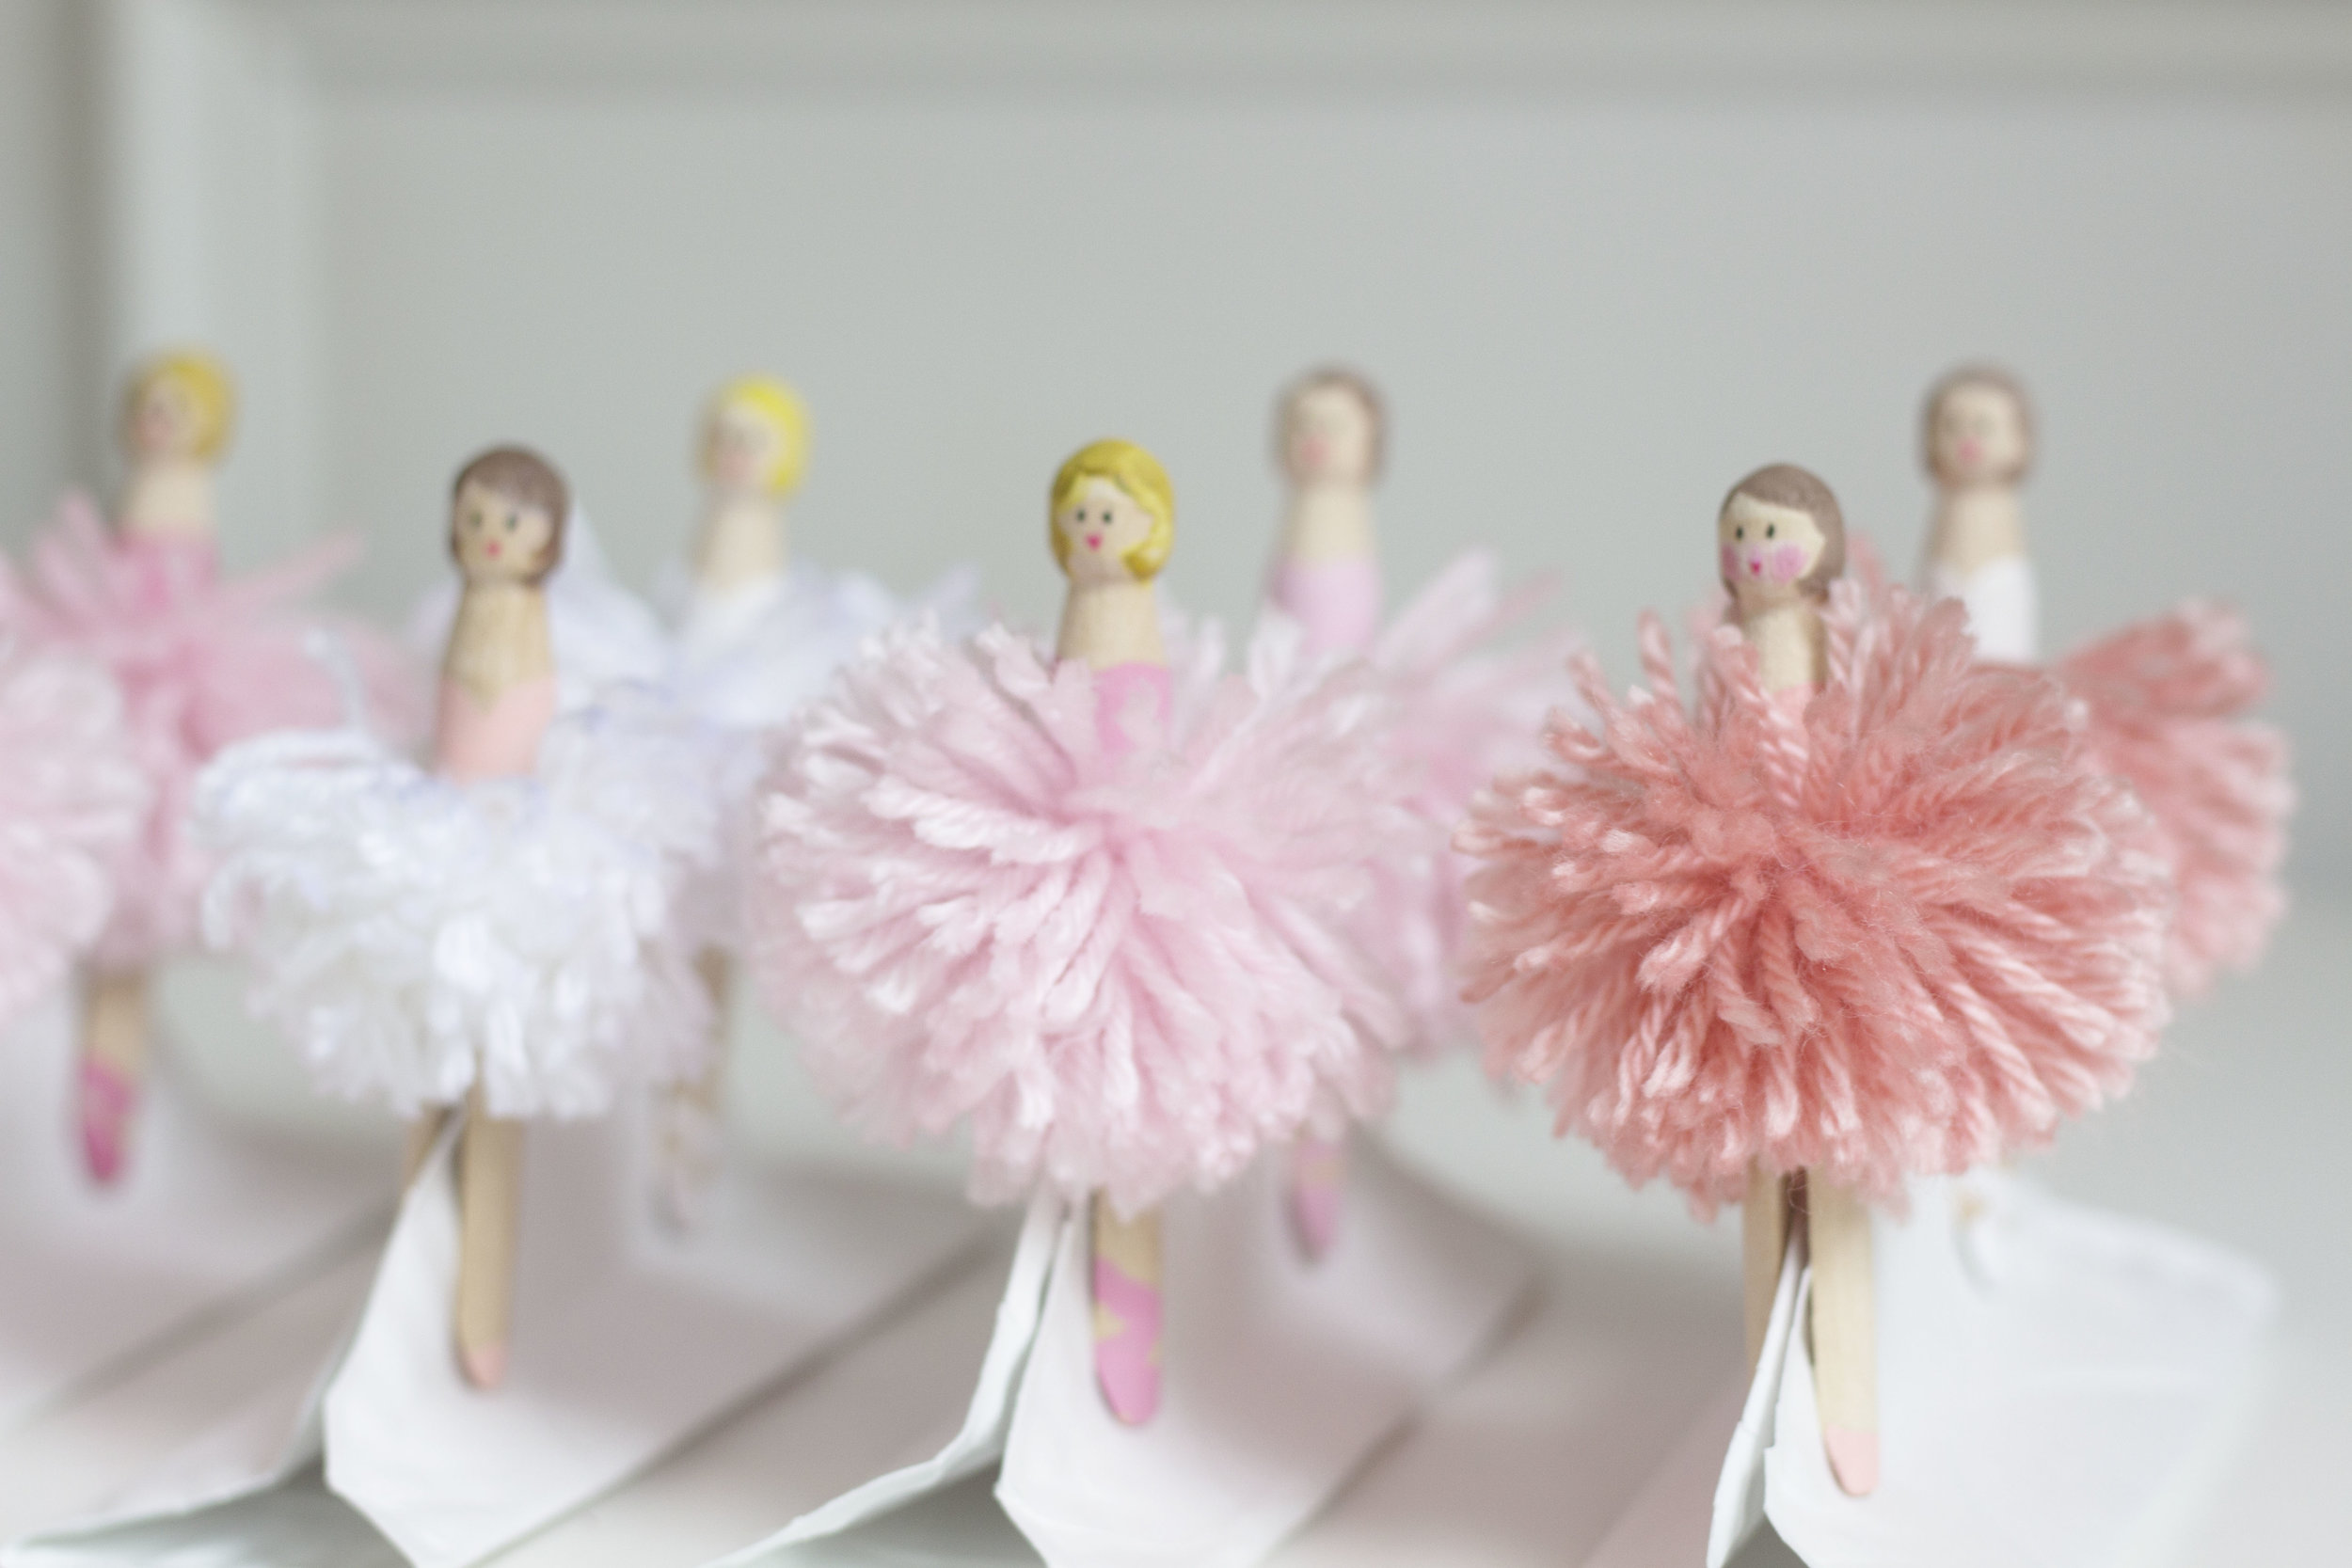
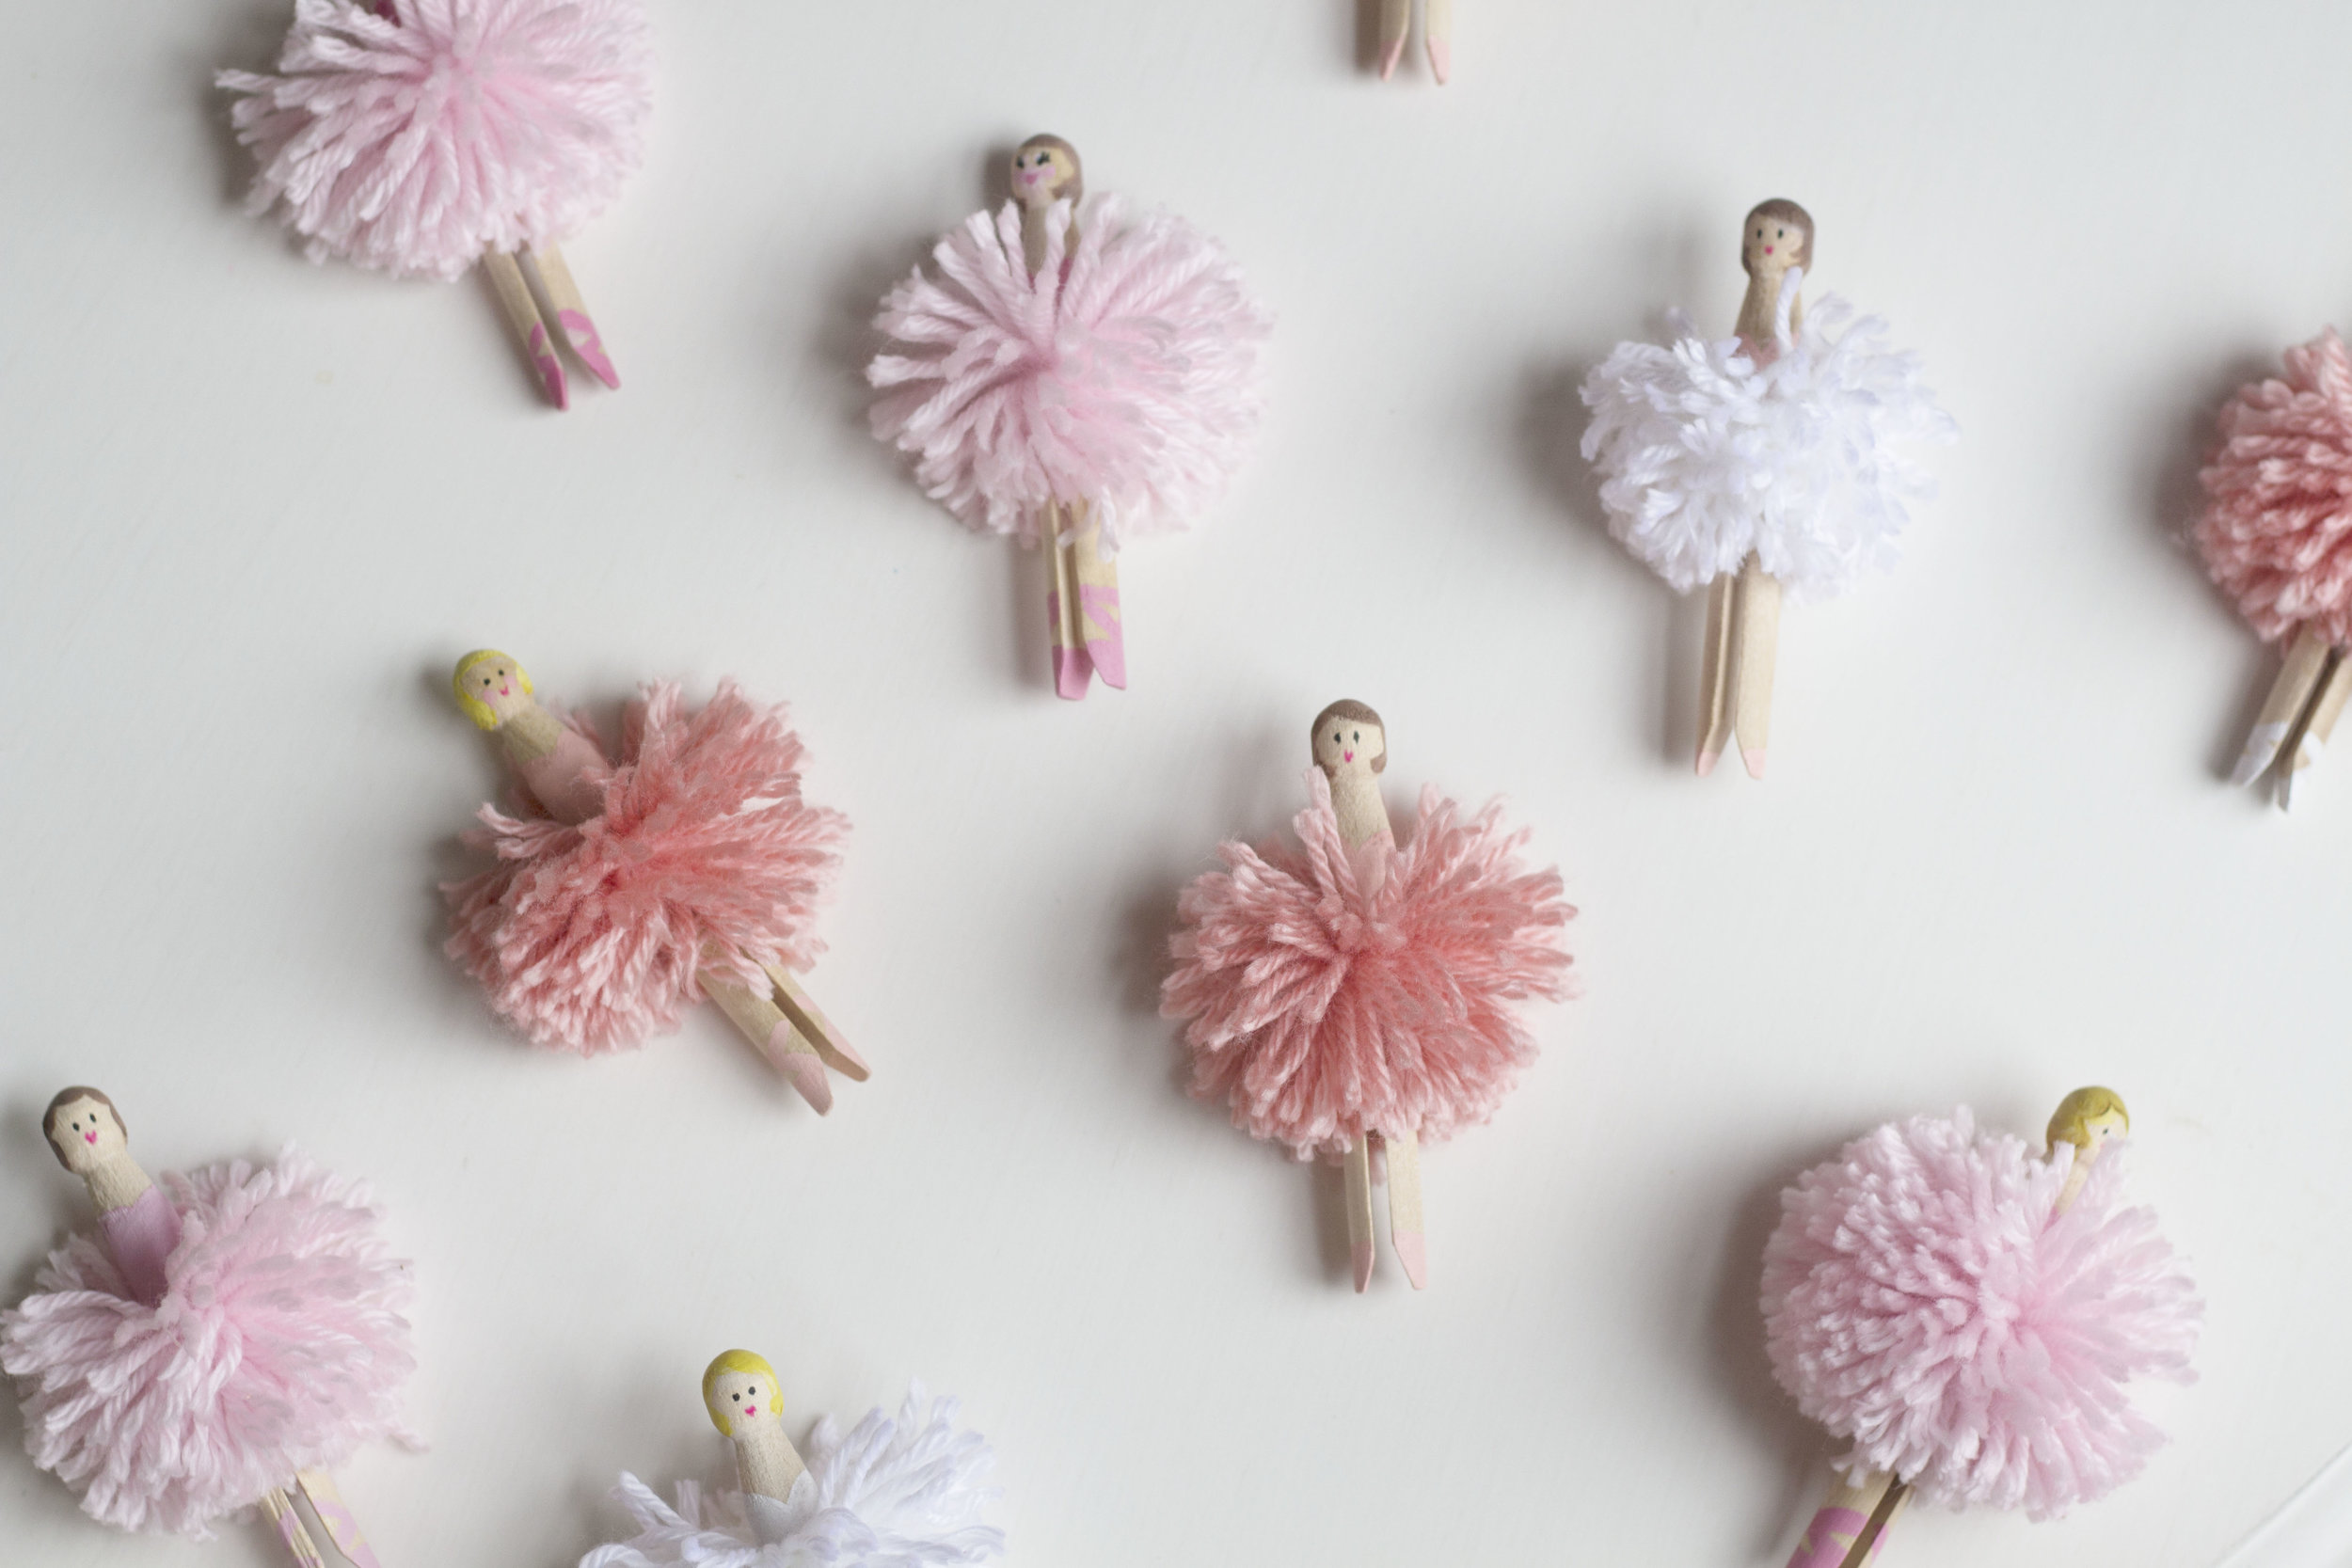
Pom Ballerinas!

As you know, Olivia is obsessed with ballet. My life revolves around tutus, twirls, performances... It's the sweetest. :)
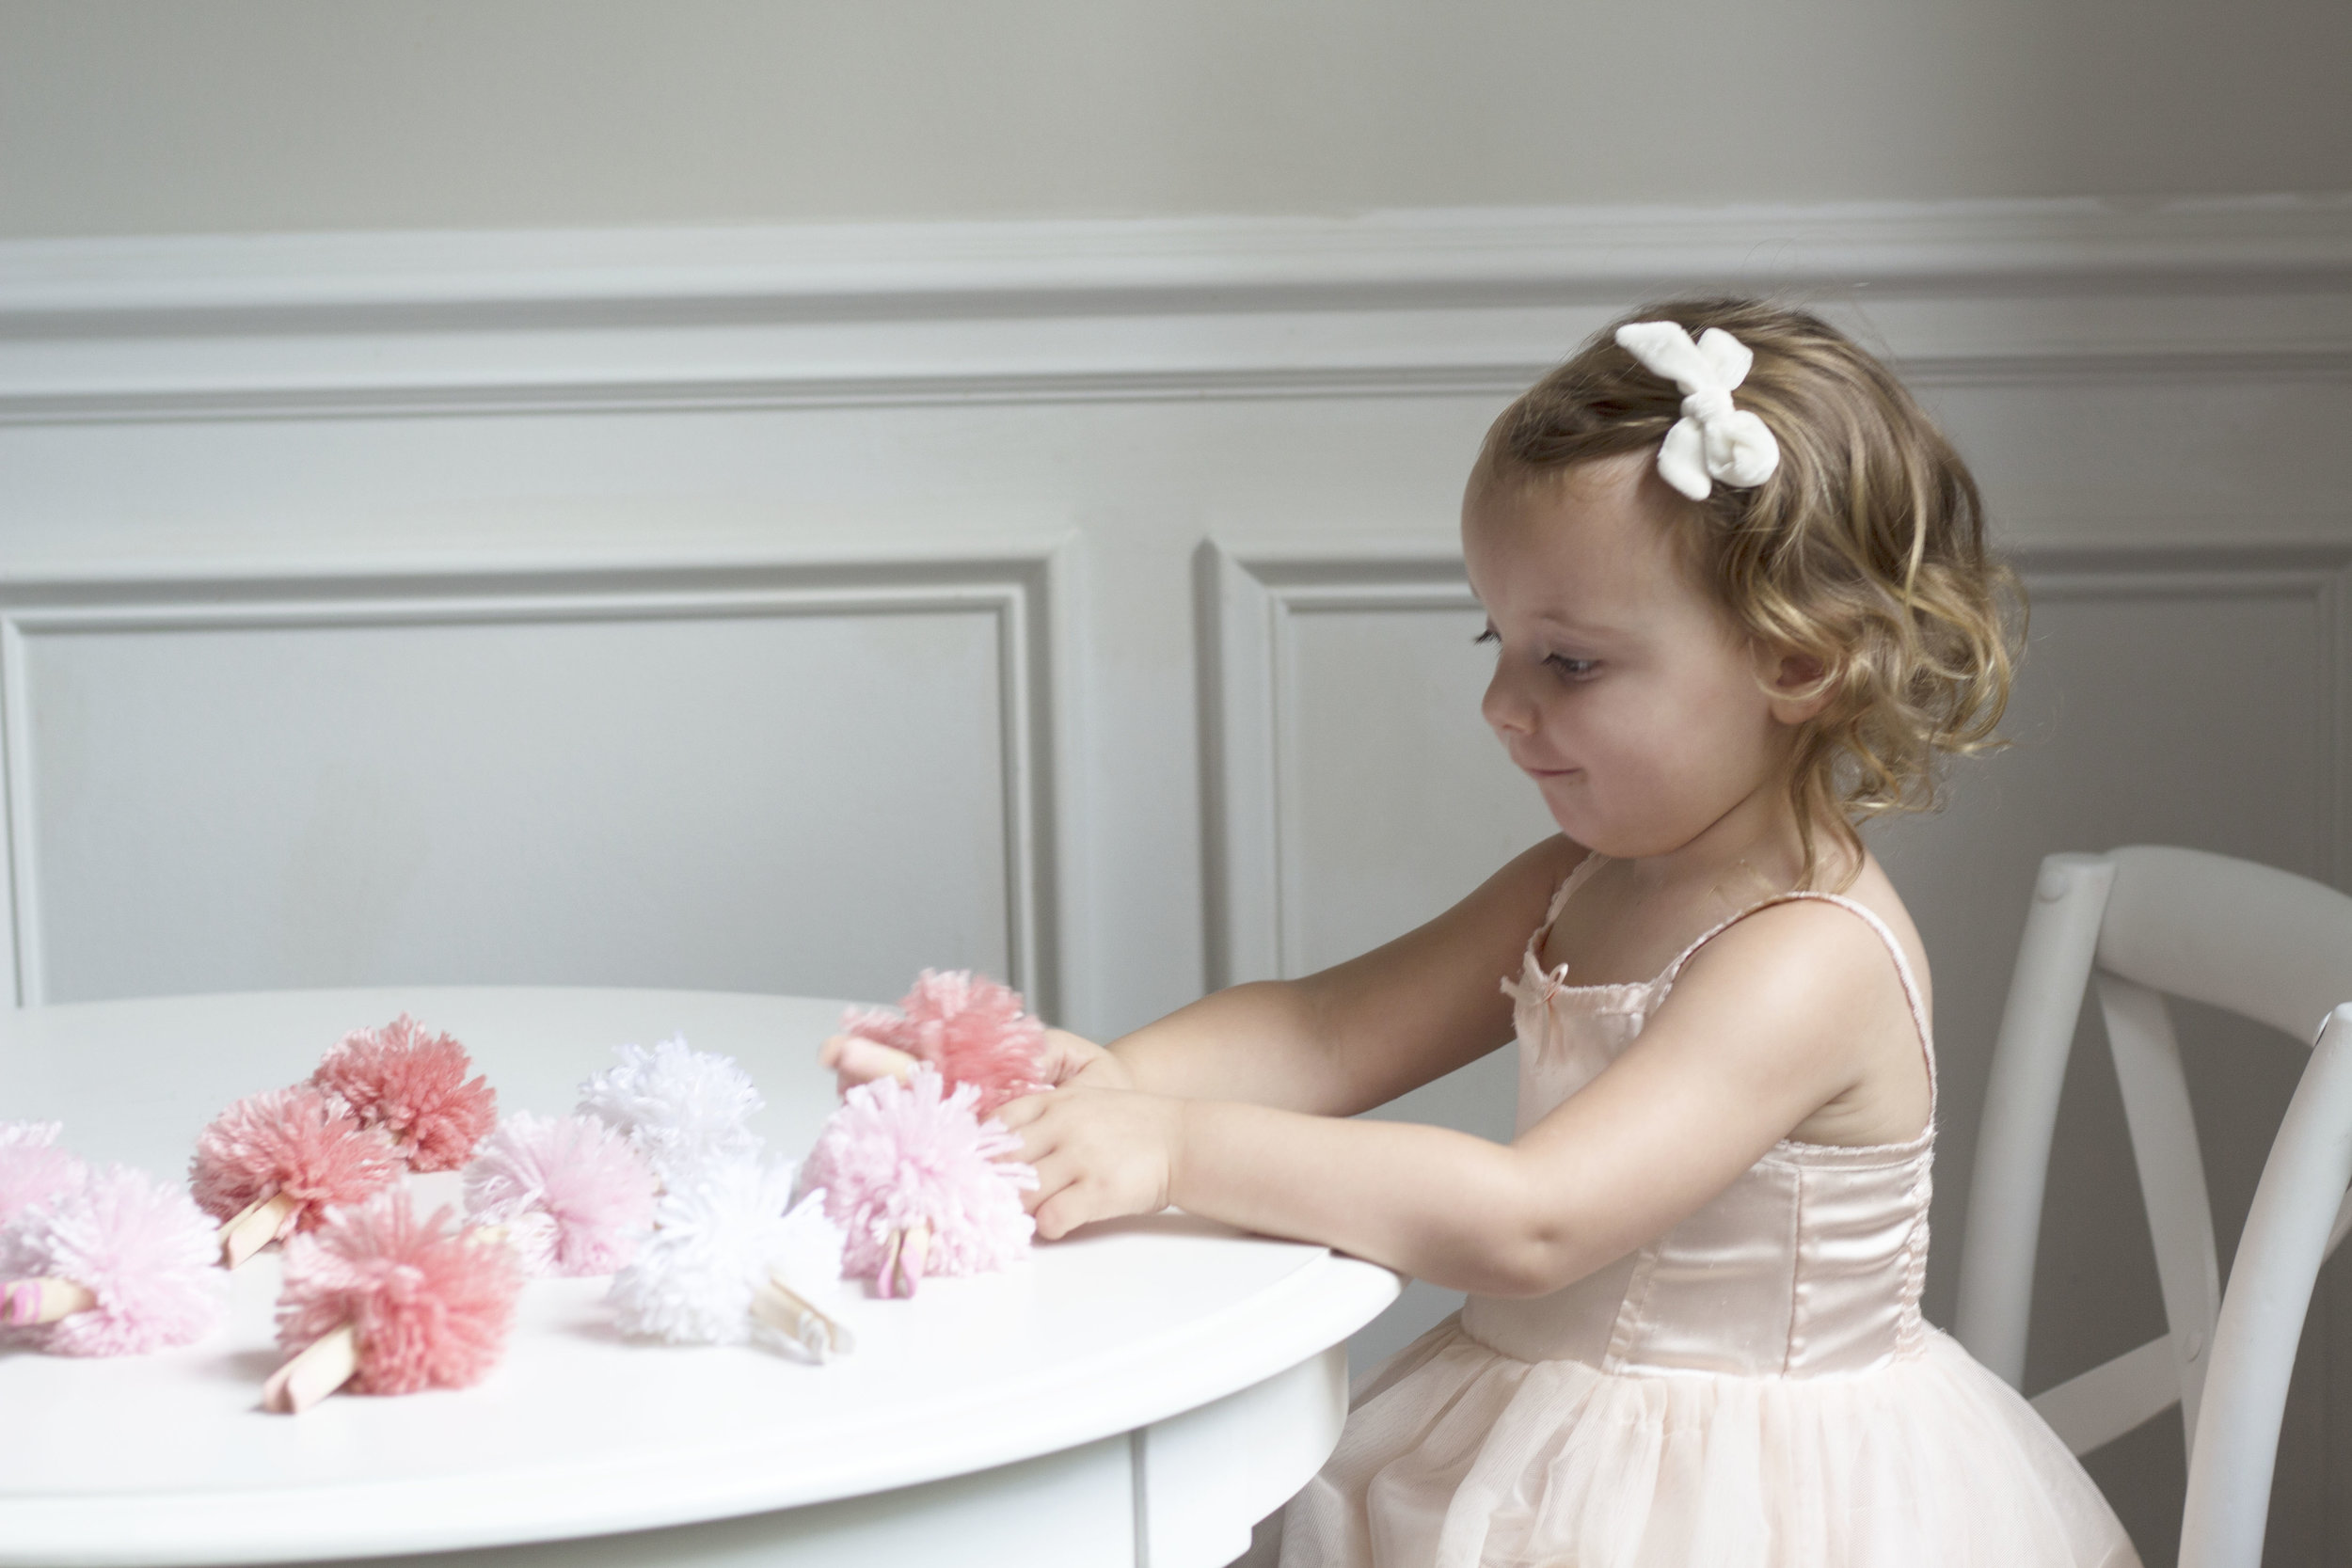
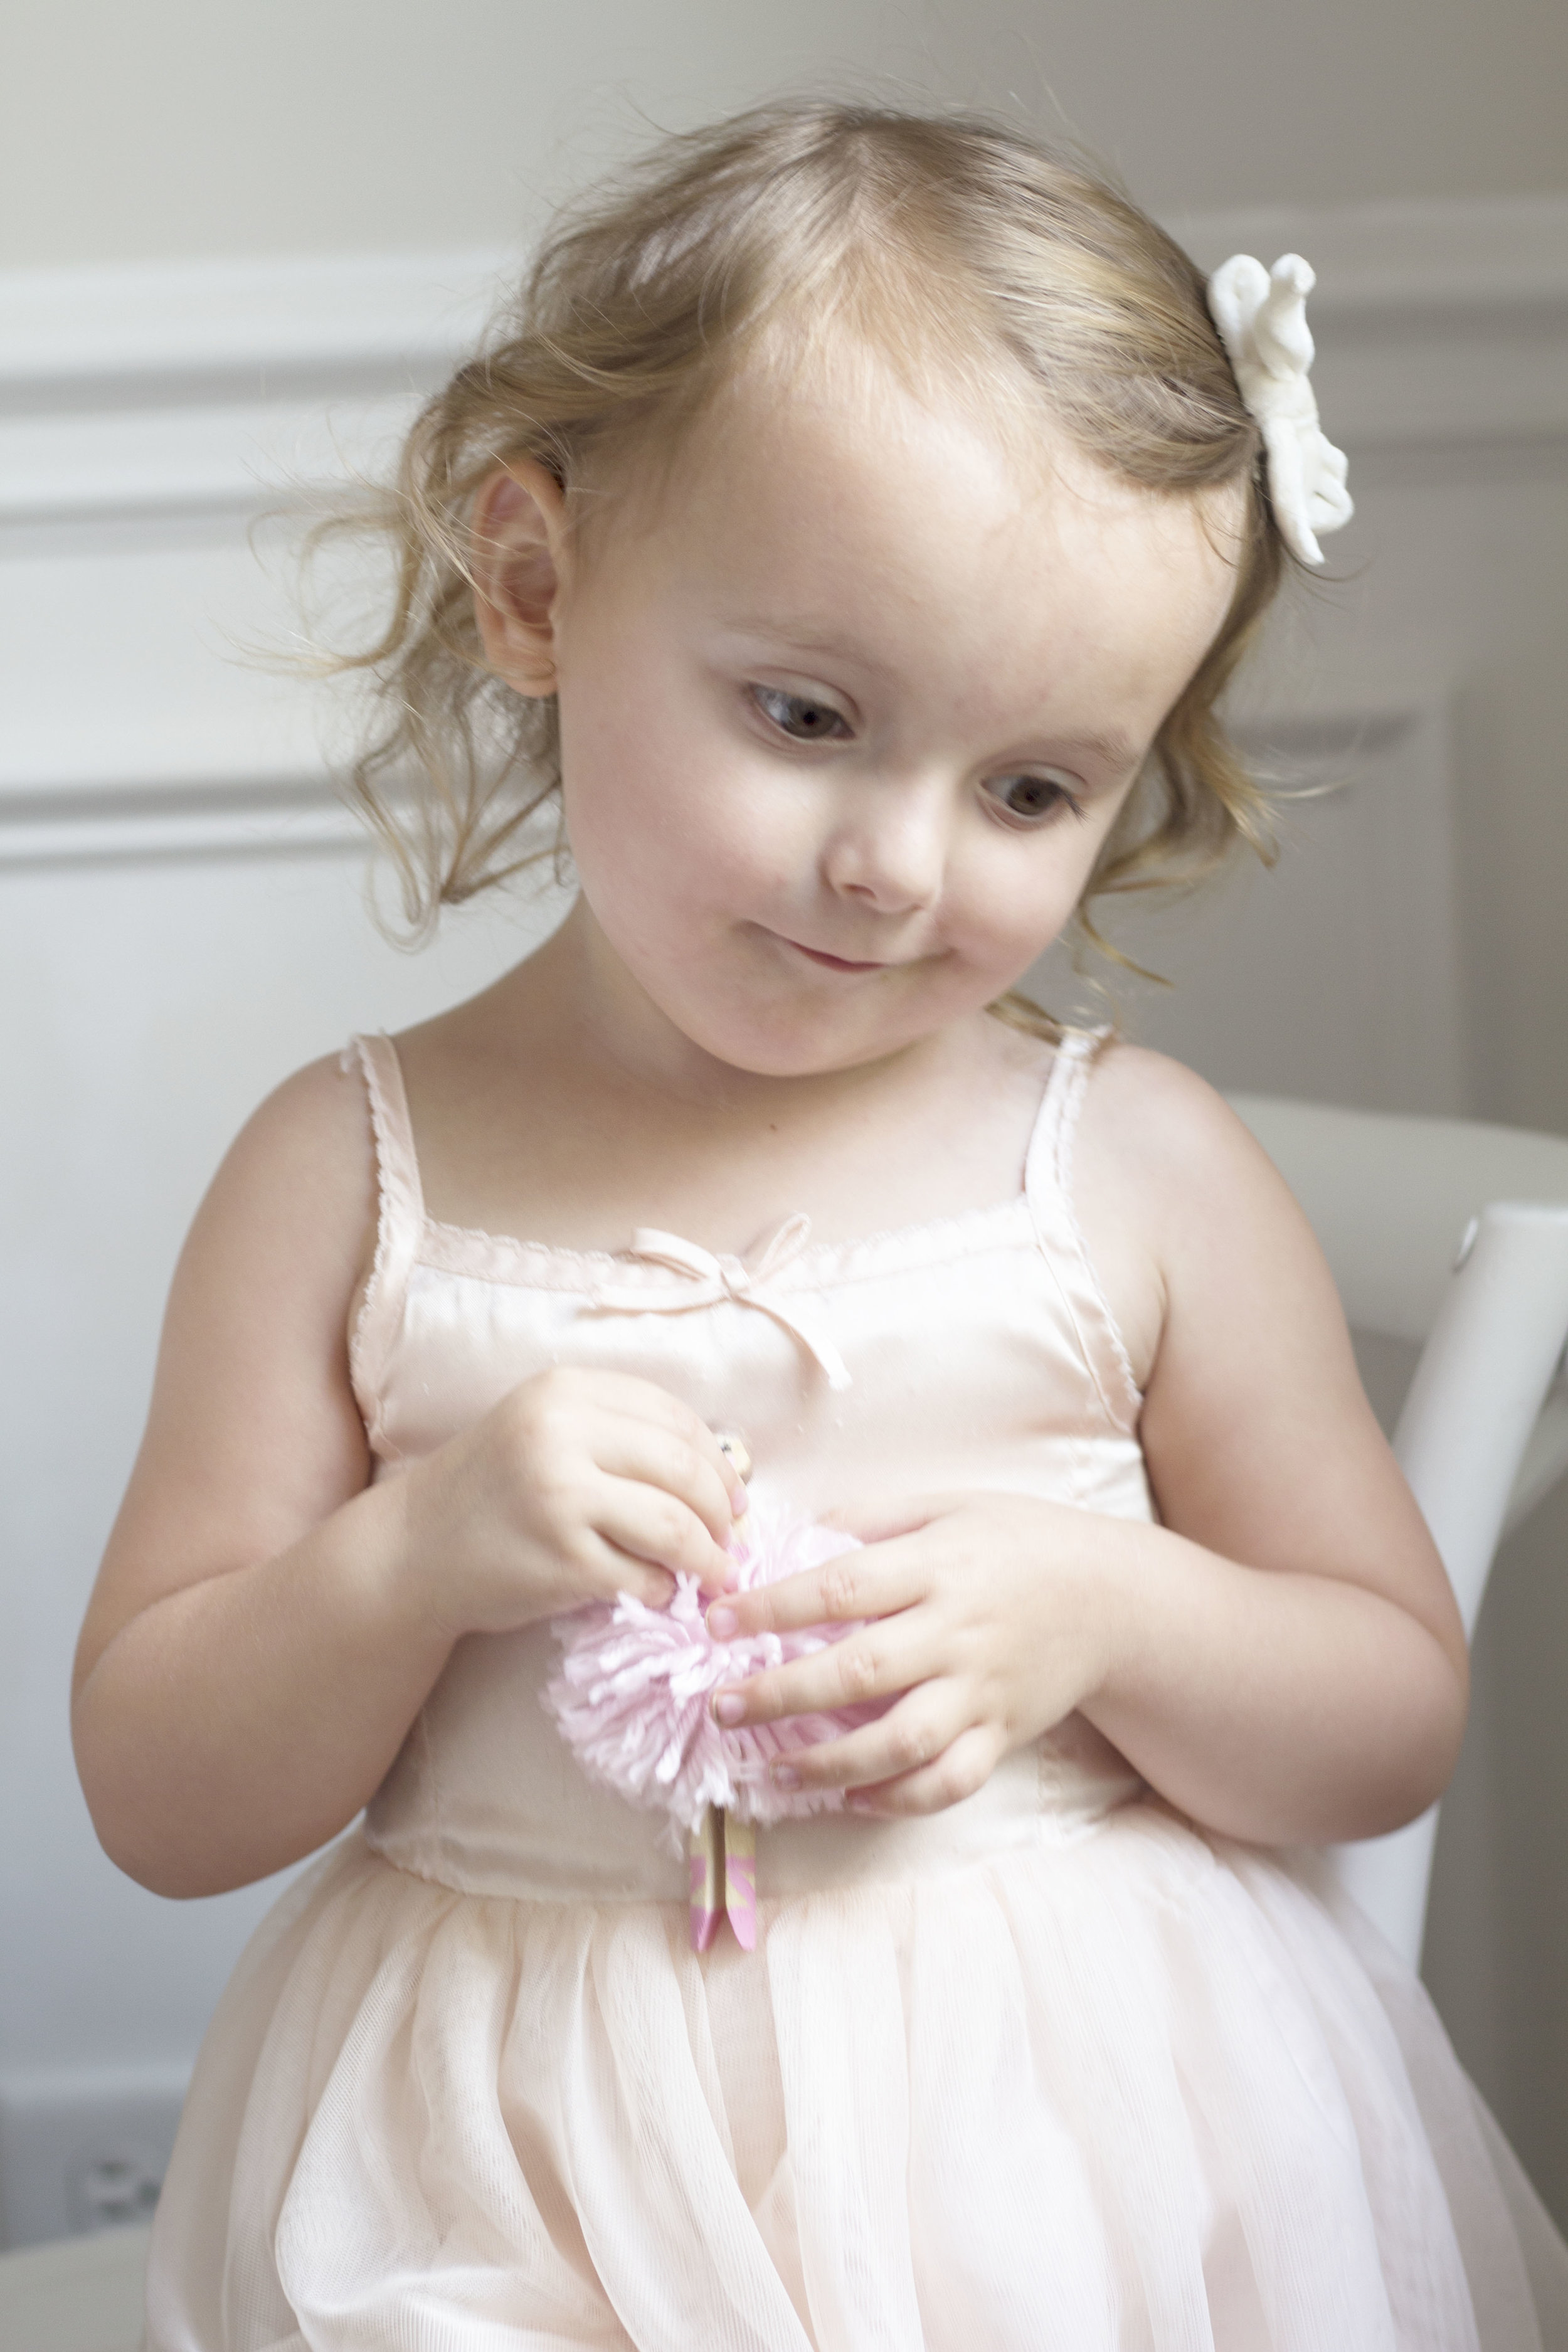
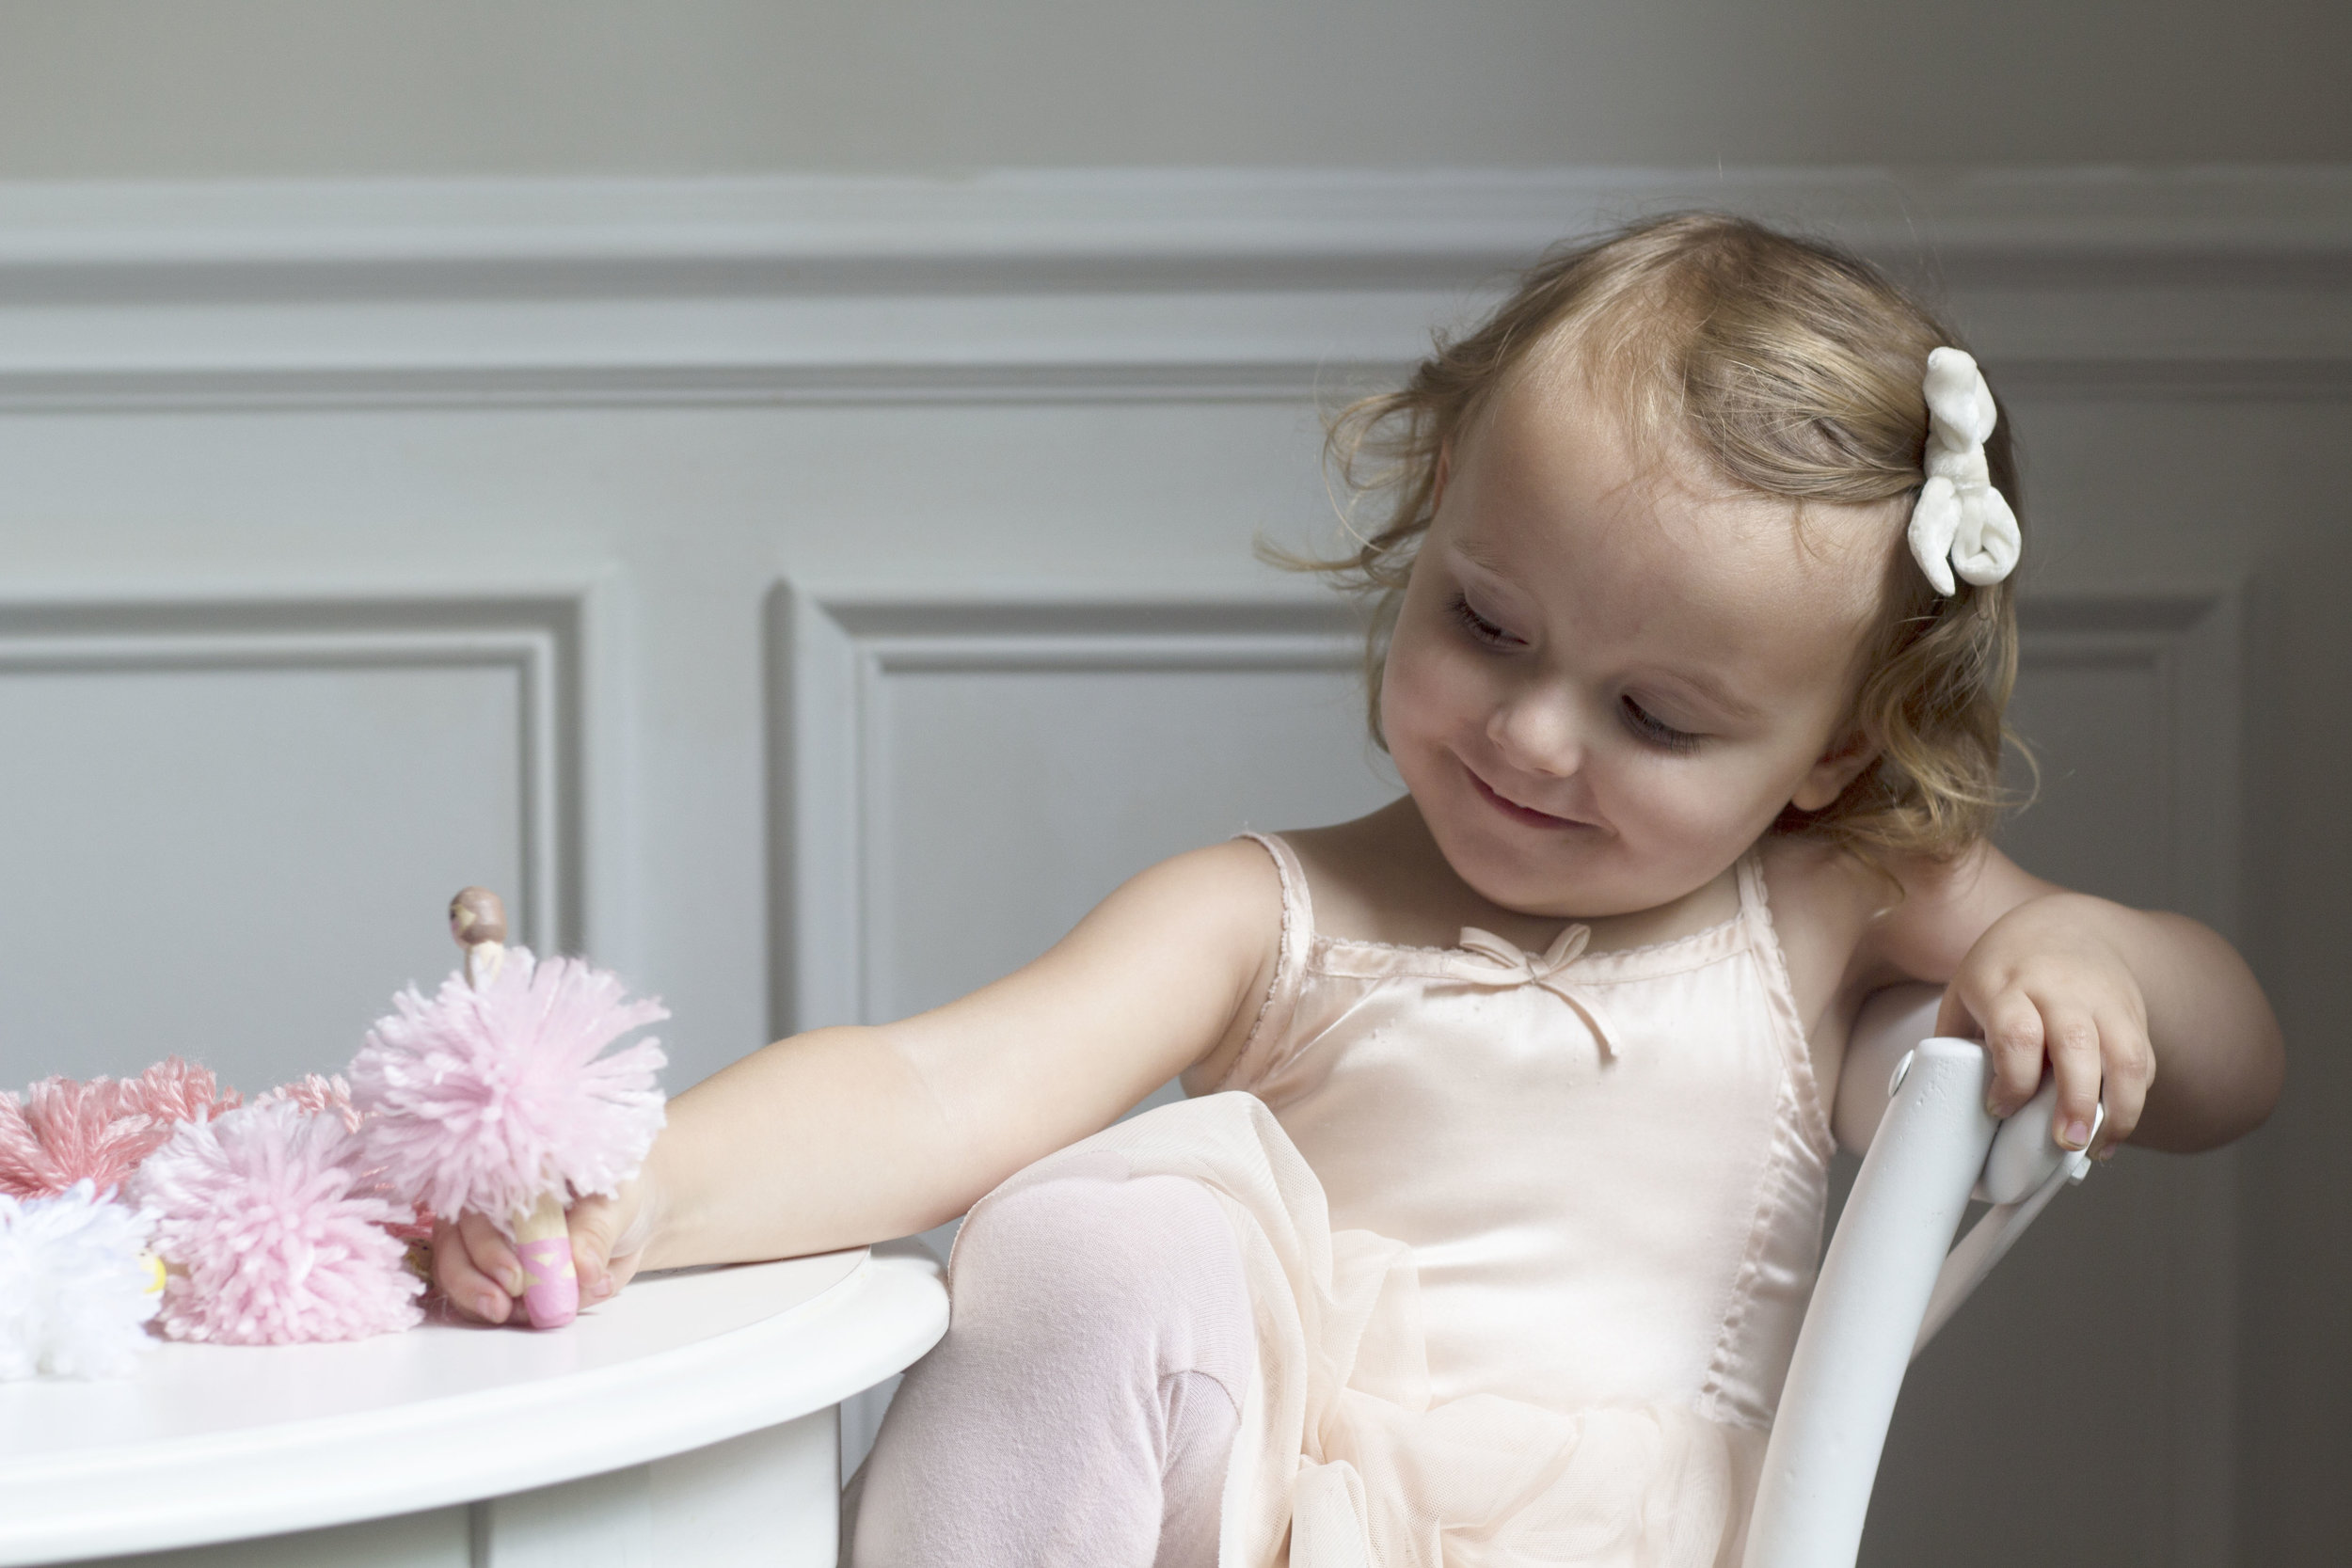
I'm in the process of planning her ballerina birthday party and am having so much fun working on those details- I can't wait to share them with you! While working on her party, I recently saw some adorable popsicle stick ballerinas and was inspired me to make my girl our own variation. I decided to make these little clothespin pom ballerinas and I am so excited with how they turned out. My mom helped me make them, and we had such a great time. Olivia was a little young to actually help with the project, but she loved sitting with us, and of course loved the little ballerinas! Especially the pink ones. :) In fact, she loved them so much, my mom and I made even more for her after she went to bed. We Skype'd with my grandma while we worked away. It was really fun.
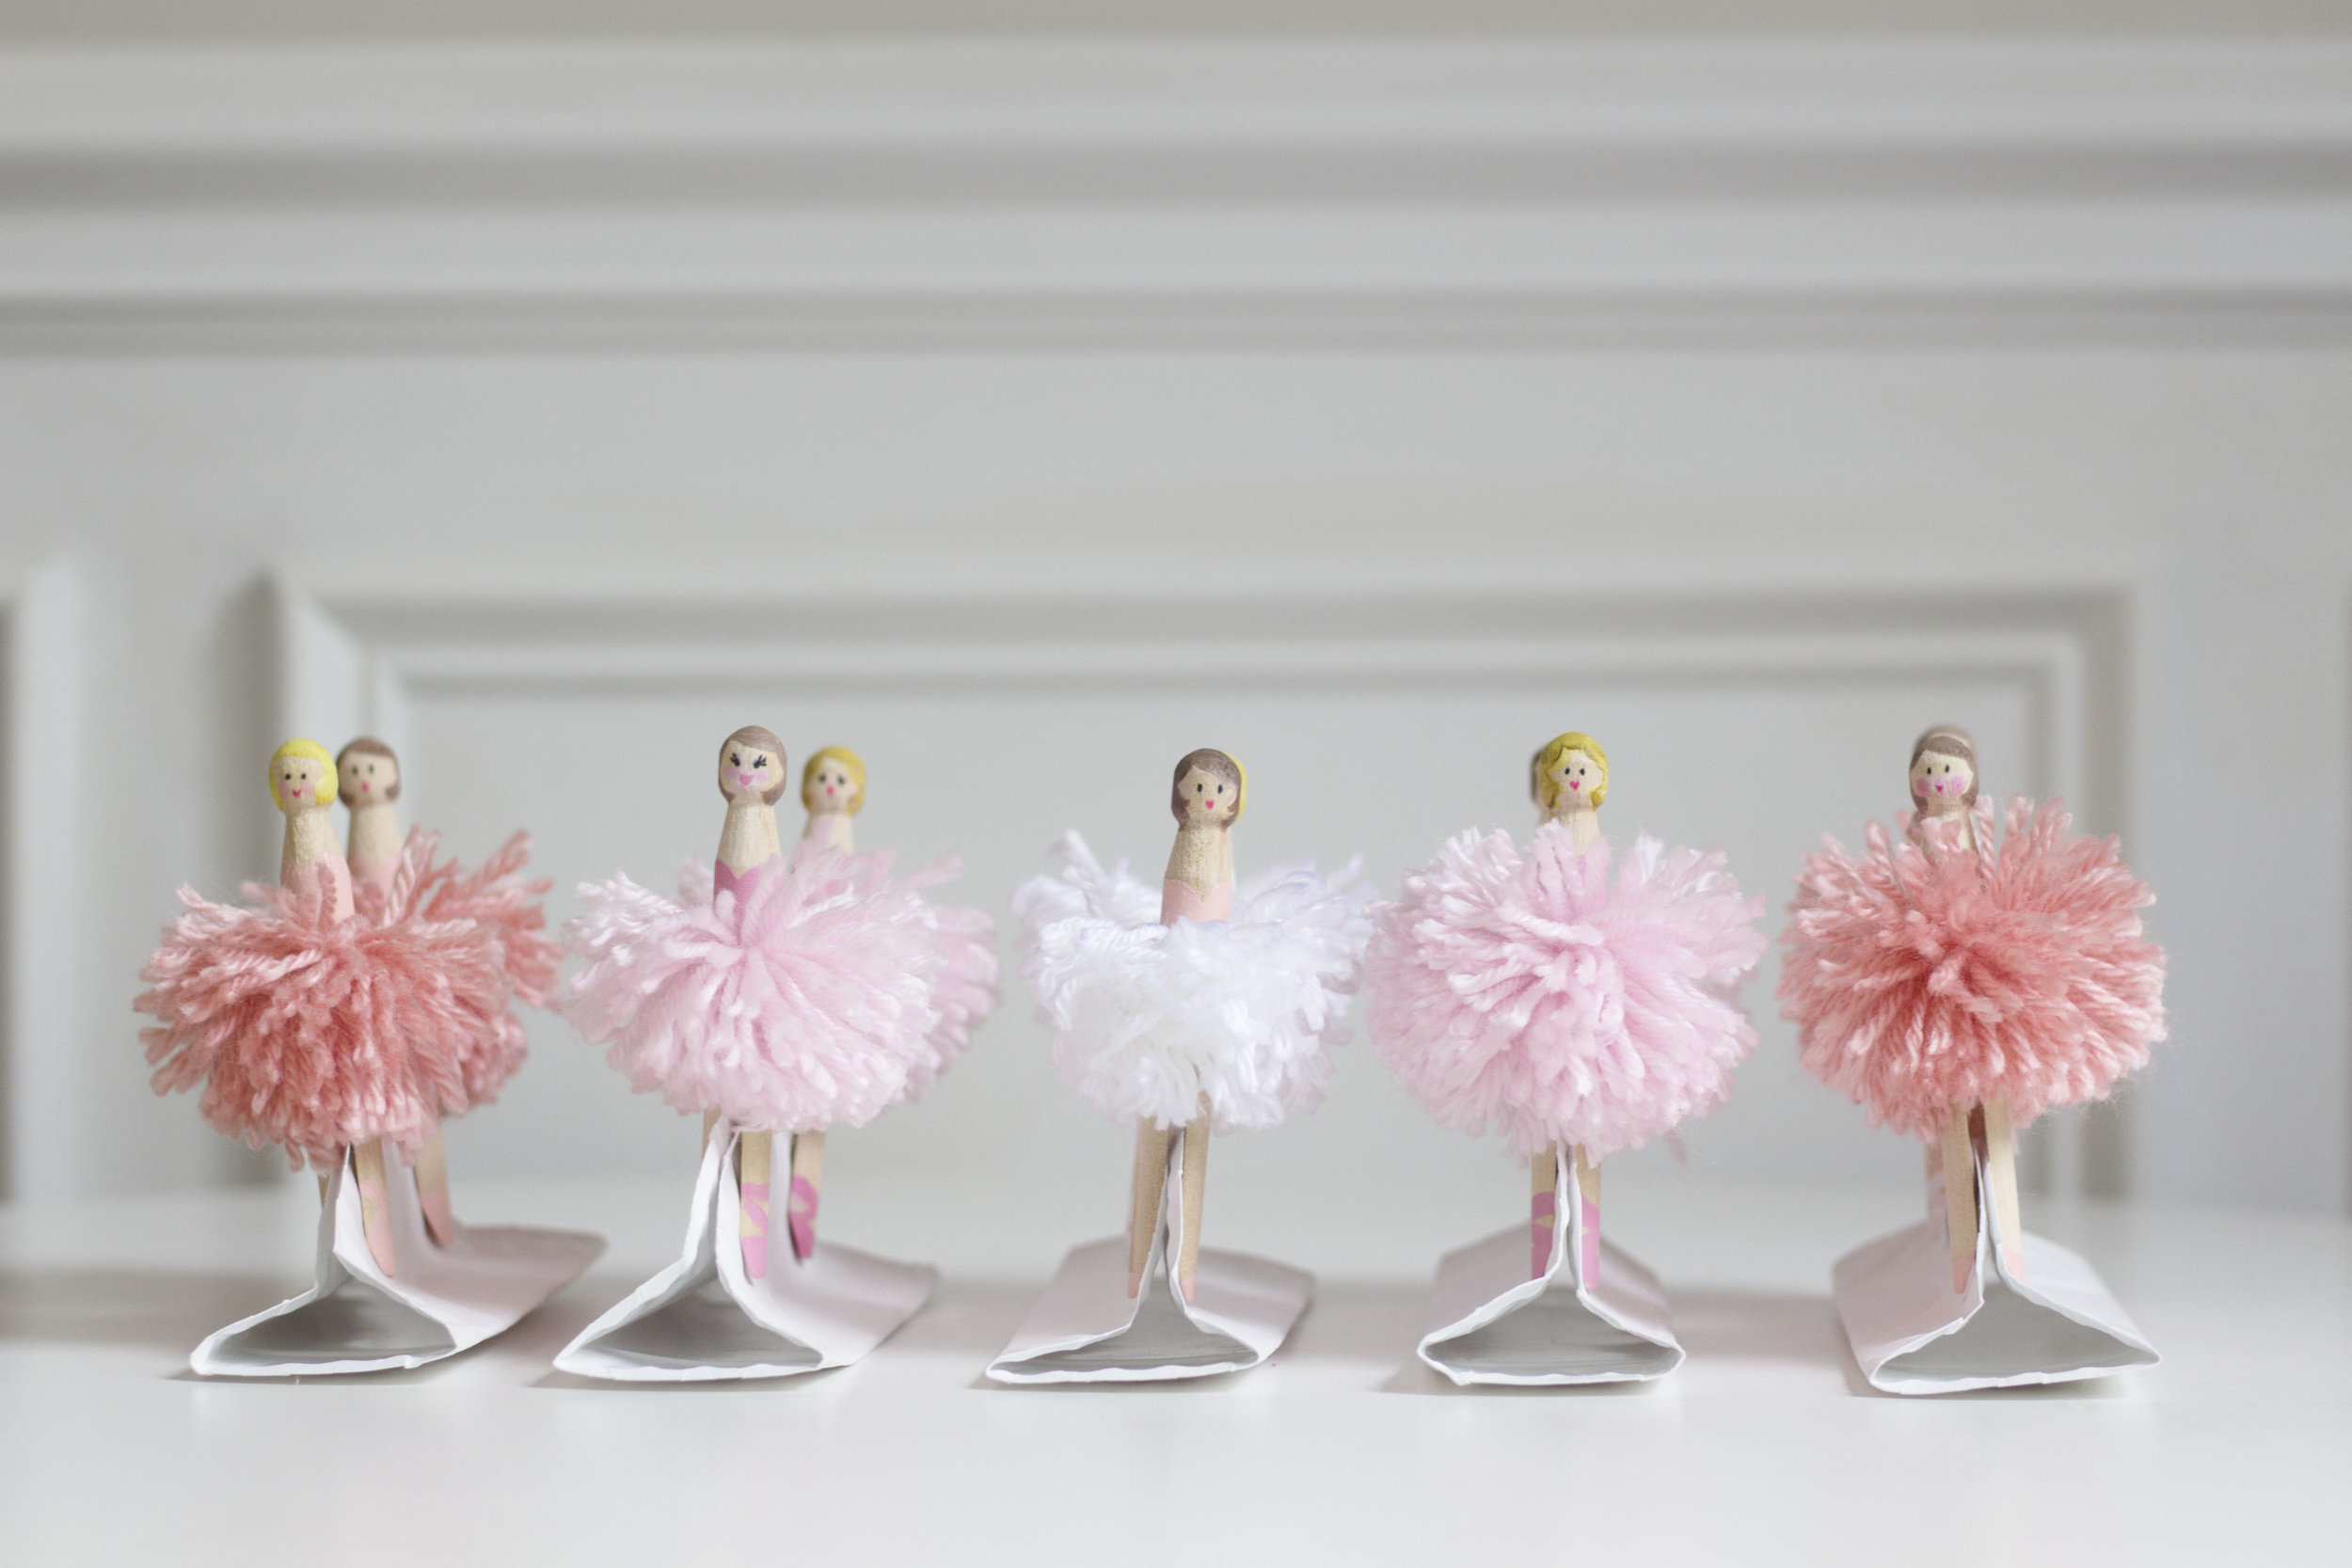
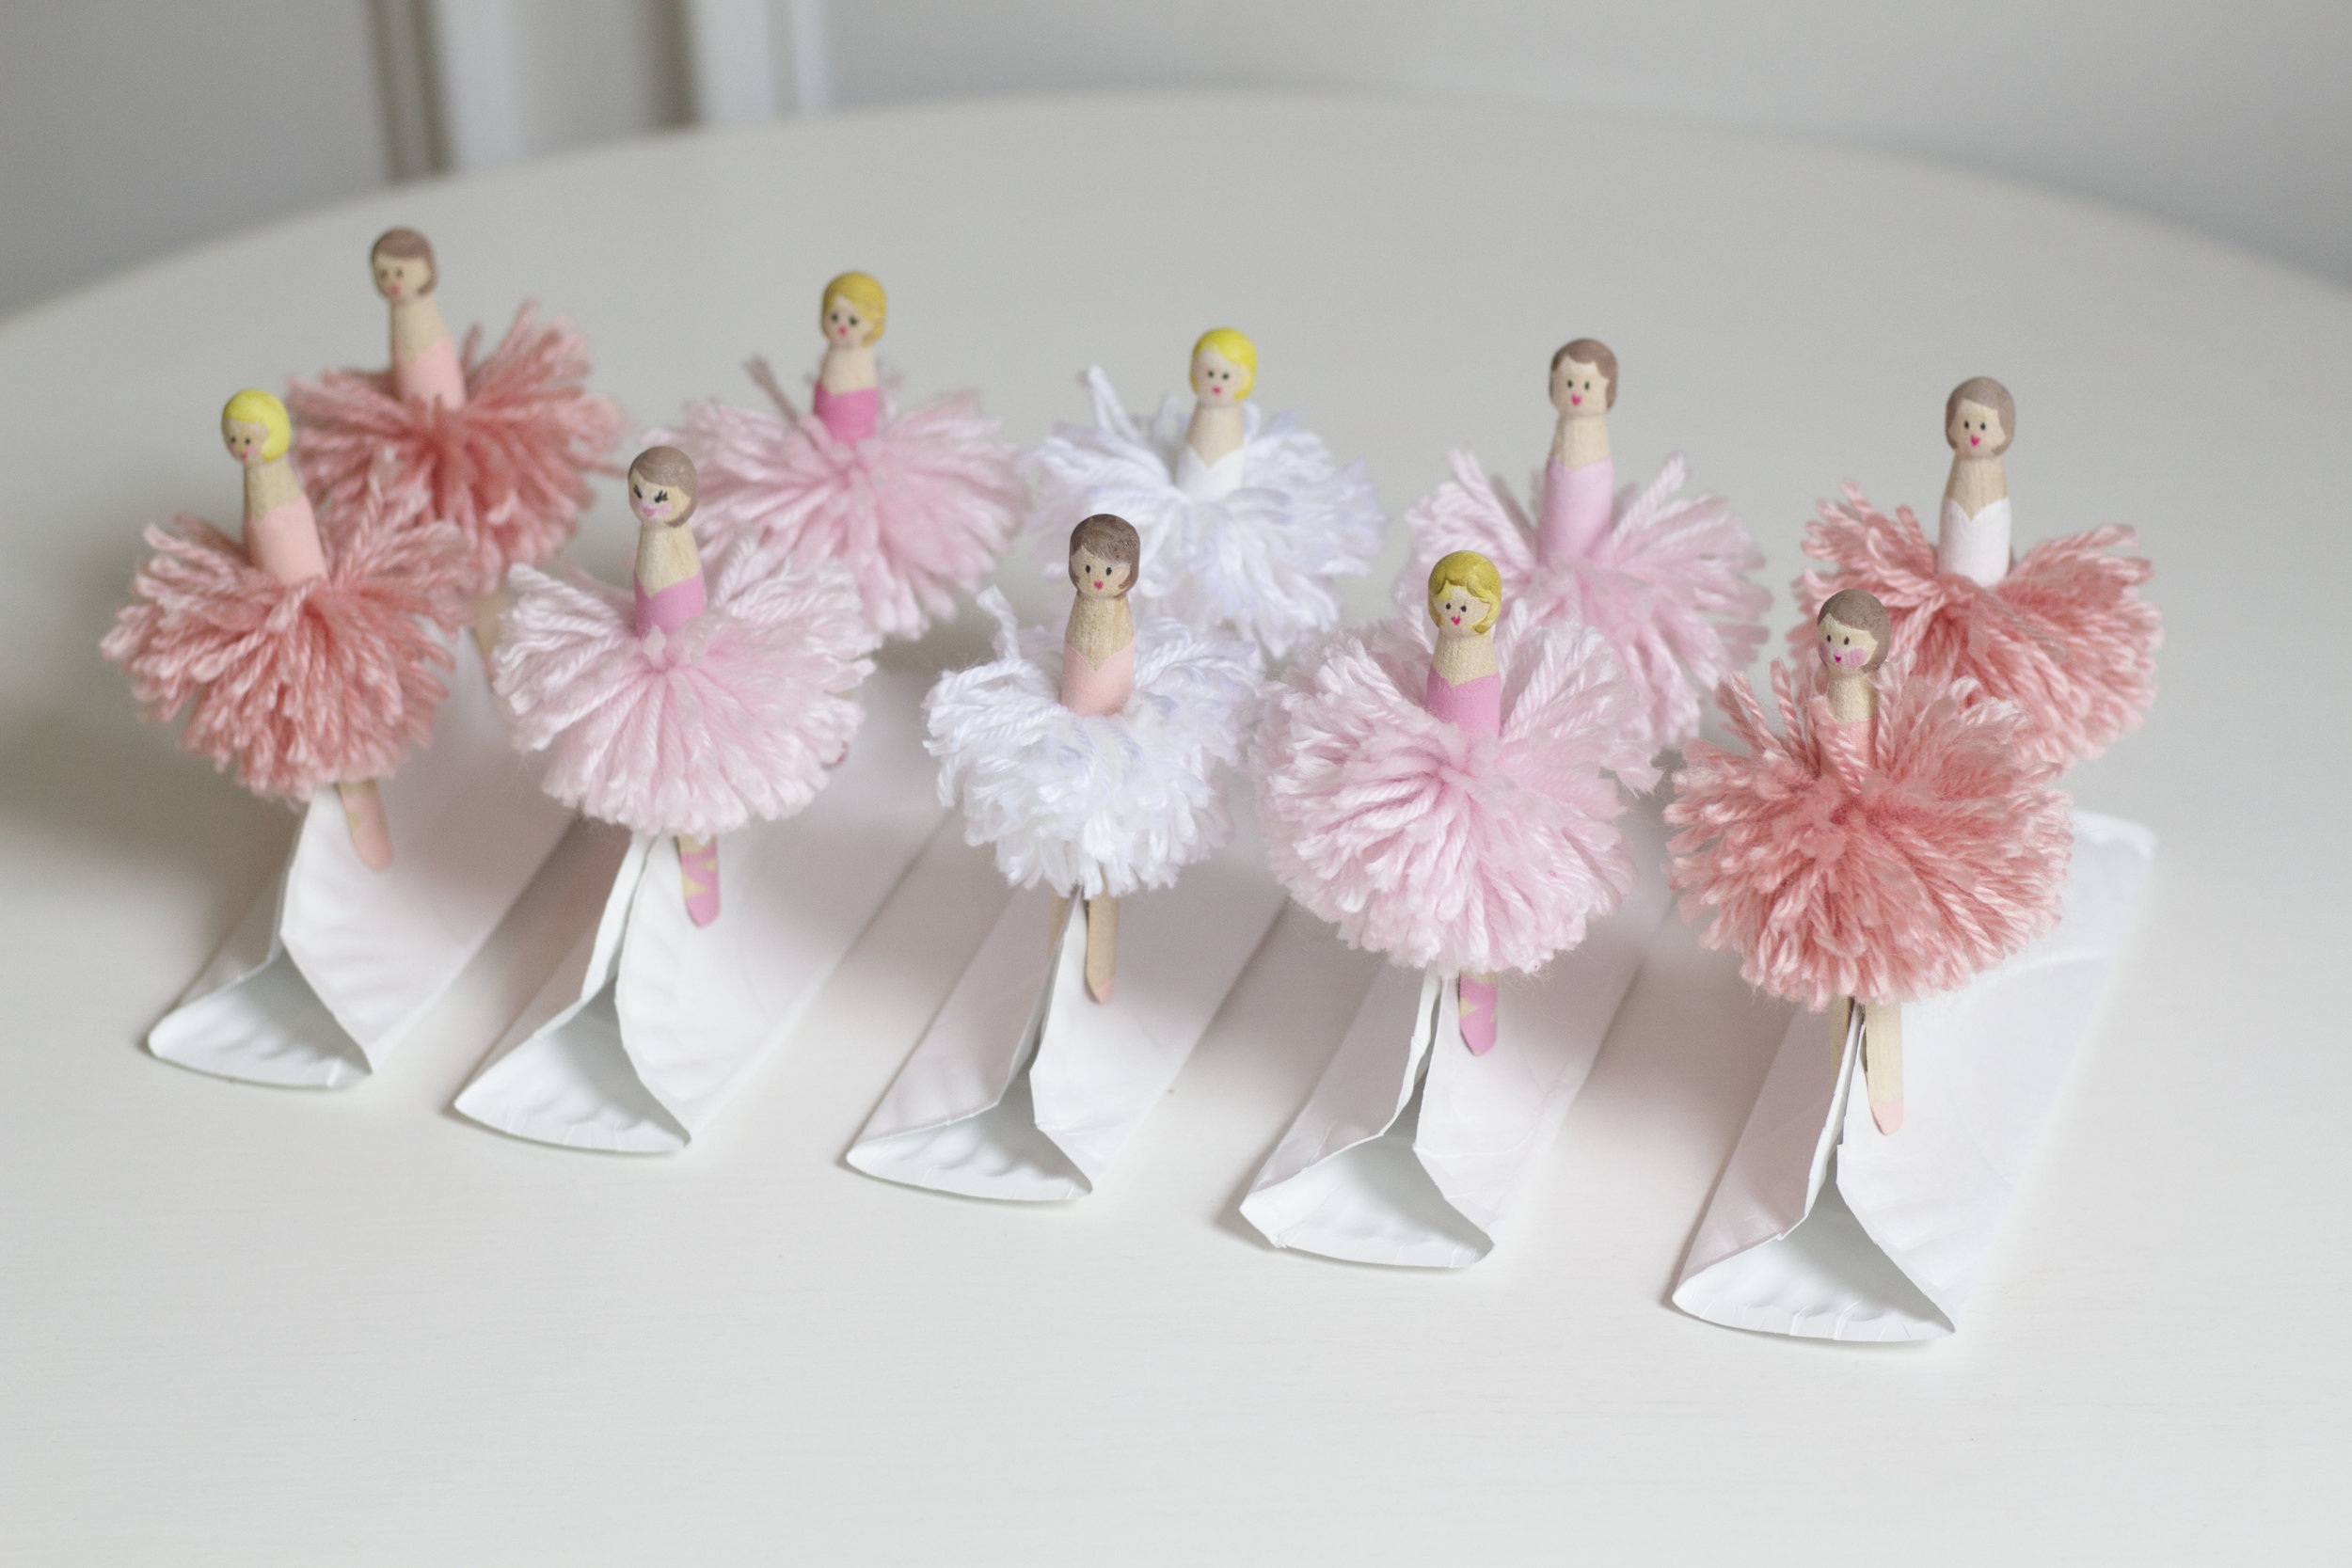
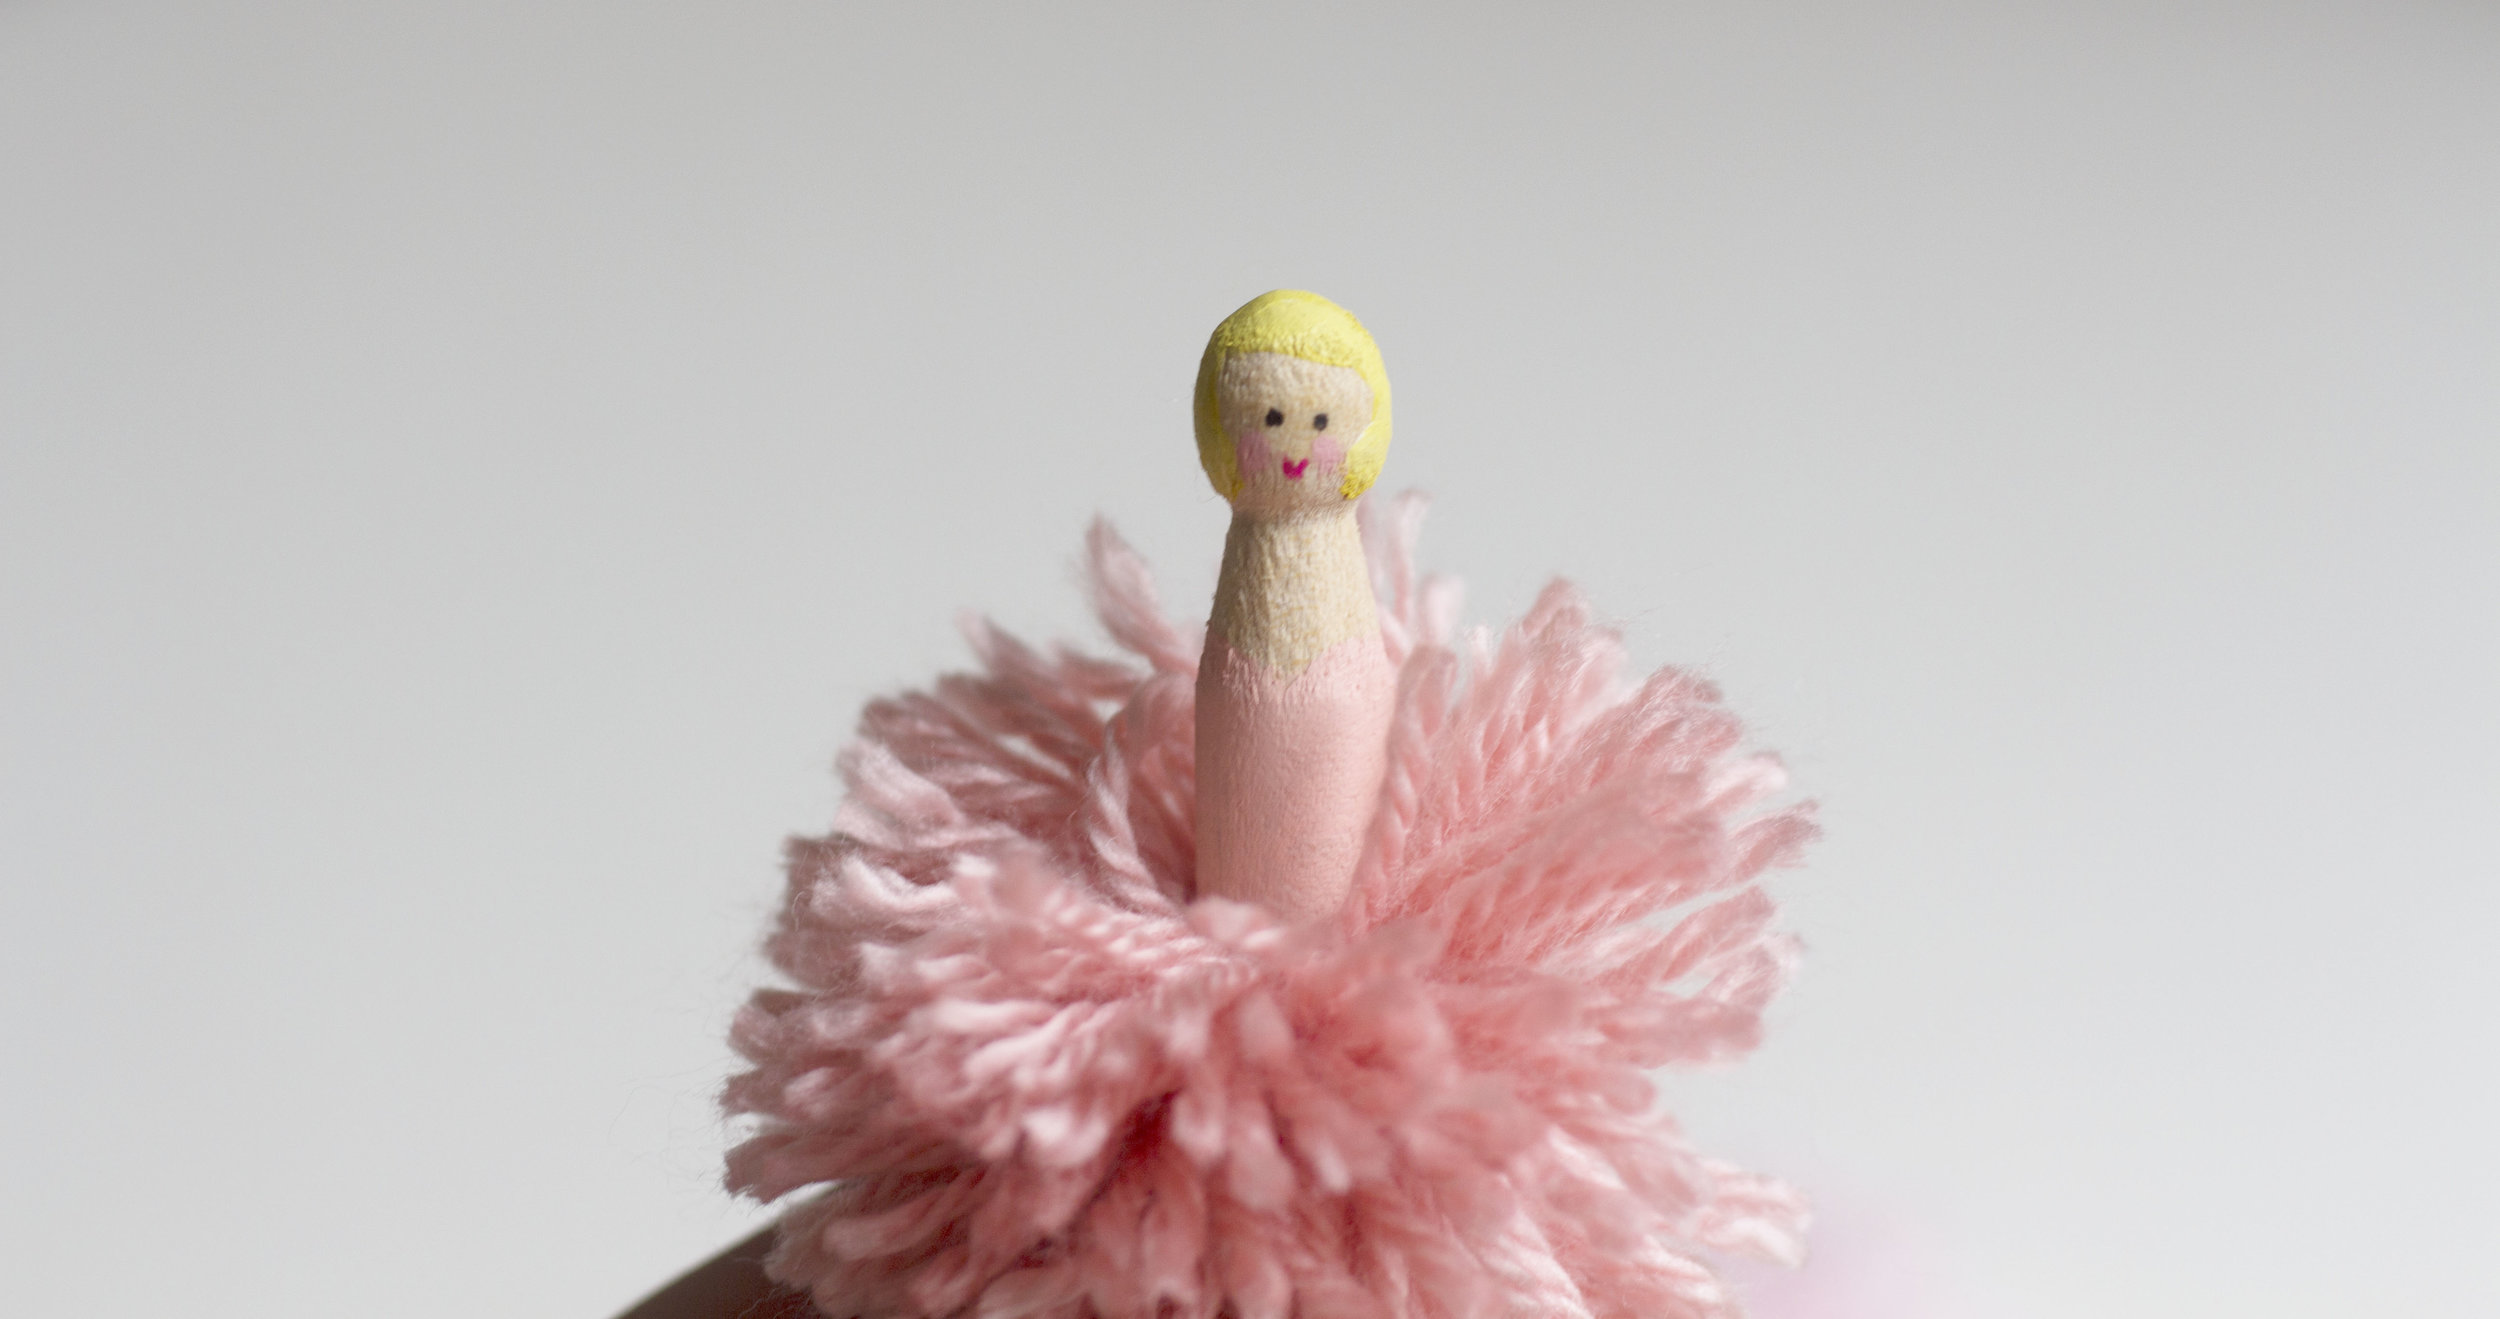
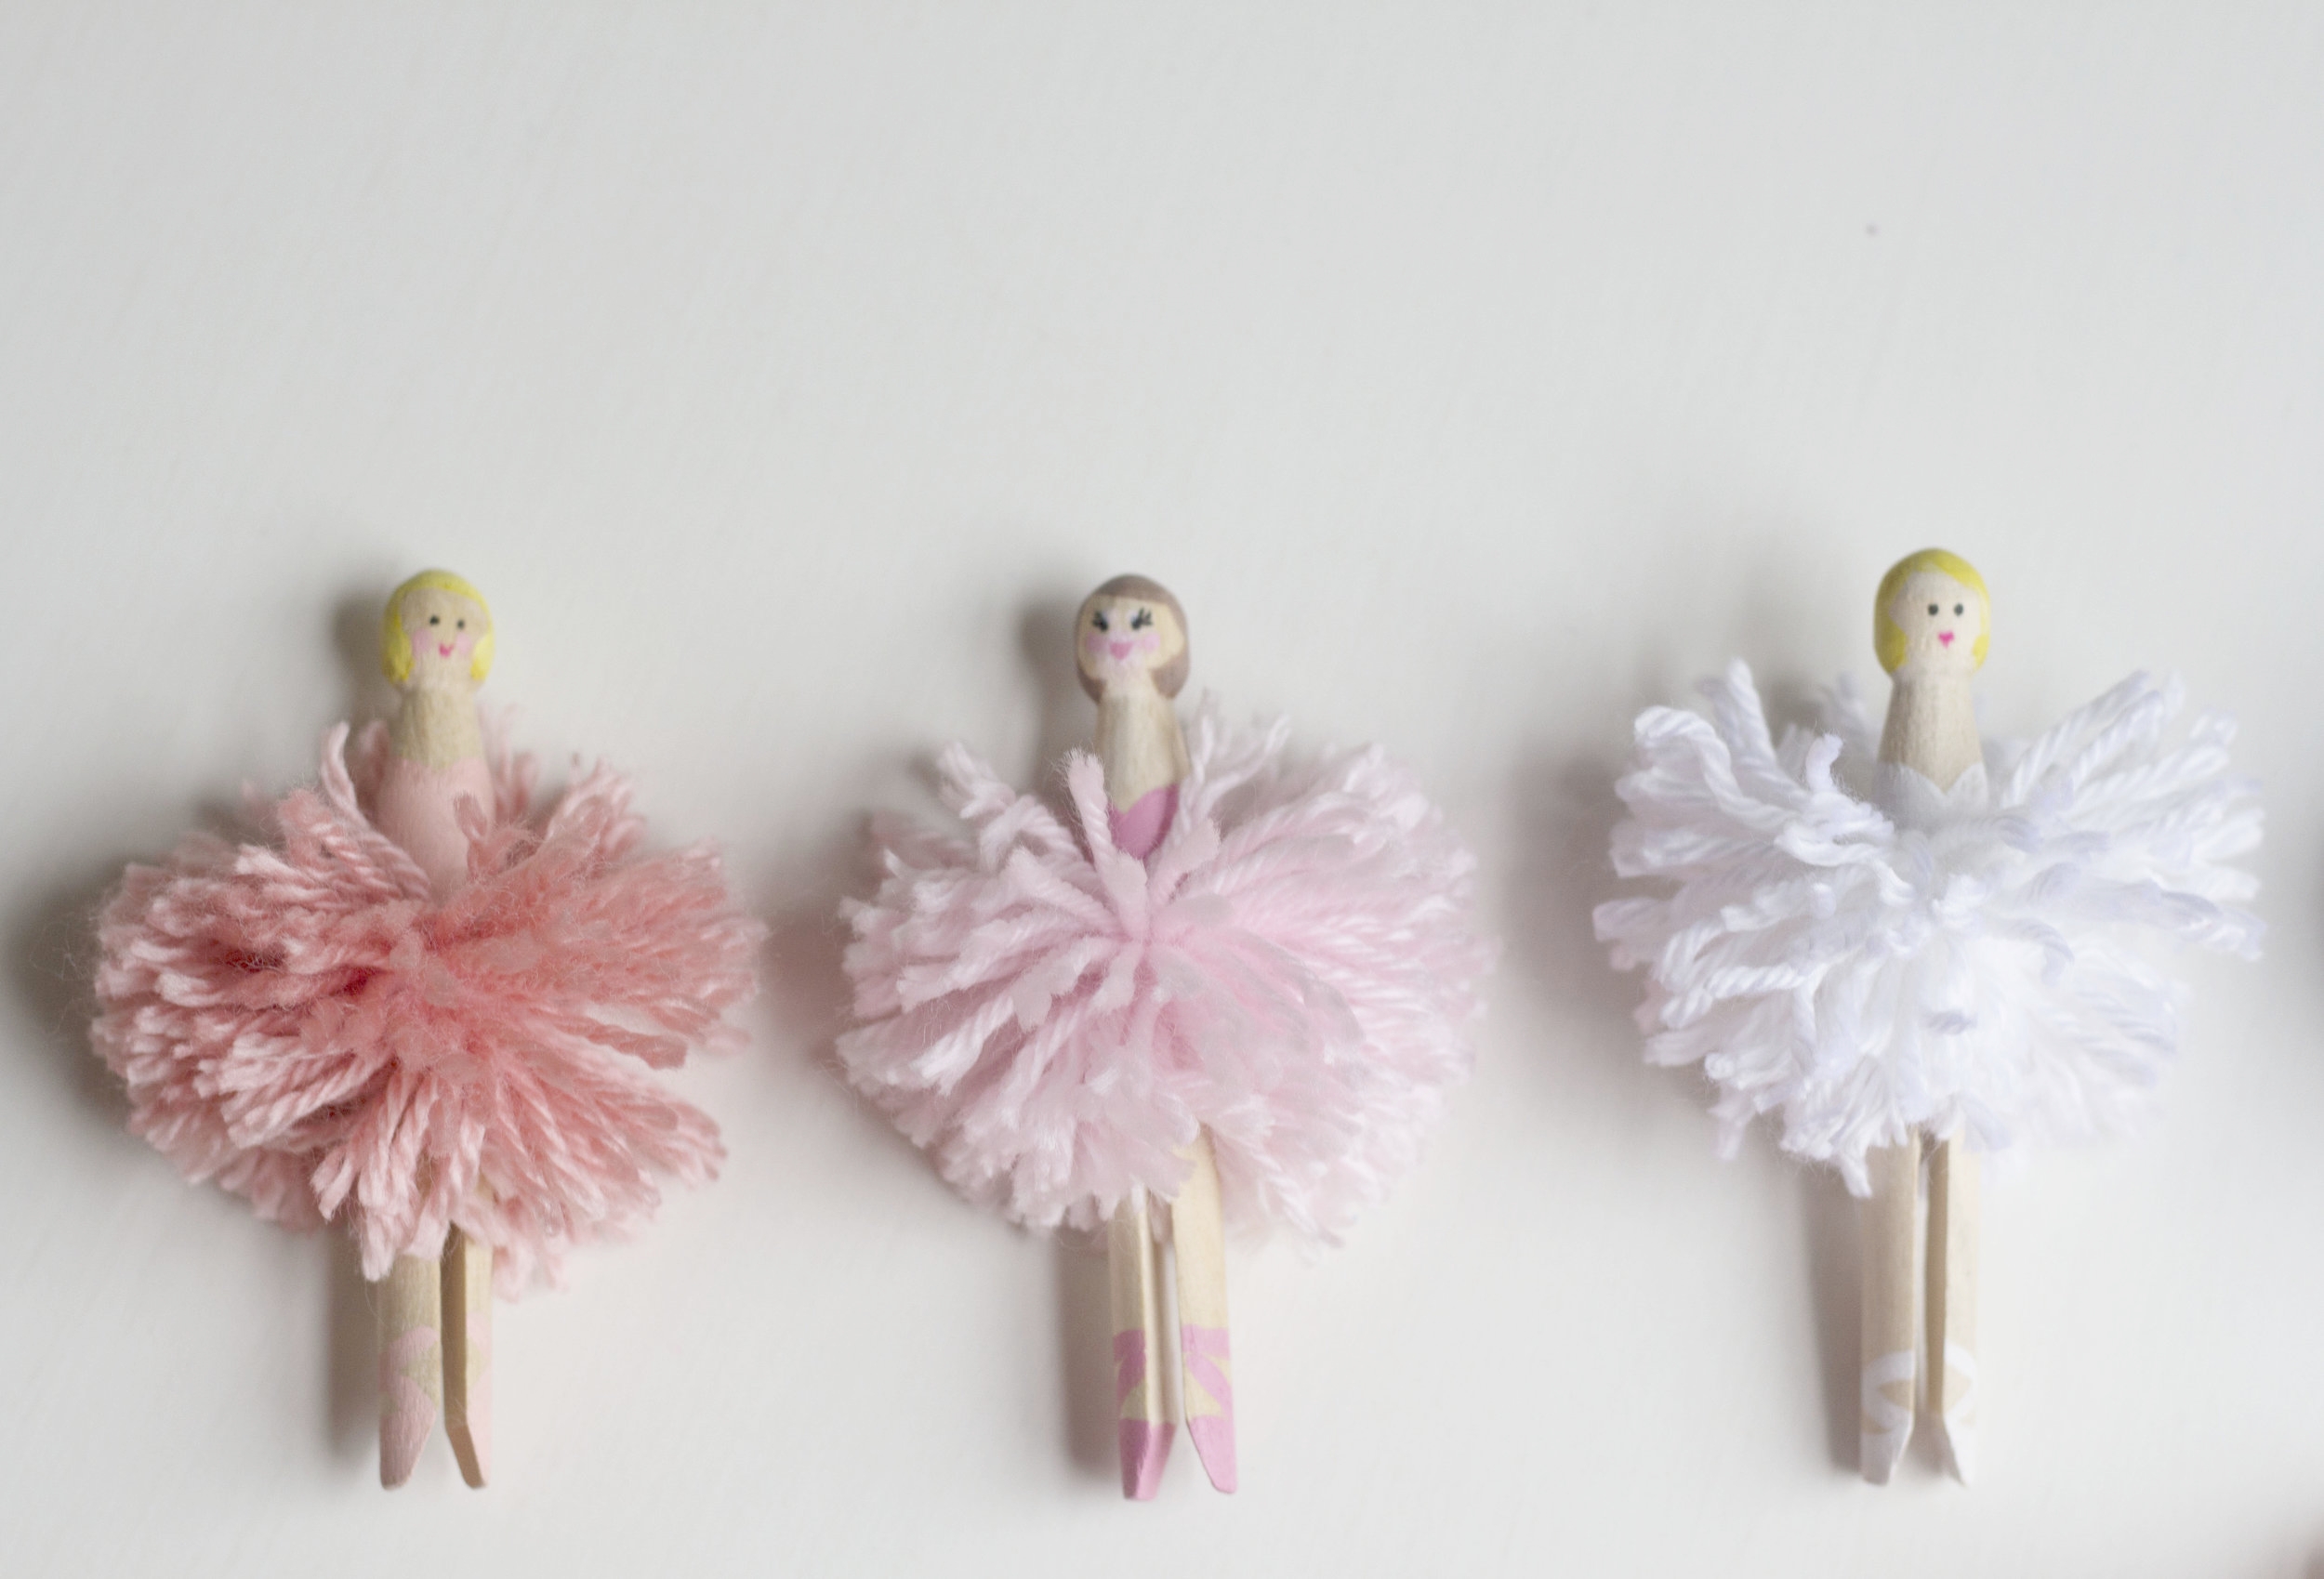
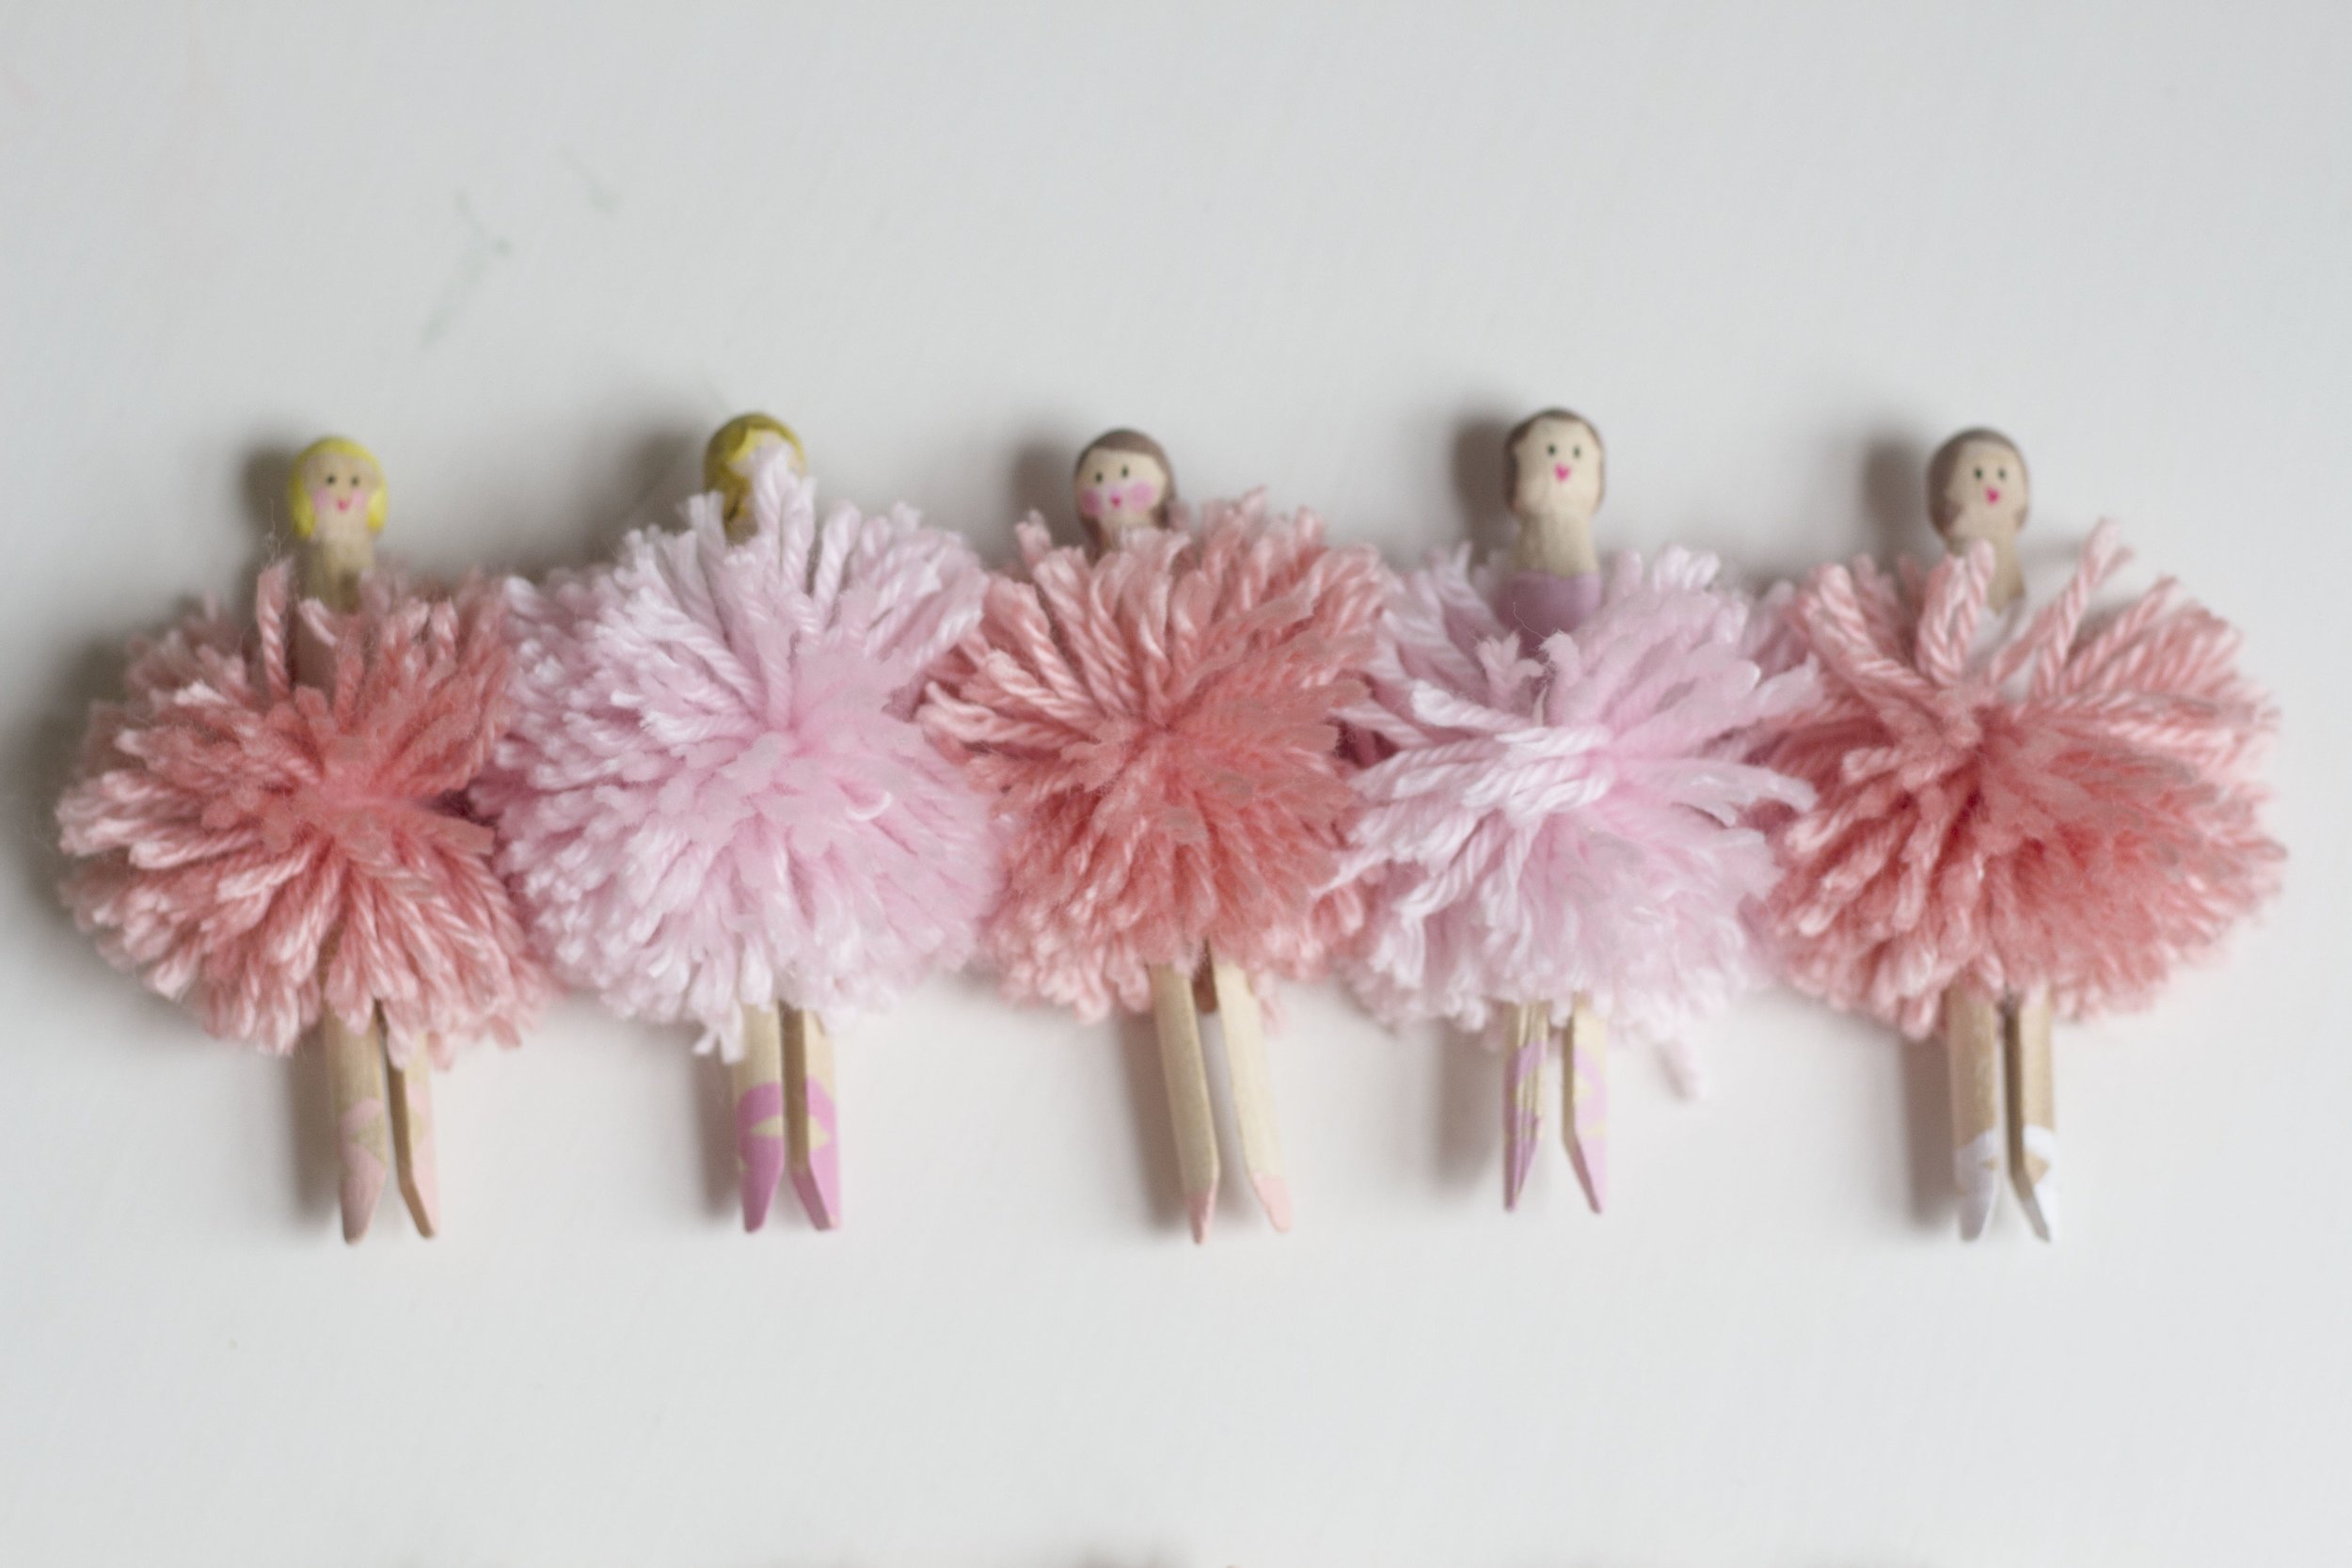
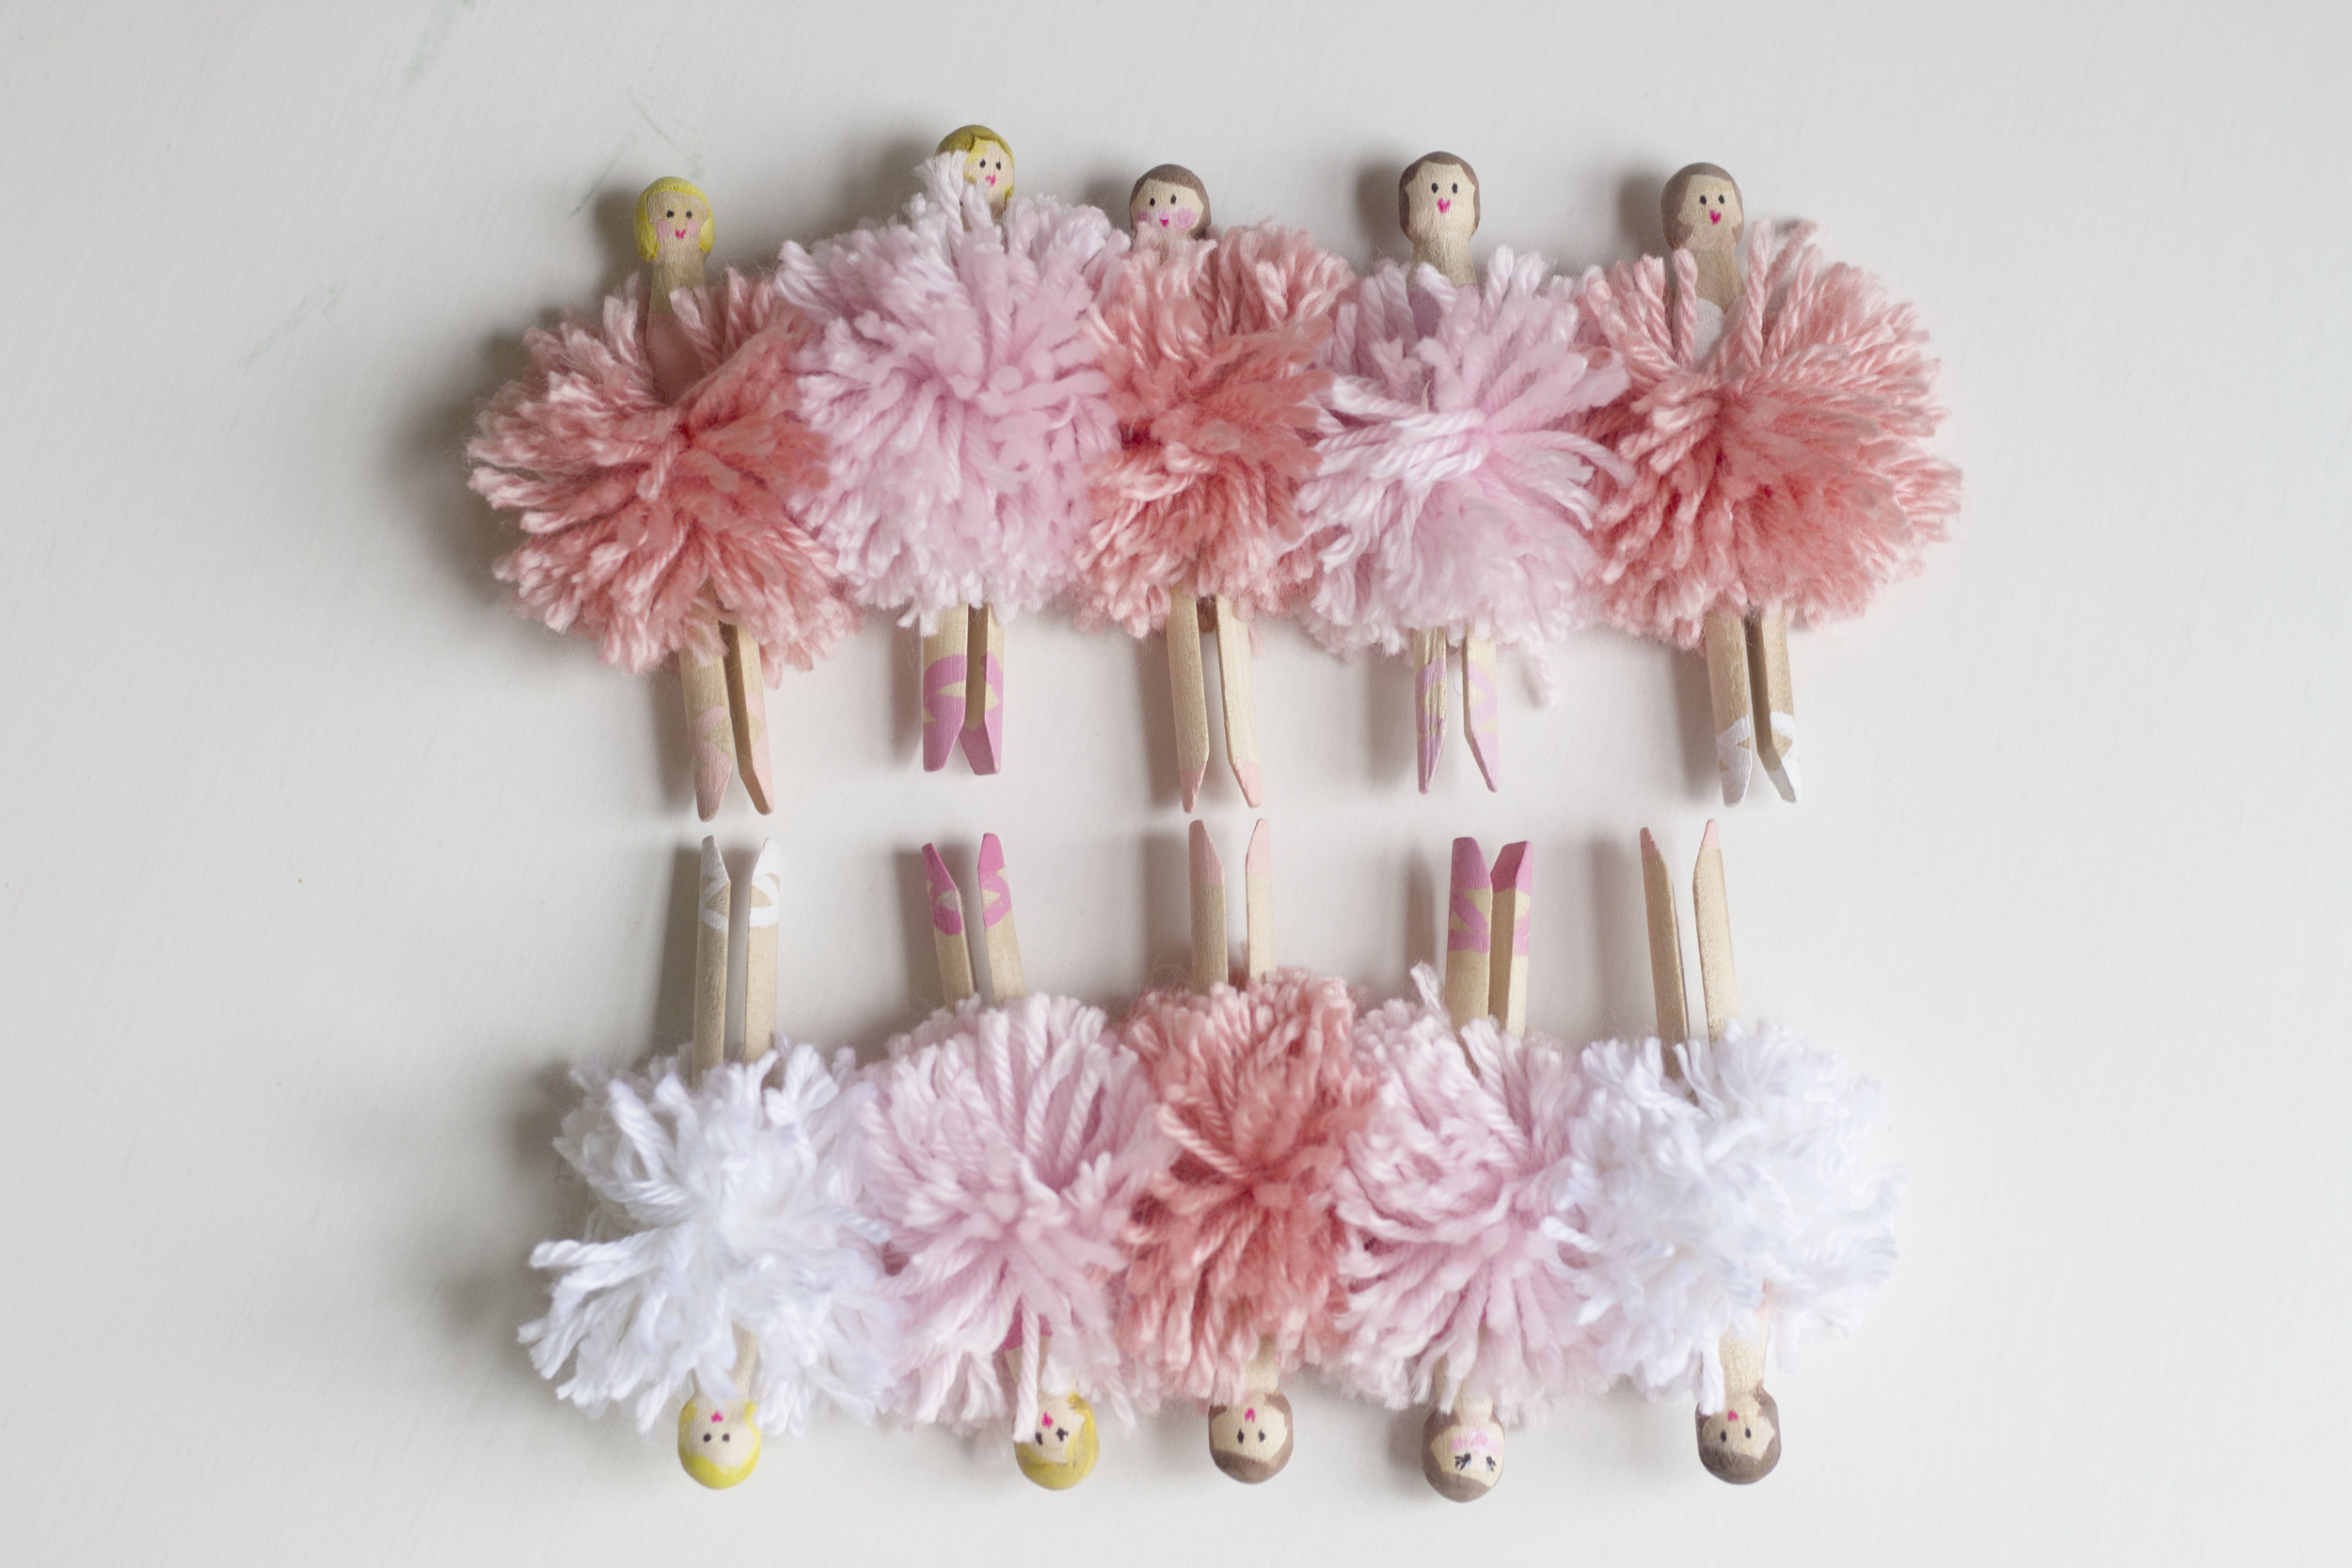
I found these cute wooden clothespins that have the rounded top which seemed perfect for a little ballerina head :) And I love how it looks like the dancers are up on their tippy toes. Of course traditional clothes pins would work (and then their legs would move a bit!) but I think this style really makes the project, so I'd be sure to get them if you want to make them.
To make pom ballerinas, you will need:
Yarn in the color(s) of your choice. (This yarn was my favorite look/finish and softness)
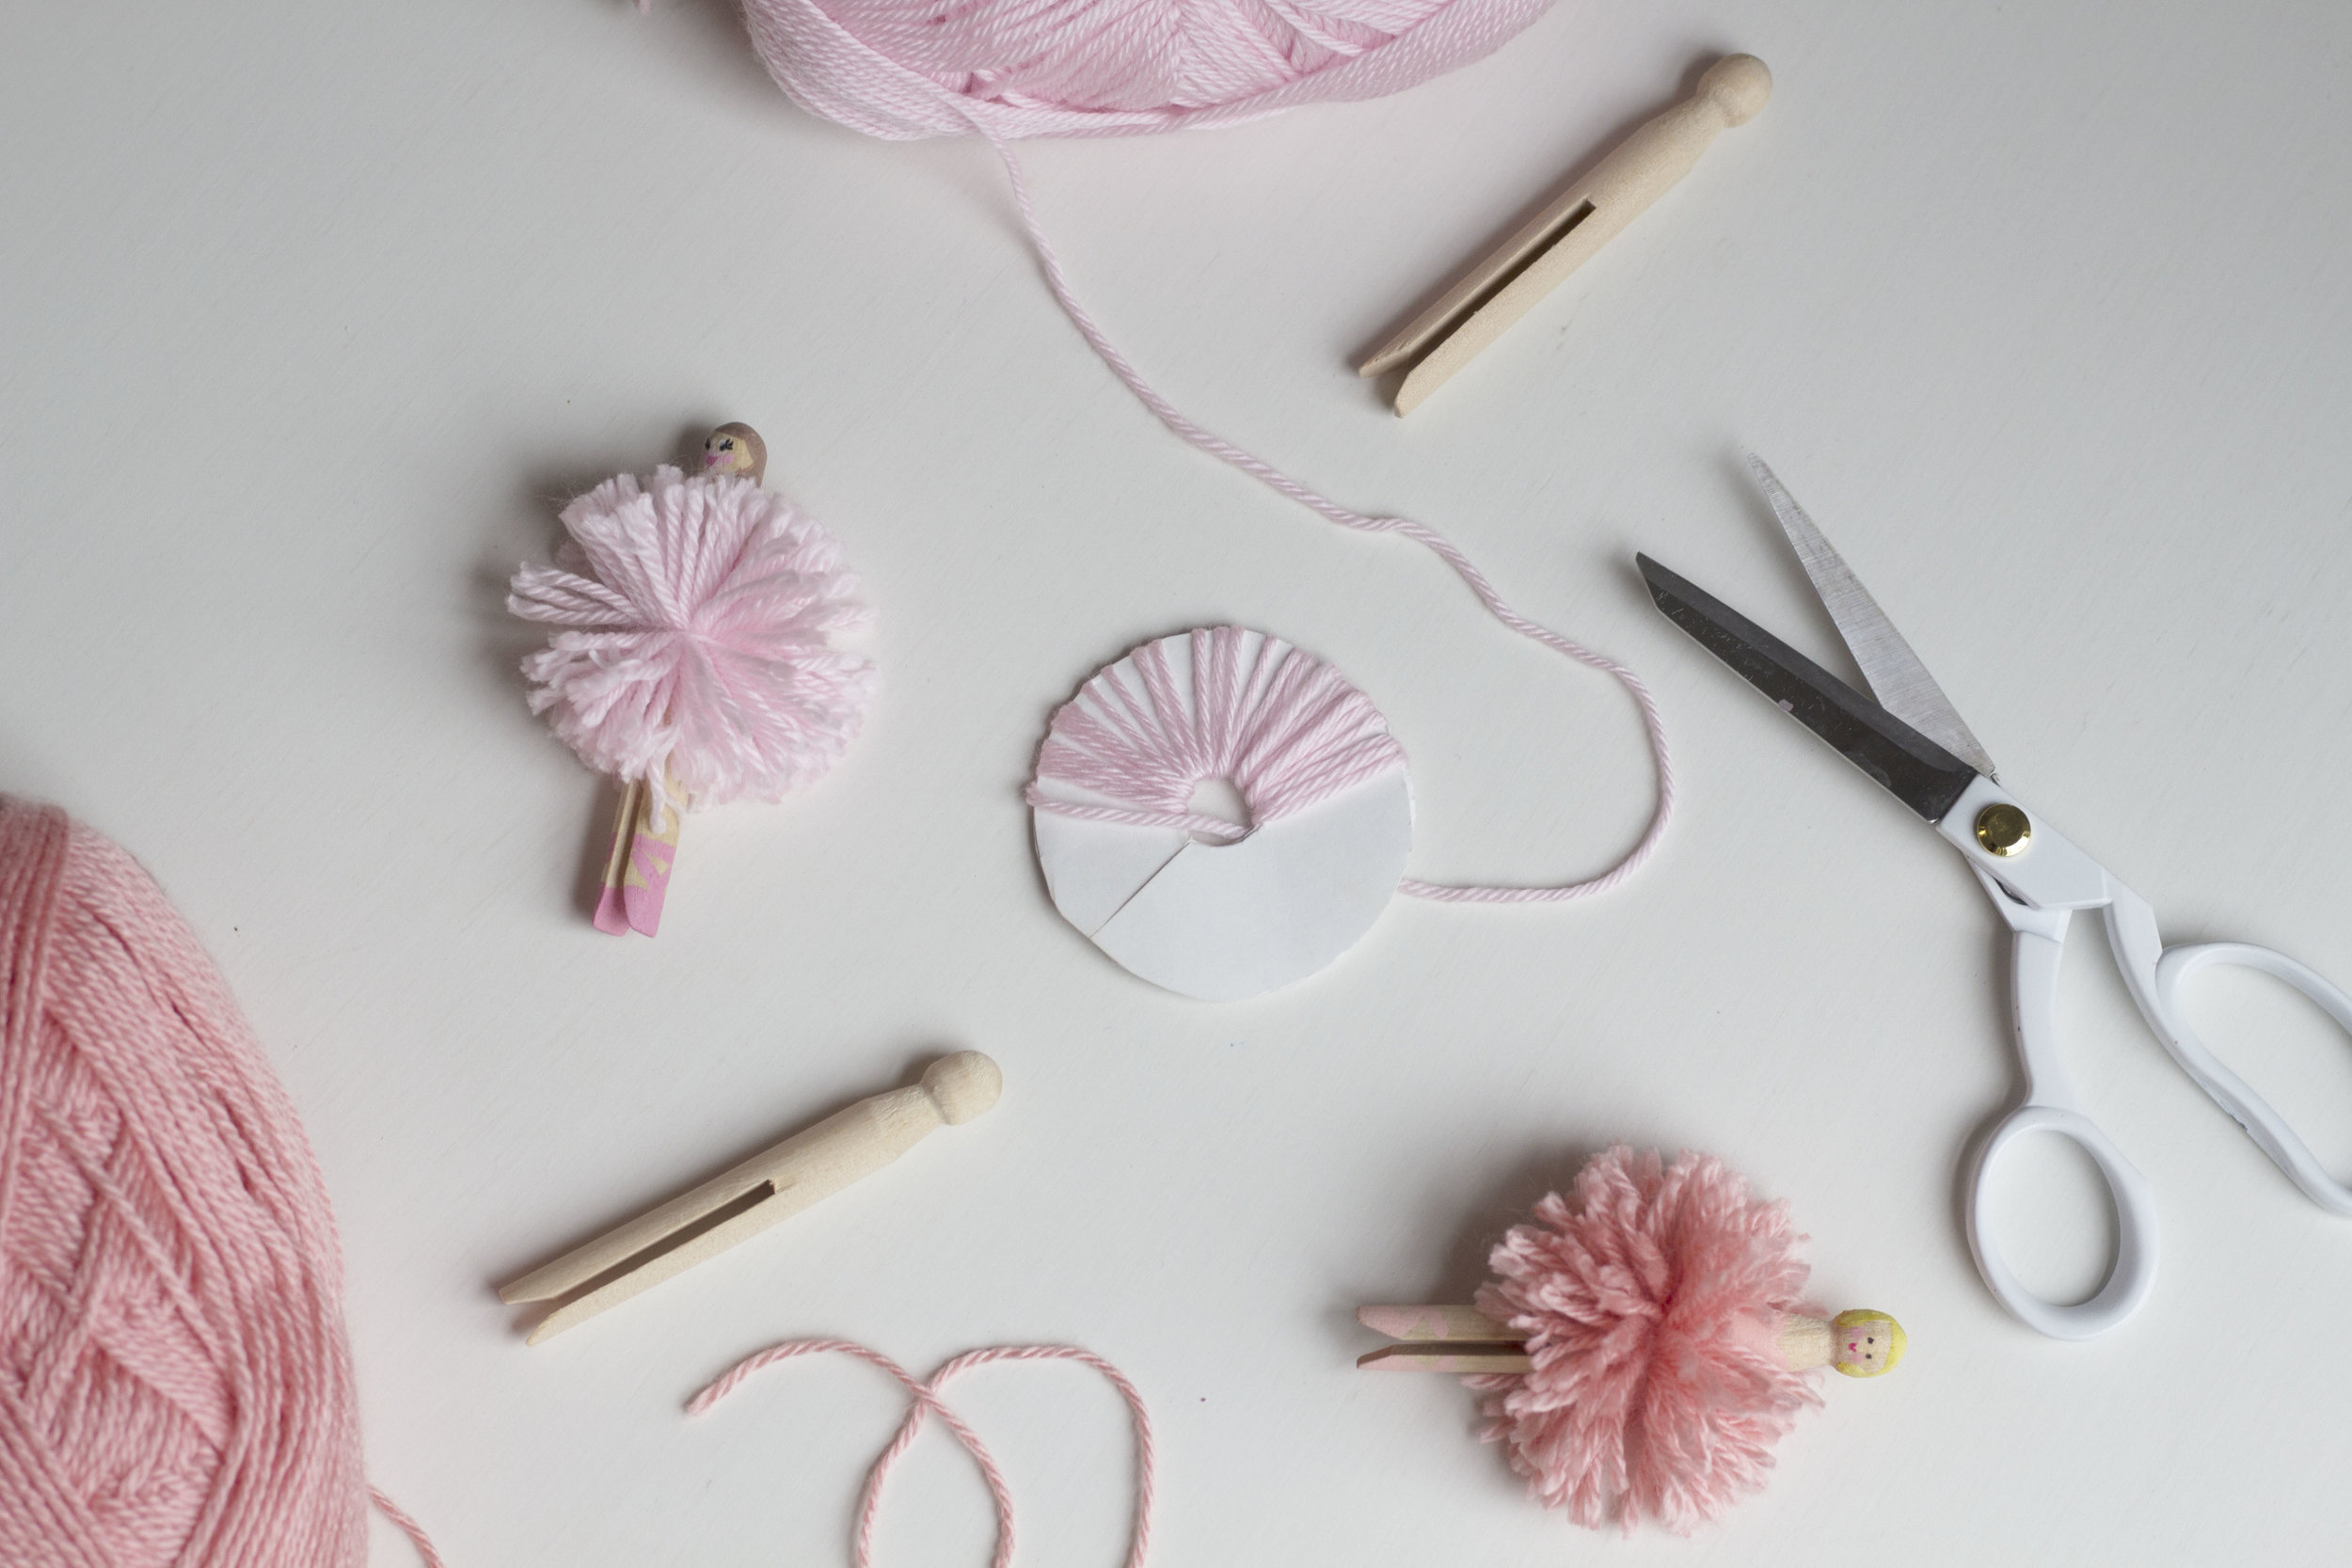
Paper plates (You need 2 for the yarn tool, and then we used 5 more for ballerina stands-- 2 fit on each plate.)
Acrylic paint in the colors of your choice (we used a non-toxic version.)
1 small paintbrush
1 cup for water/paint
Here's the step by step for these cutie ballerinas!
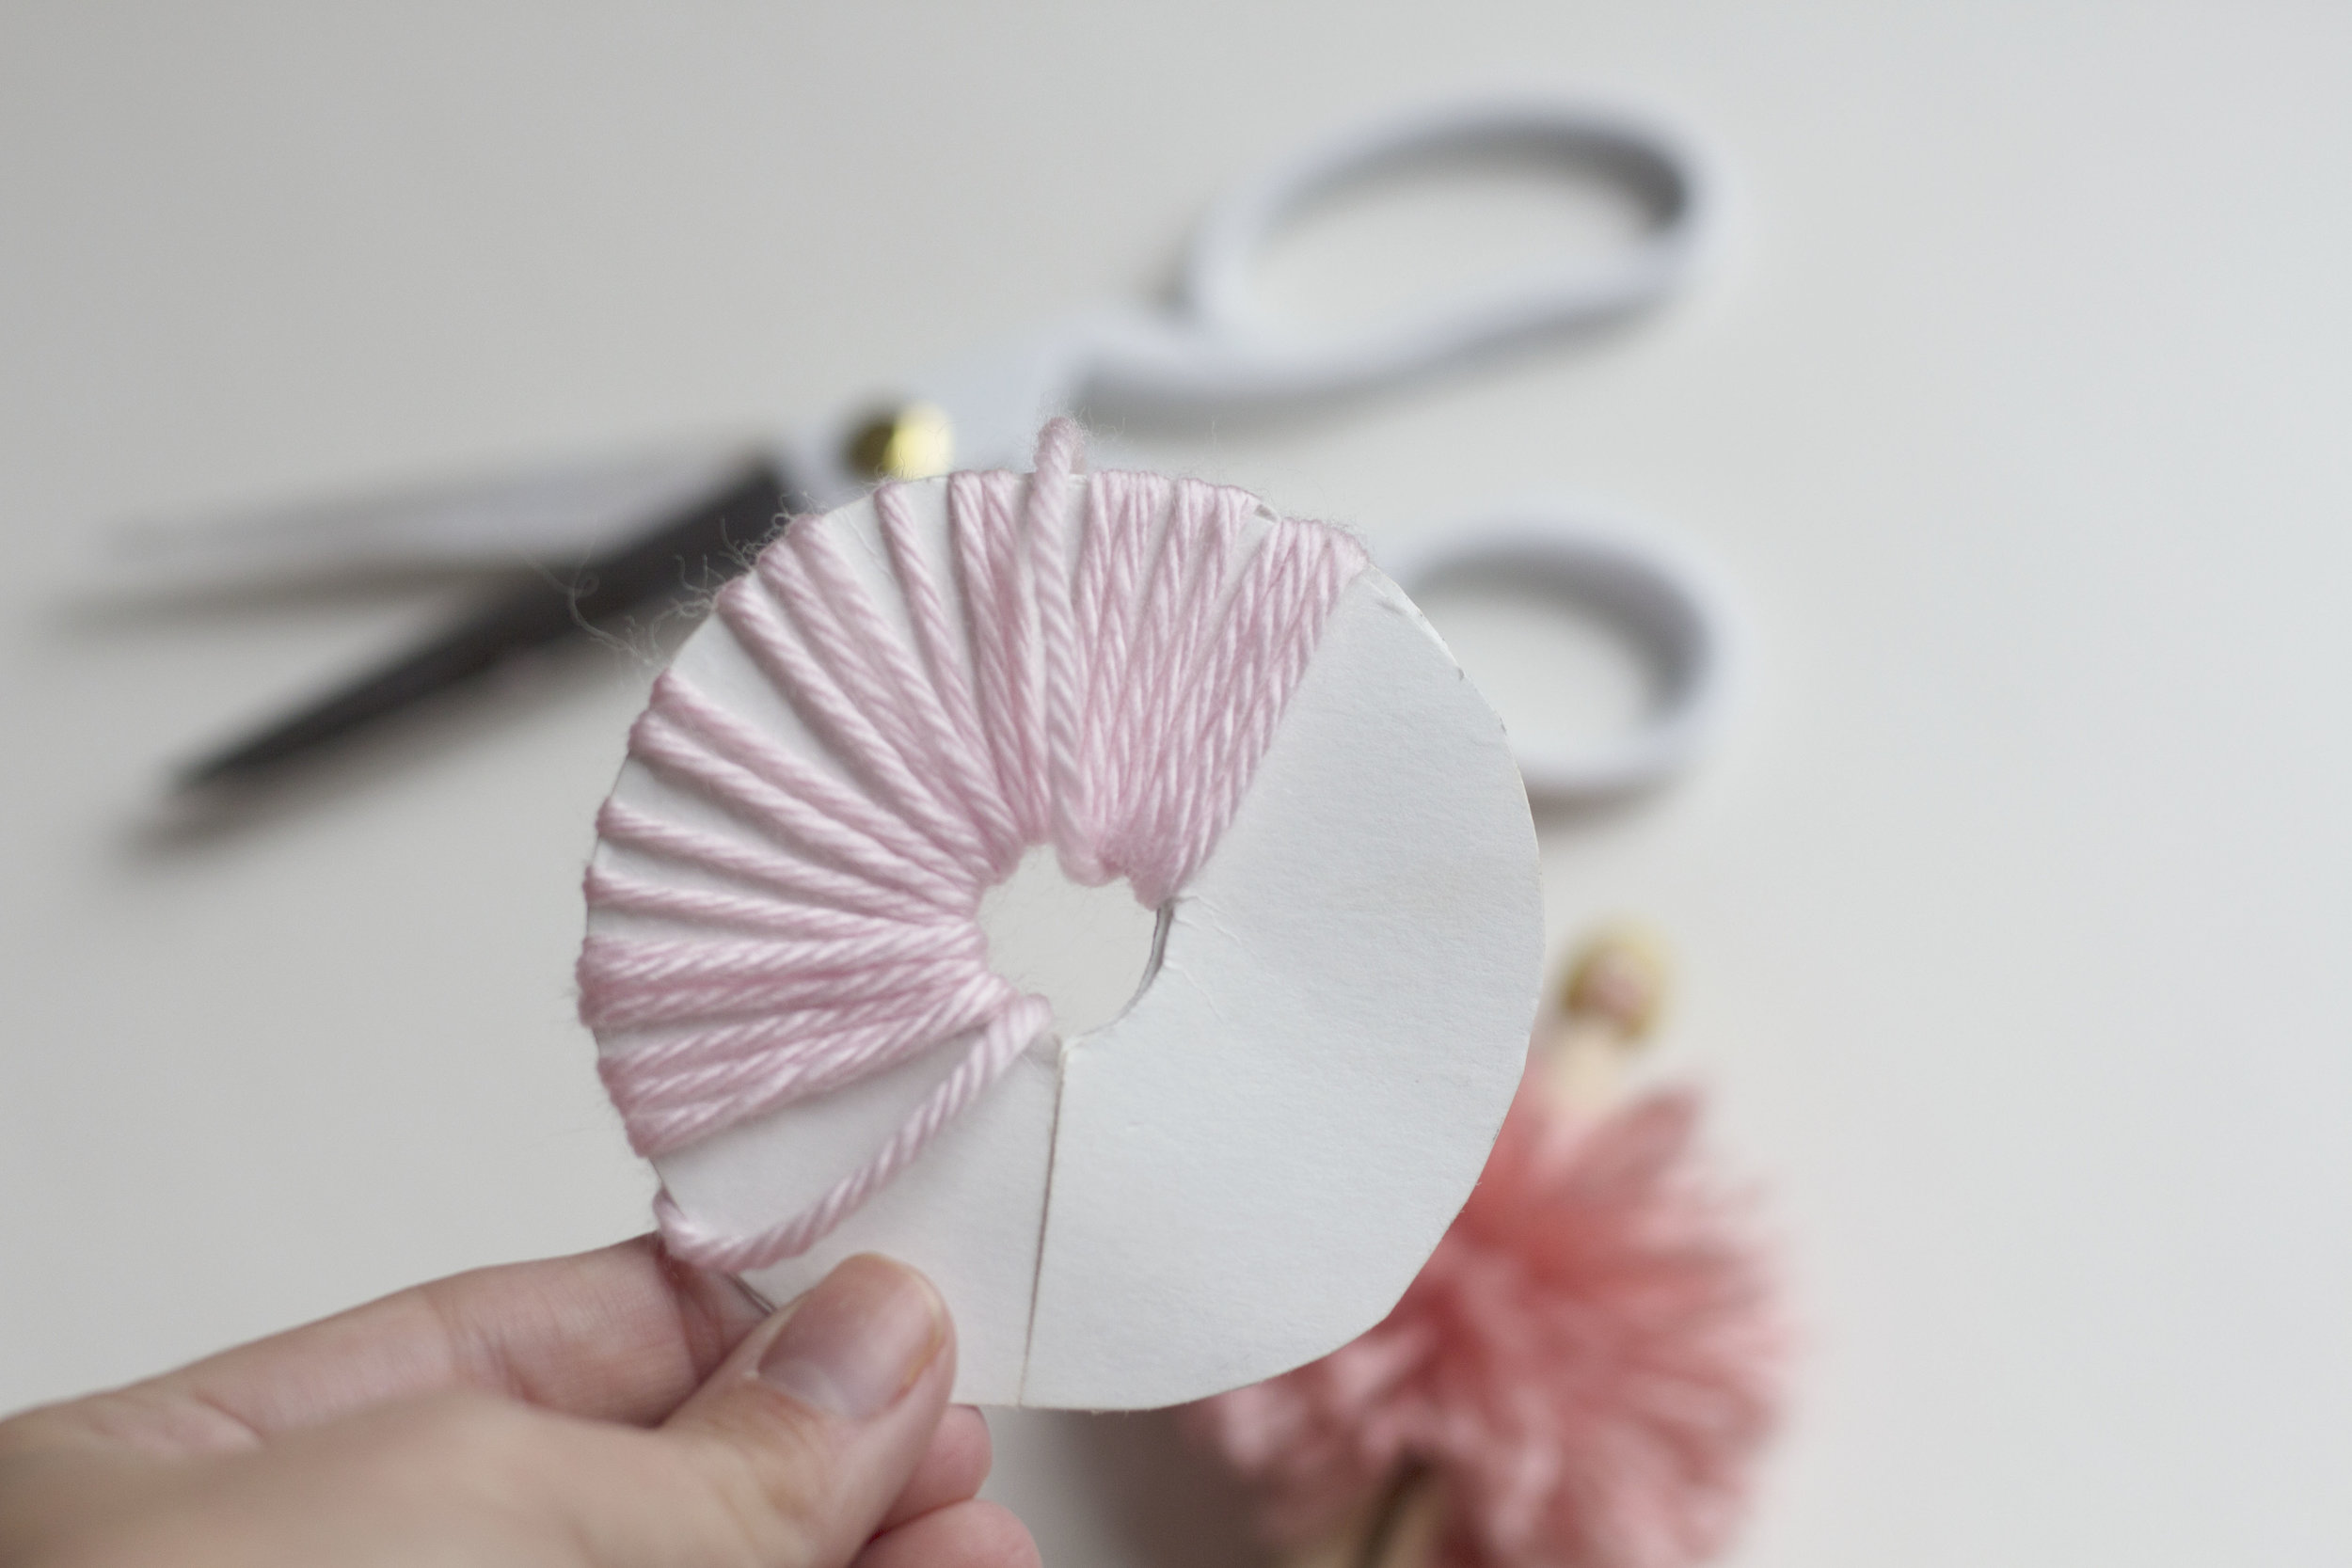
1. First you'll need to create a tool for wrapping the yarn to make the pom pom tutus. Take 2 paper plates and create a donut like shape out of each of them. You can use a glass or candle to trace the size. Ours was 3" diameter, with the center hole opening just over .5" The clothespin will eventually go in the hole so you want to make sure it fits in nicely-- not too loose, or too small. Place the two pieces on top of each other and then cut one side so there is a slit in the donuts, creating a flap in the tool. Set this aside.
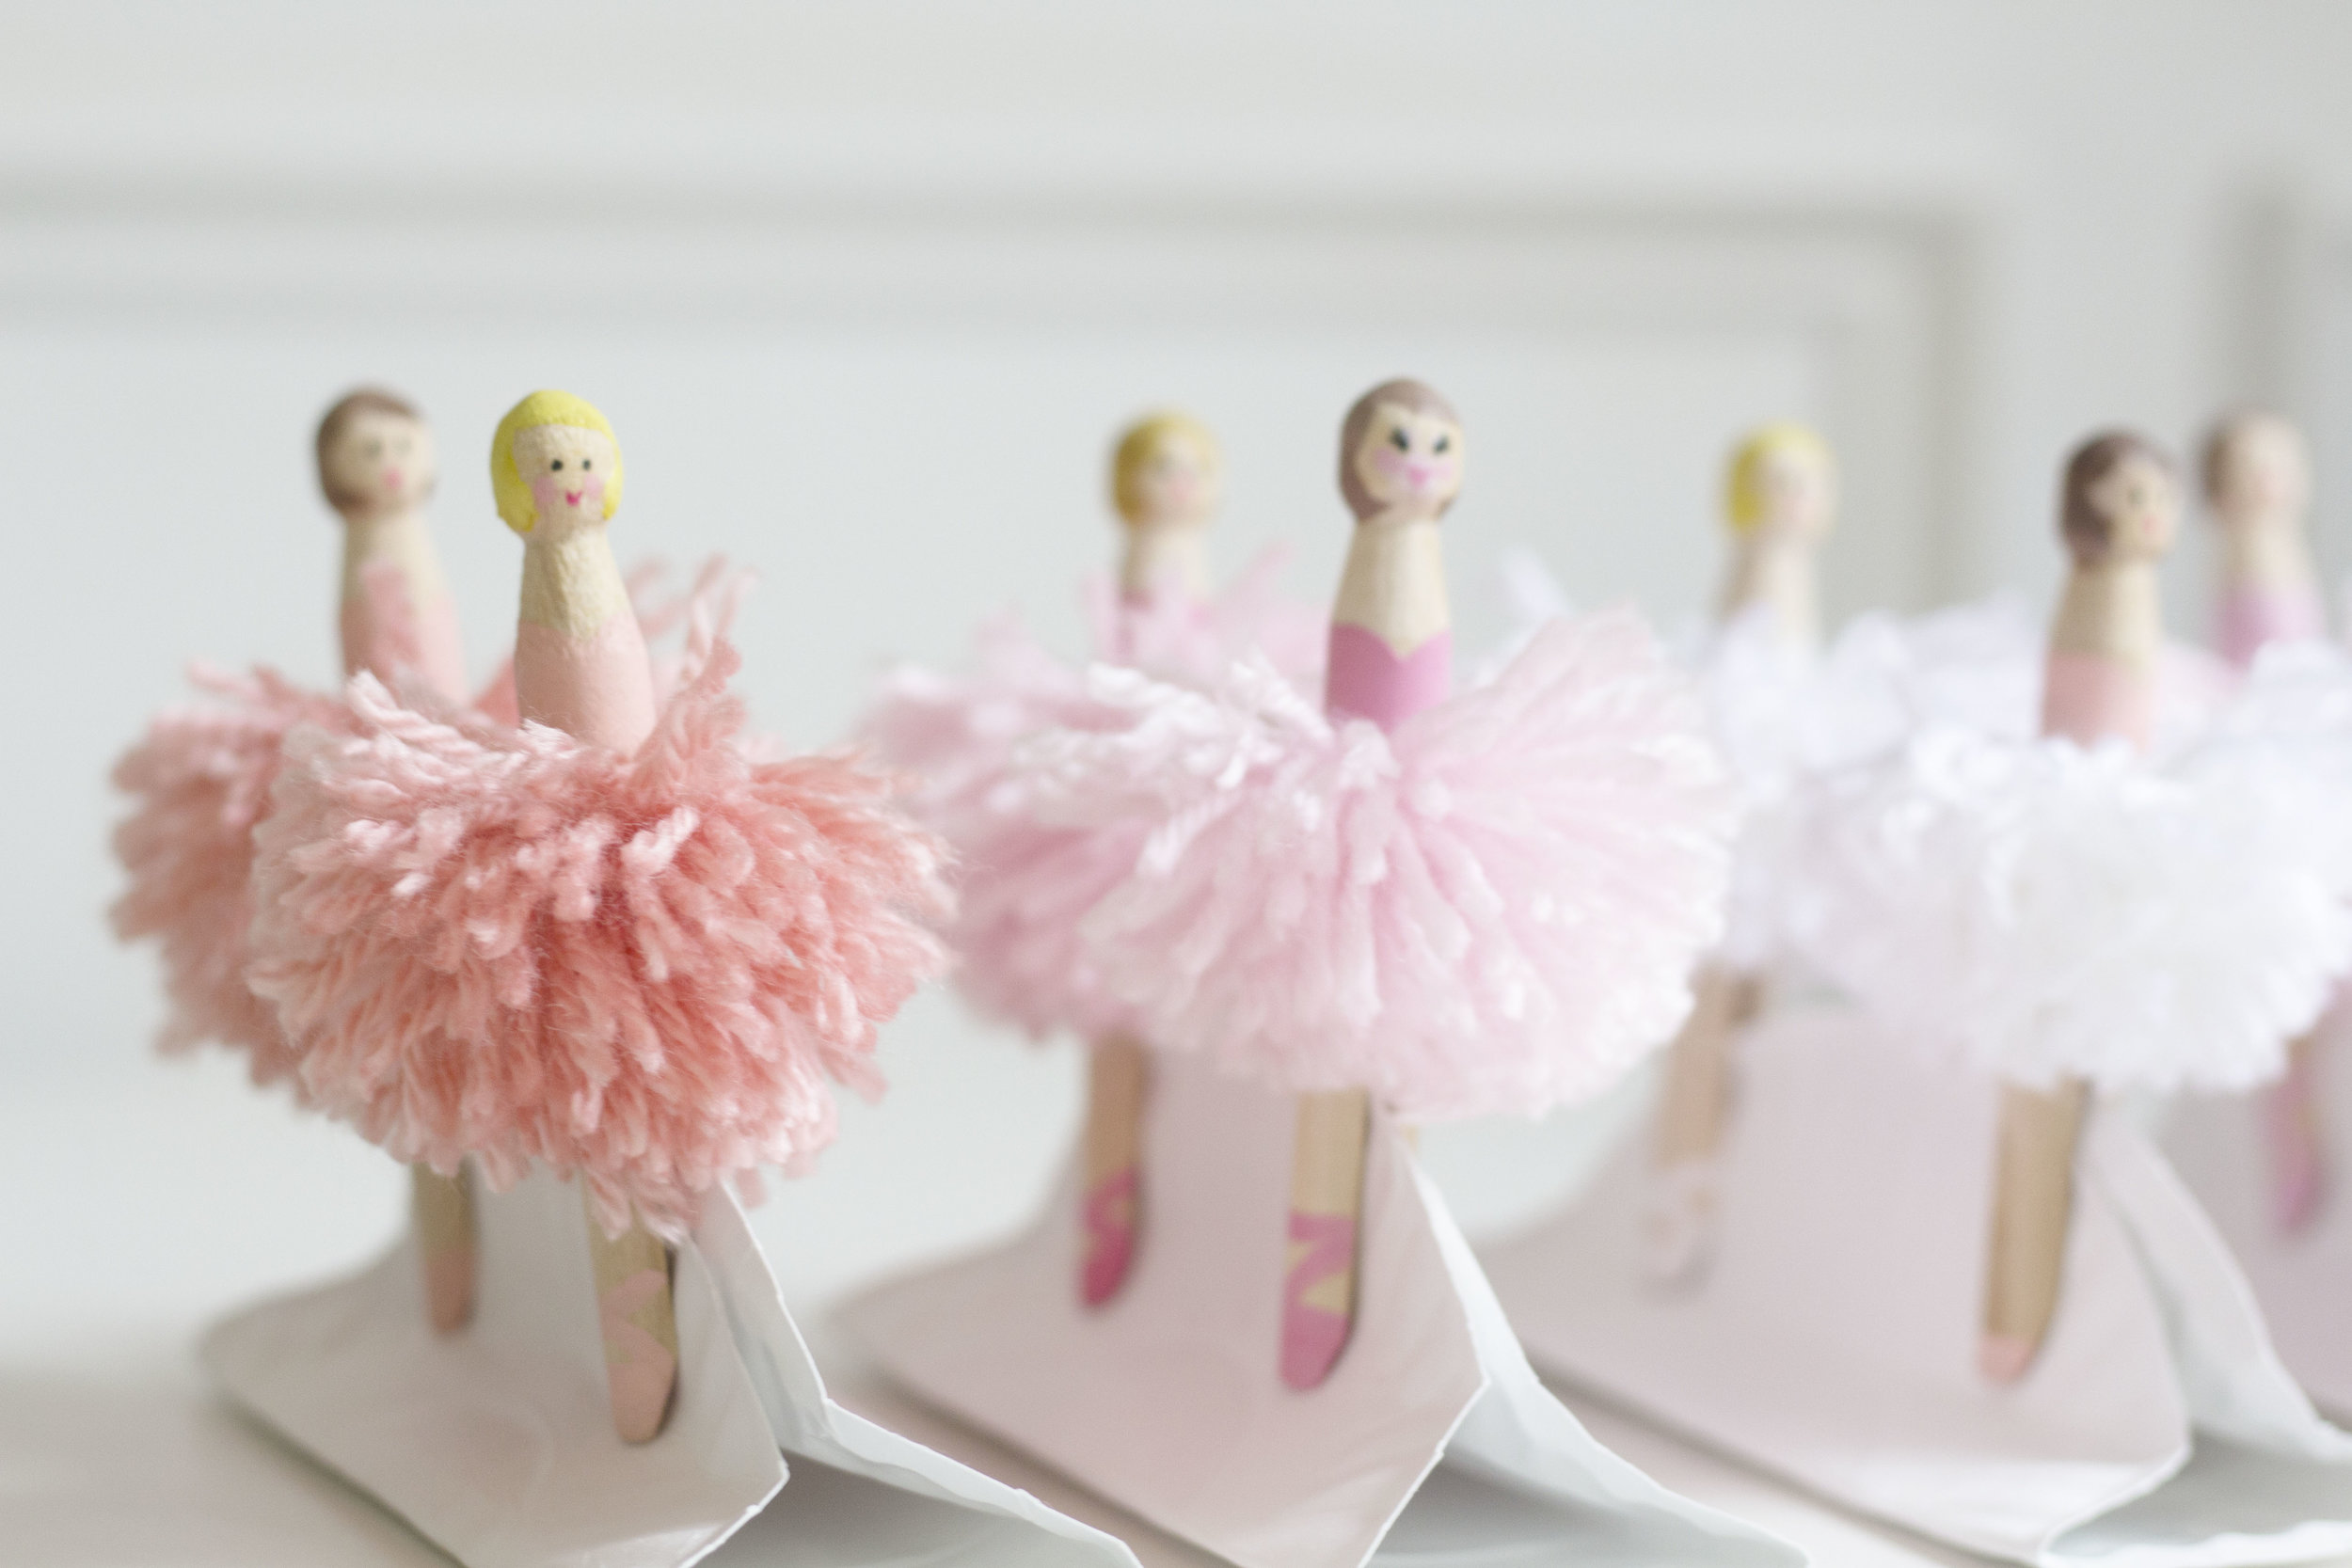
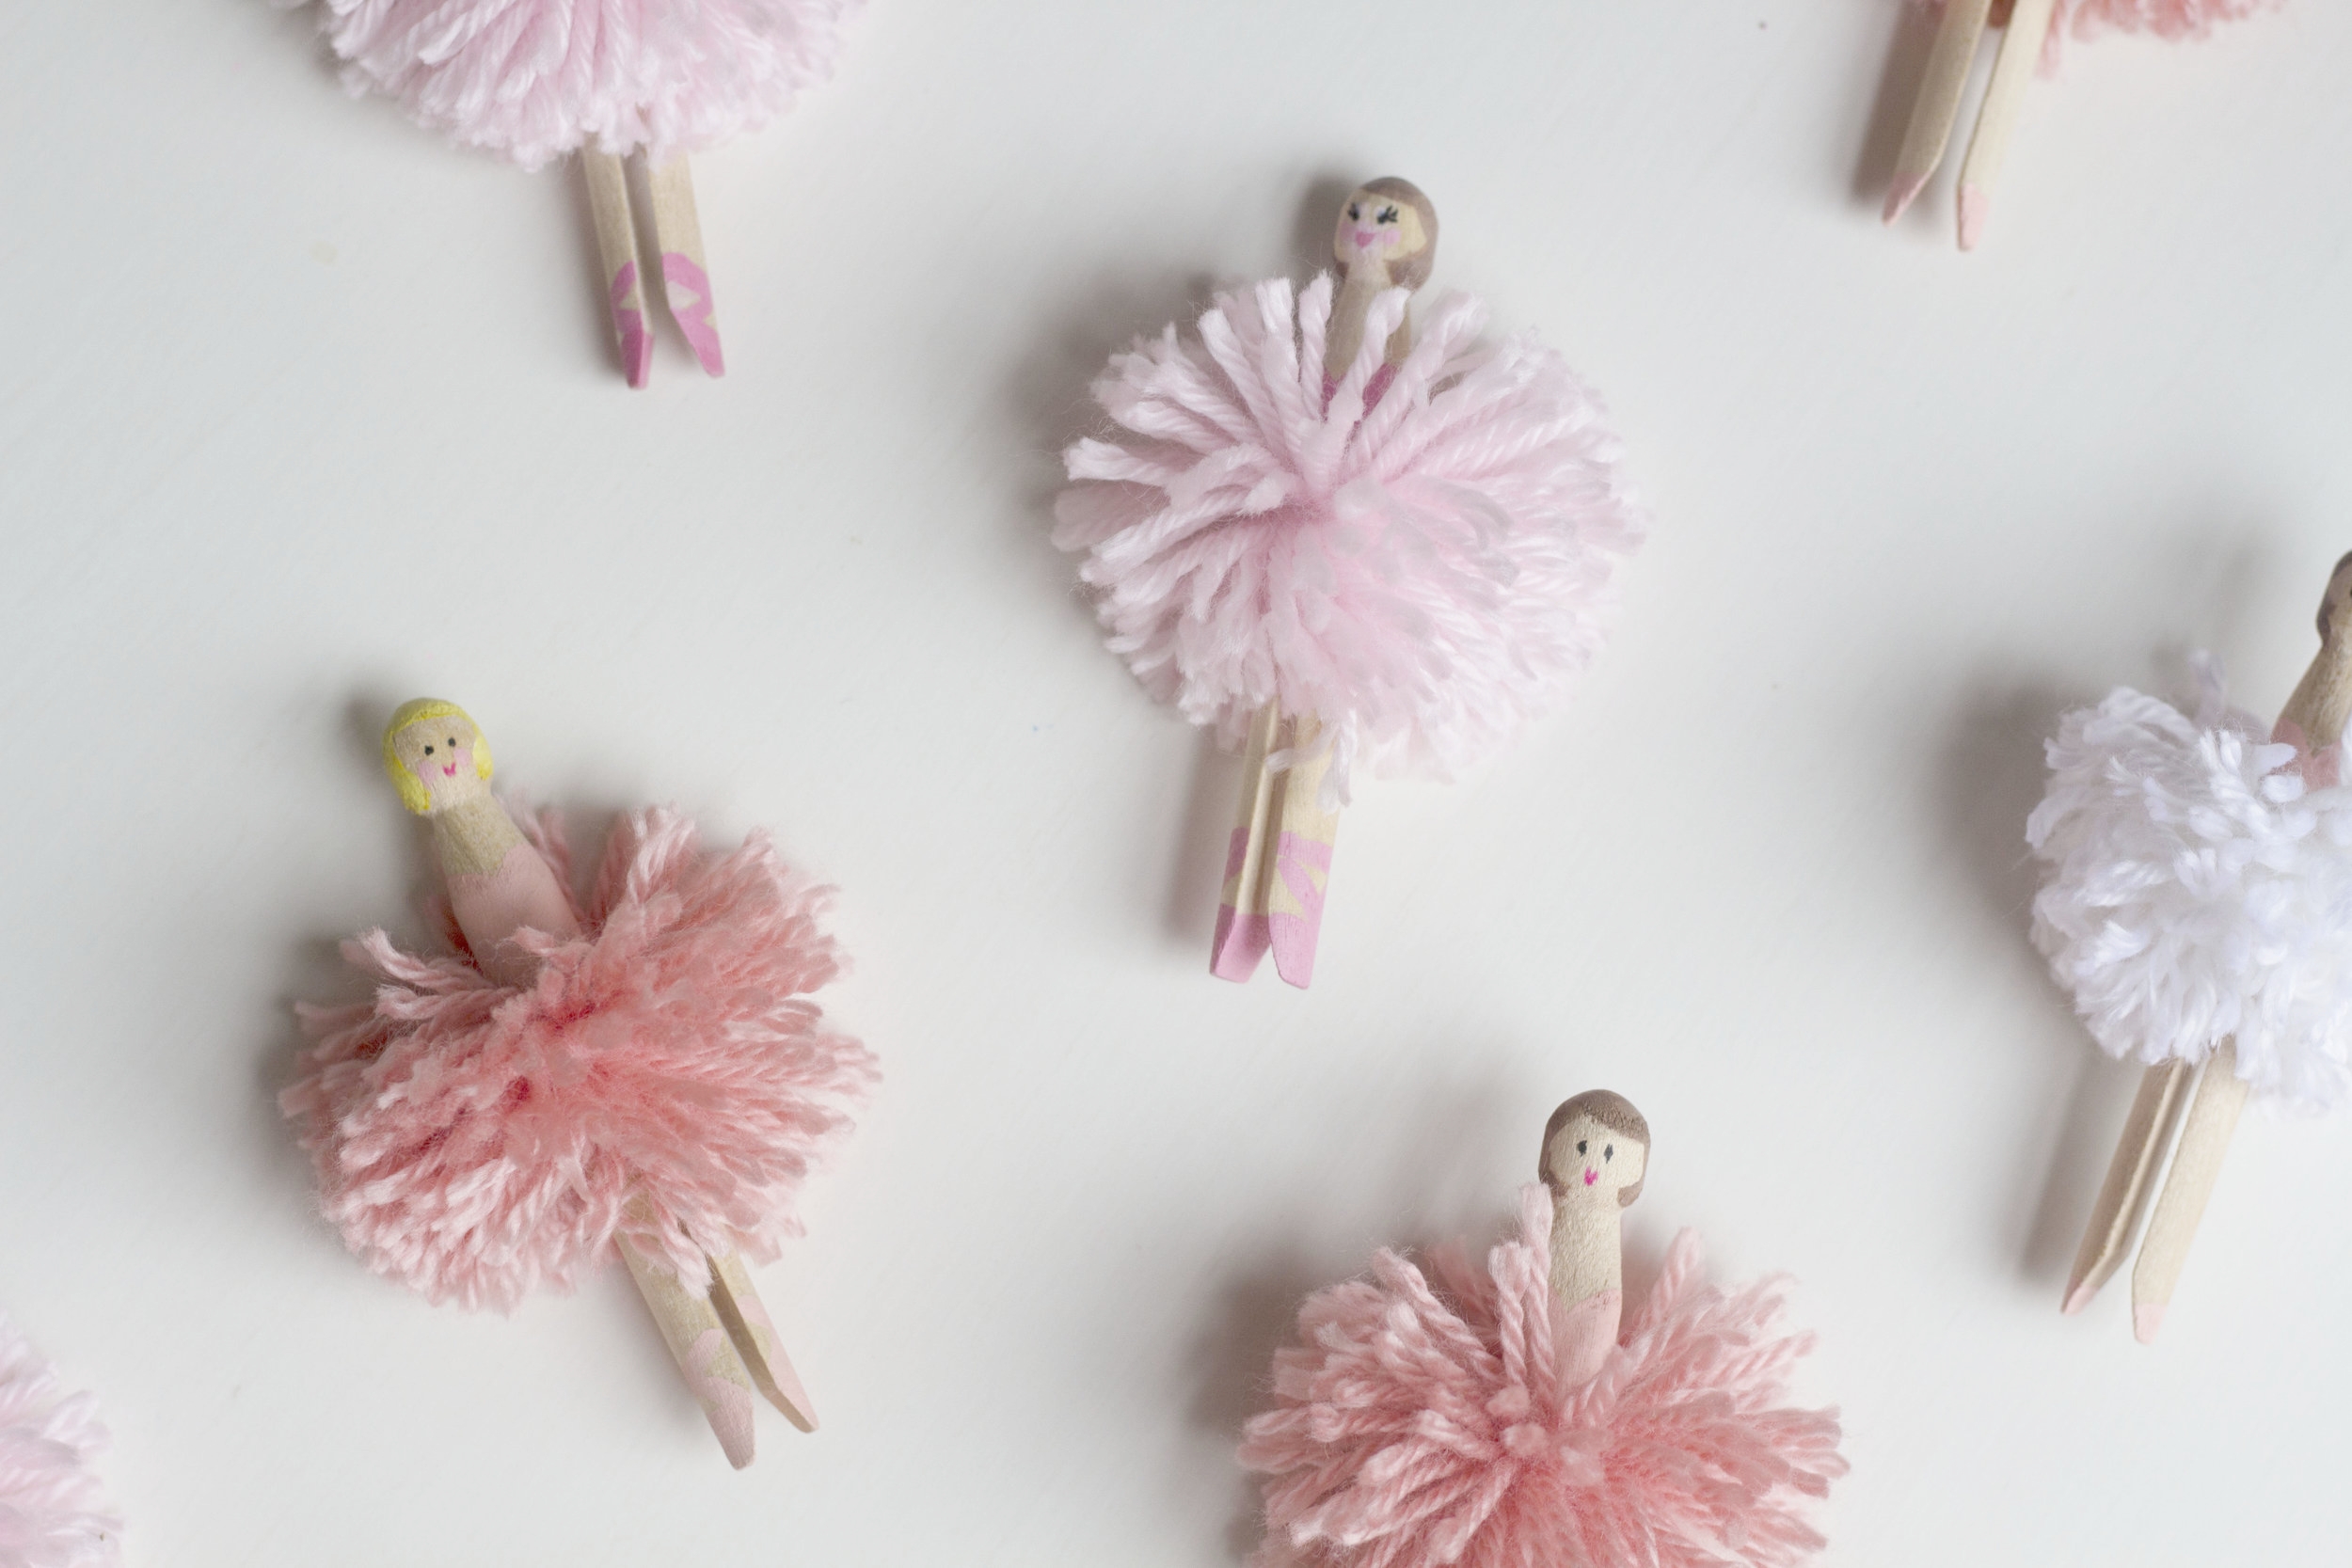
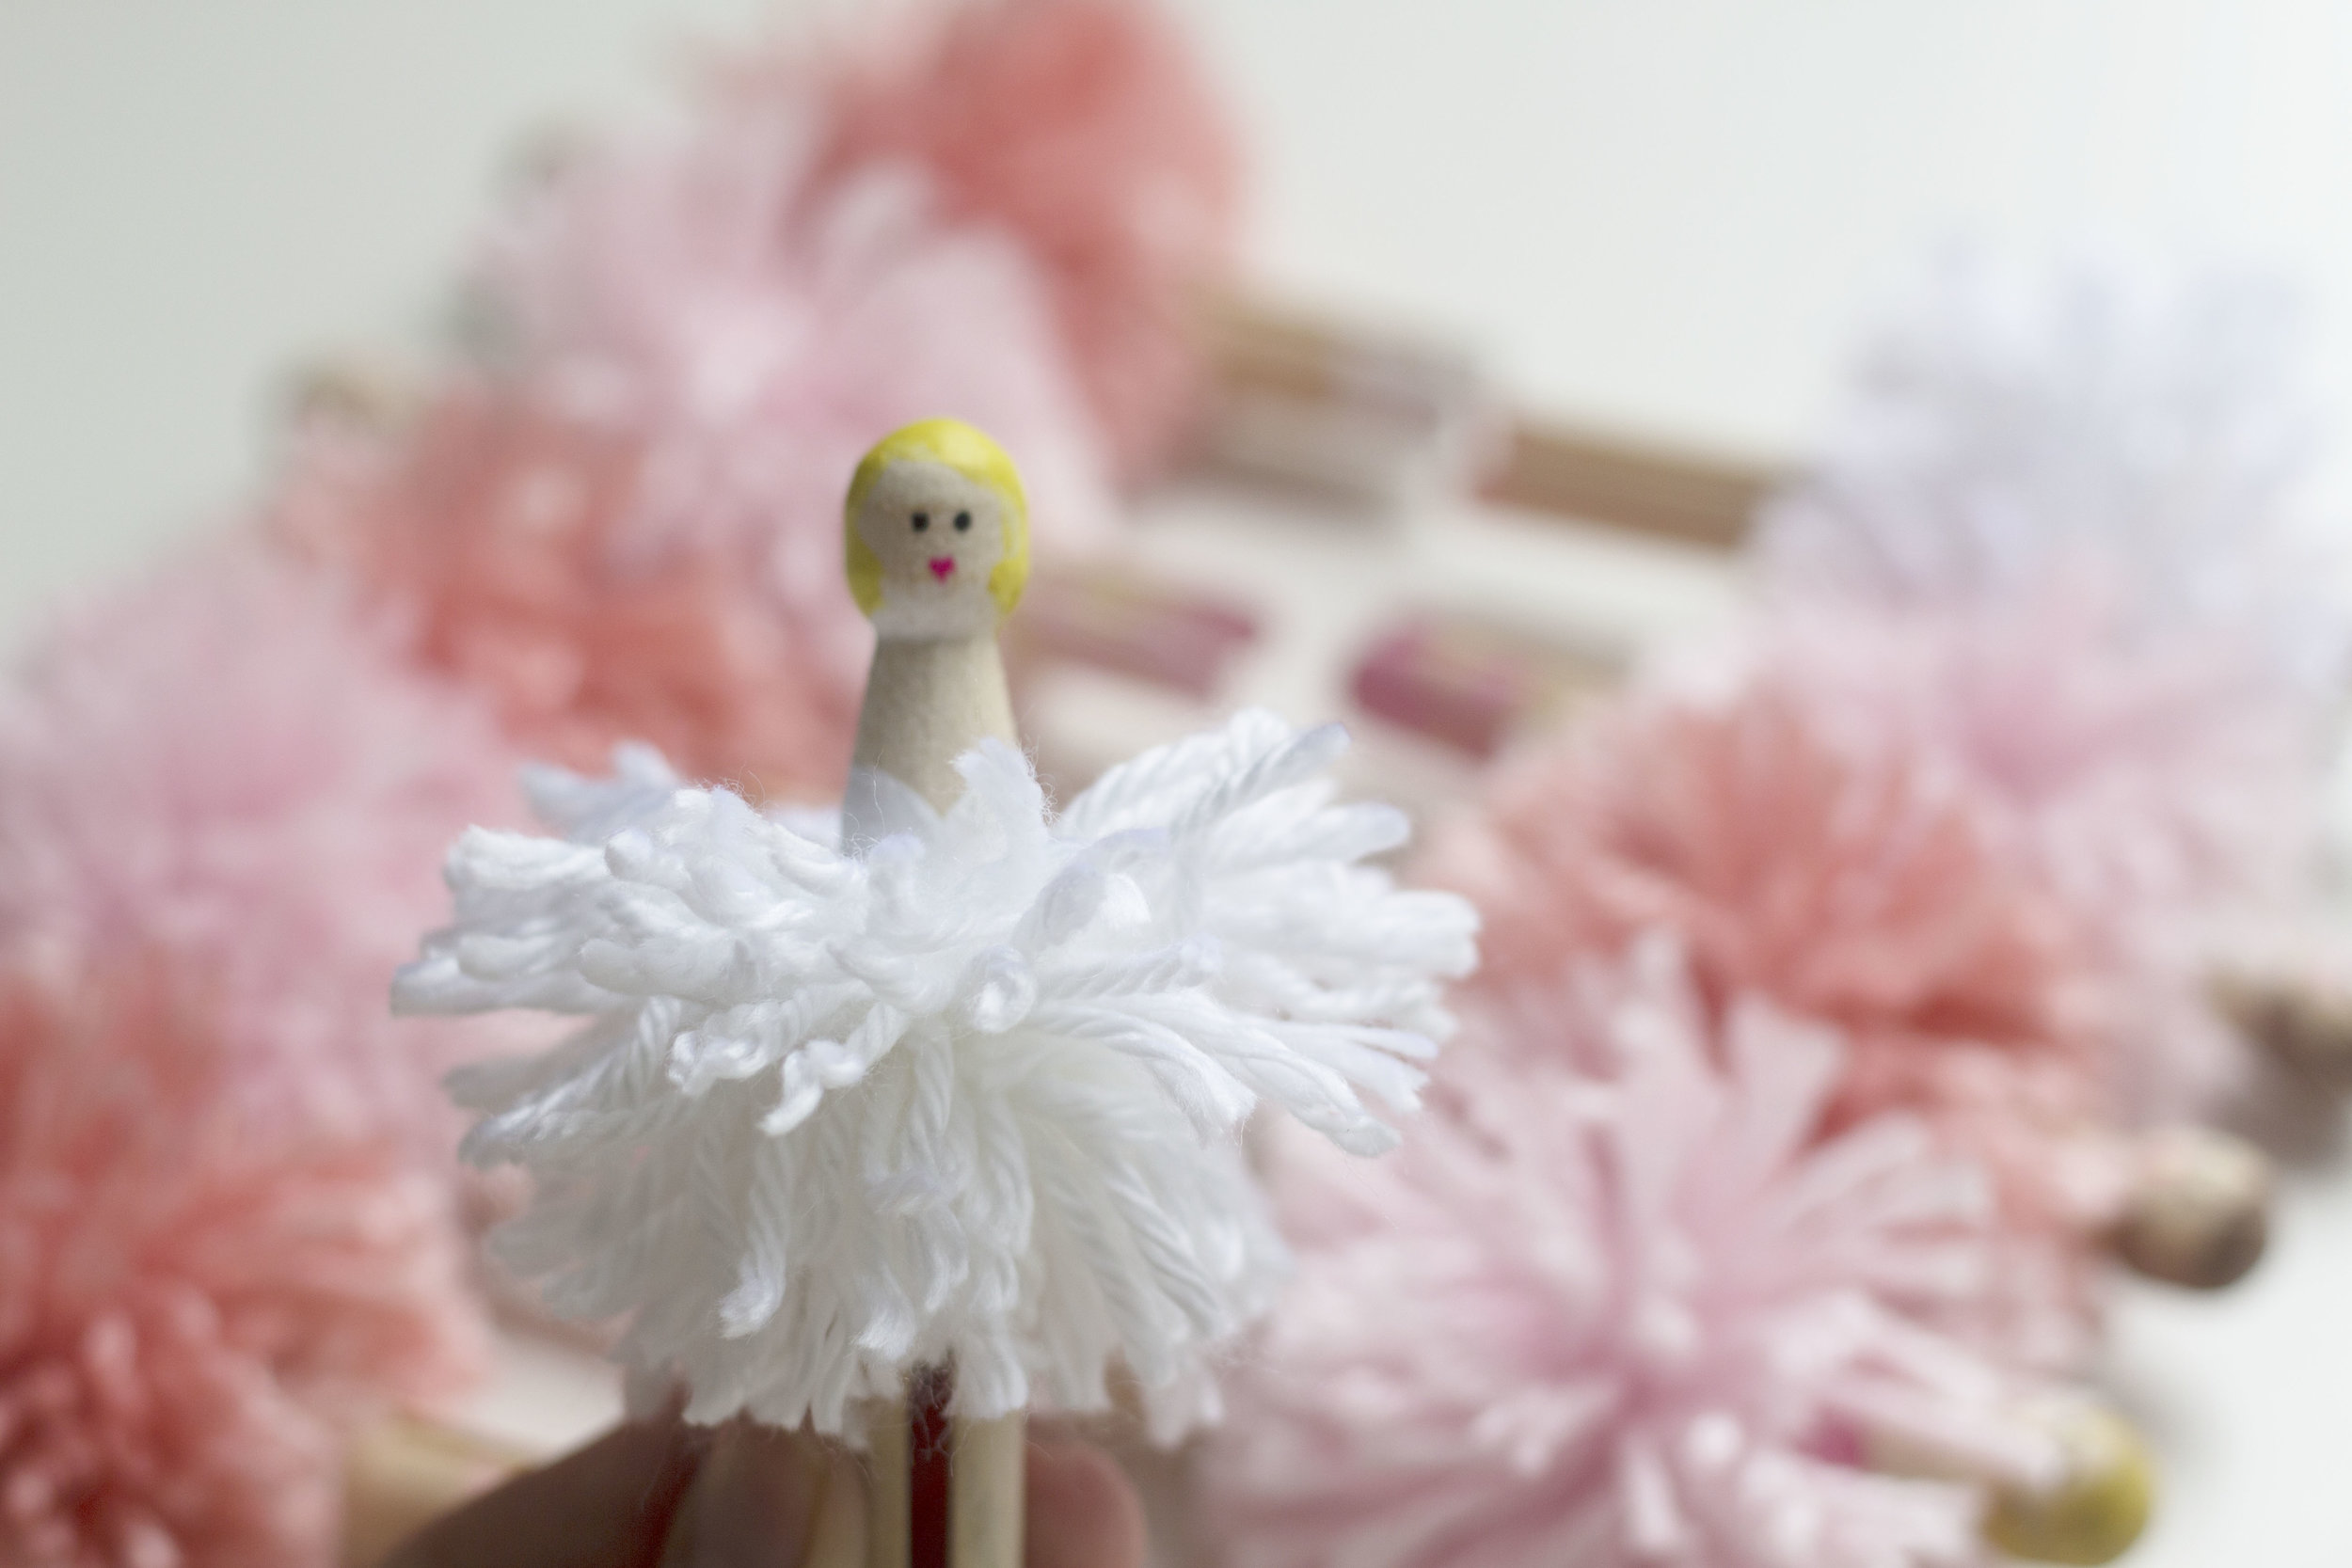
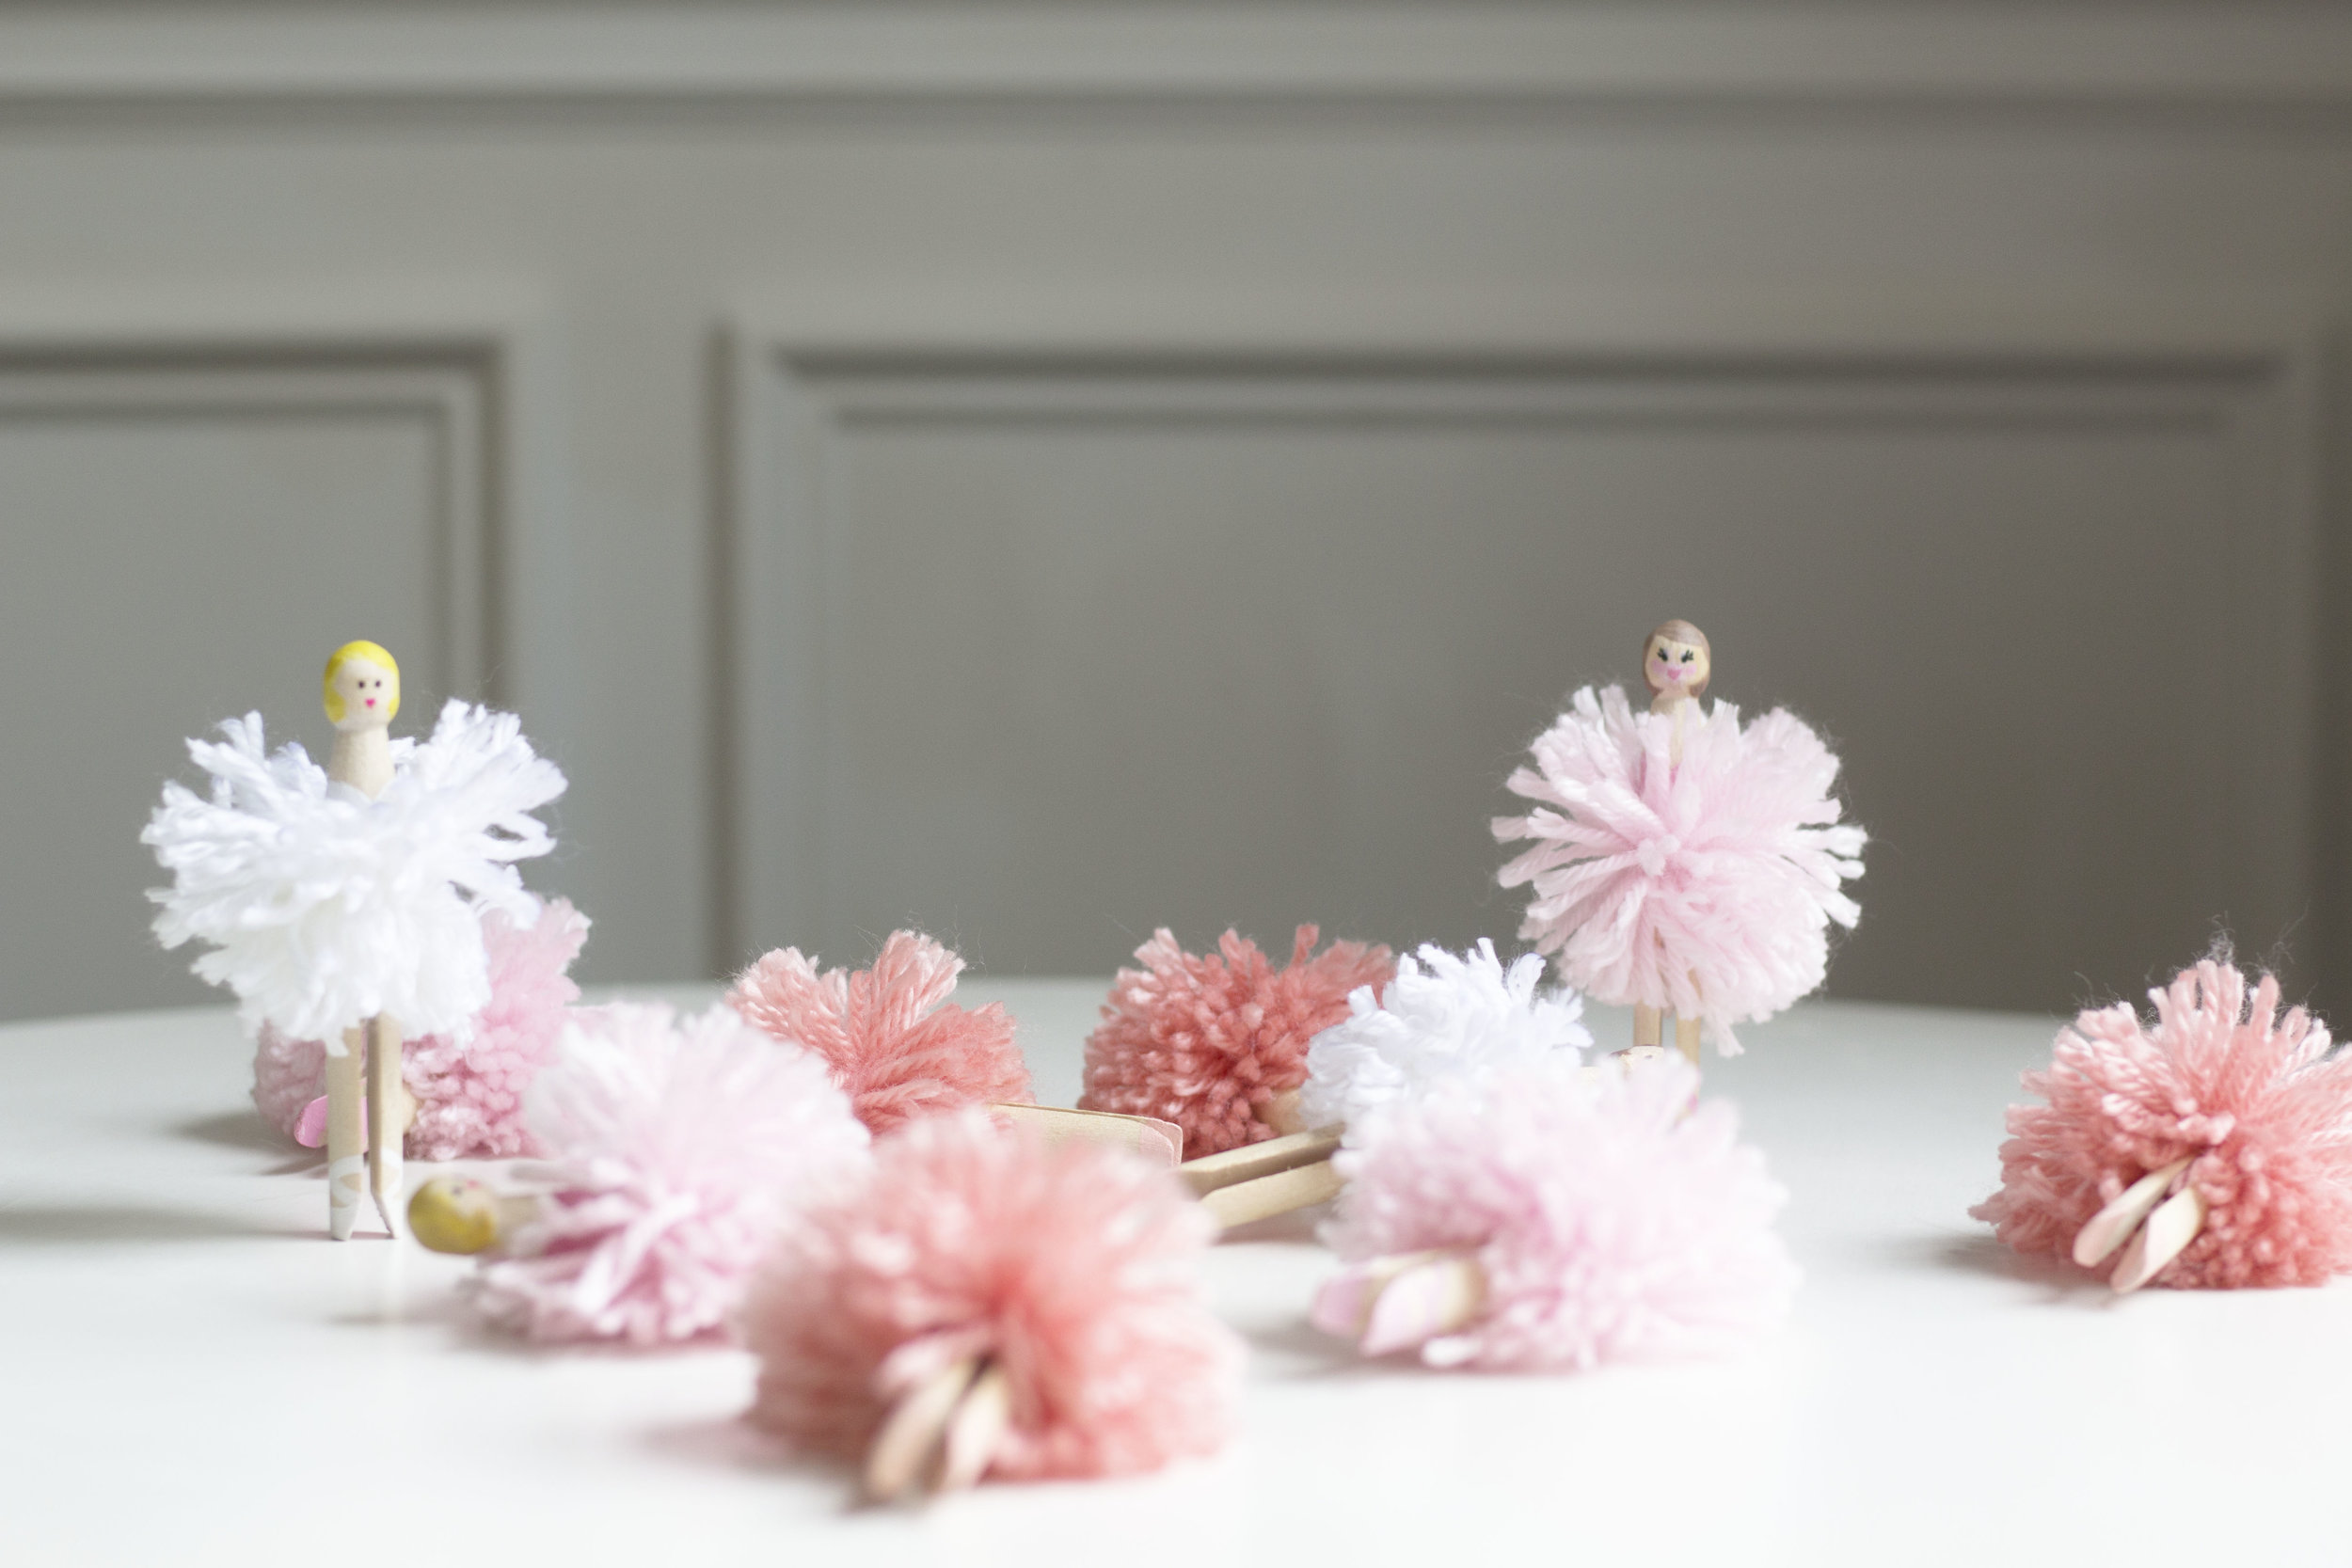
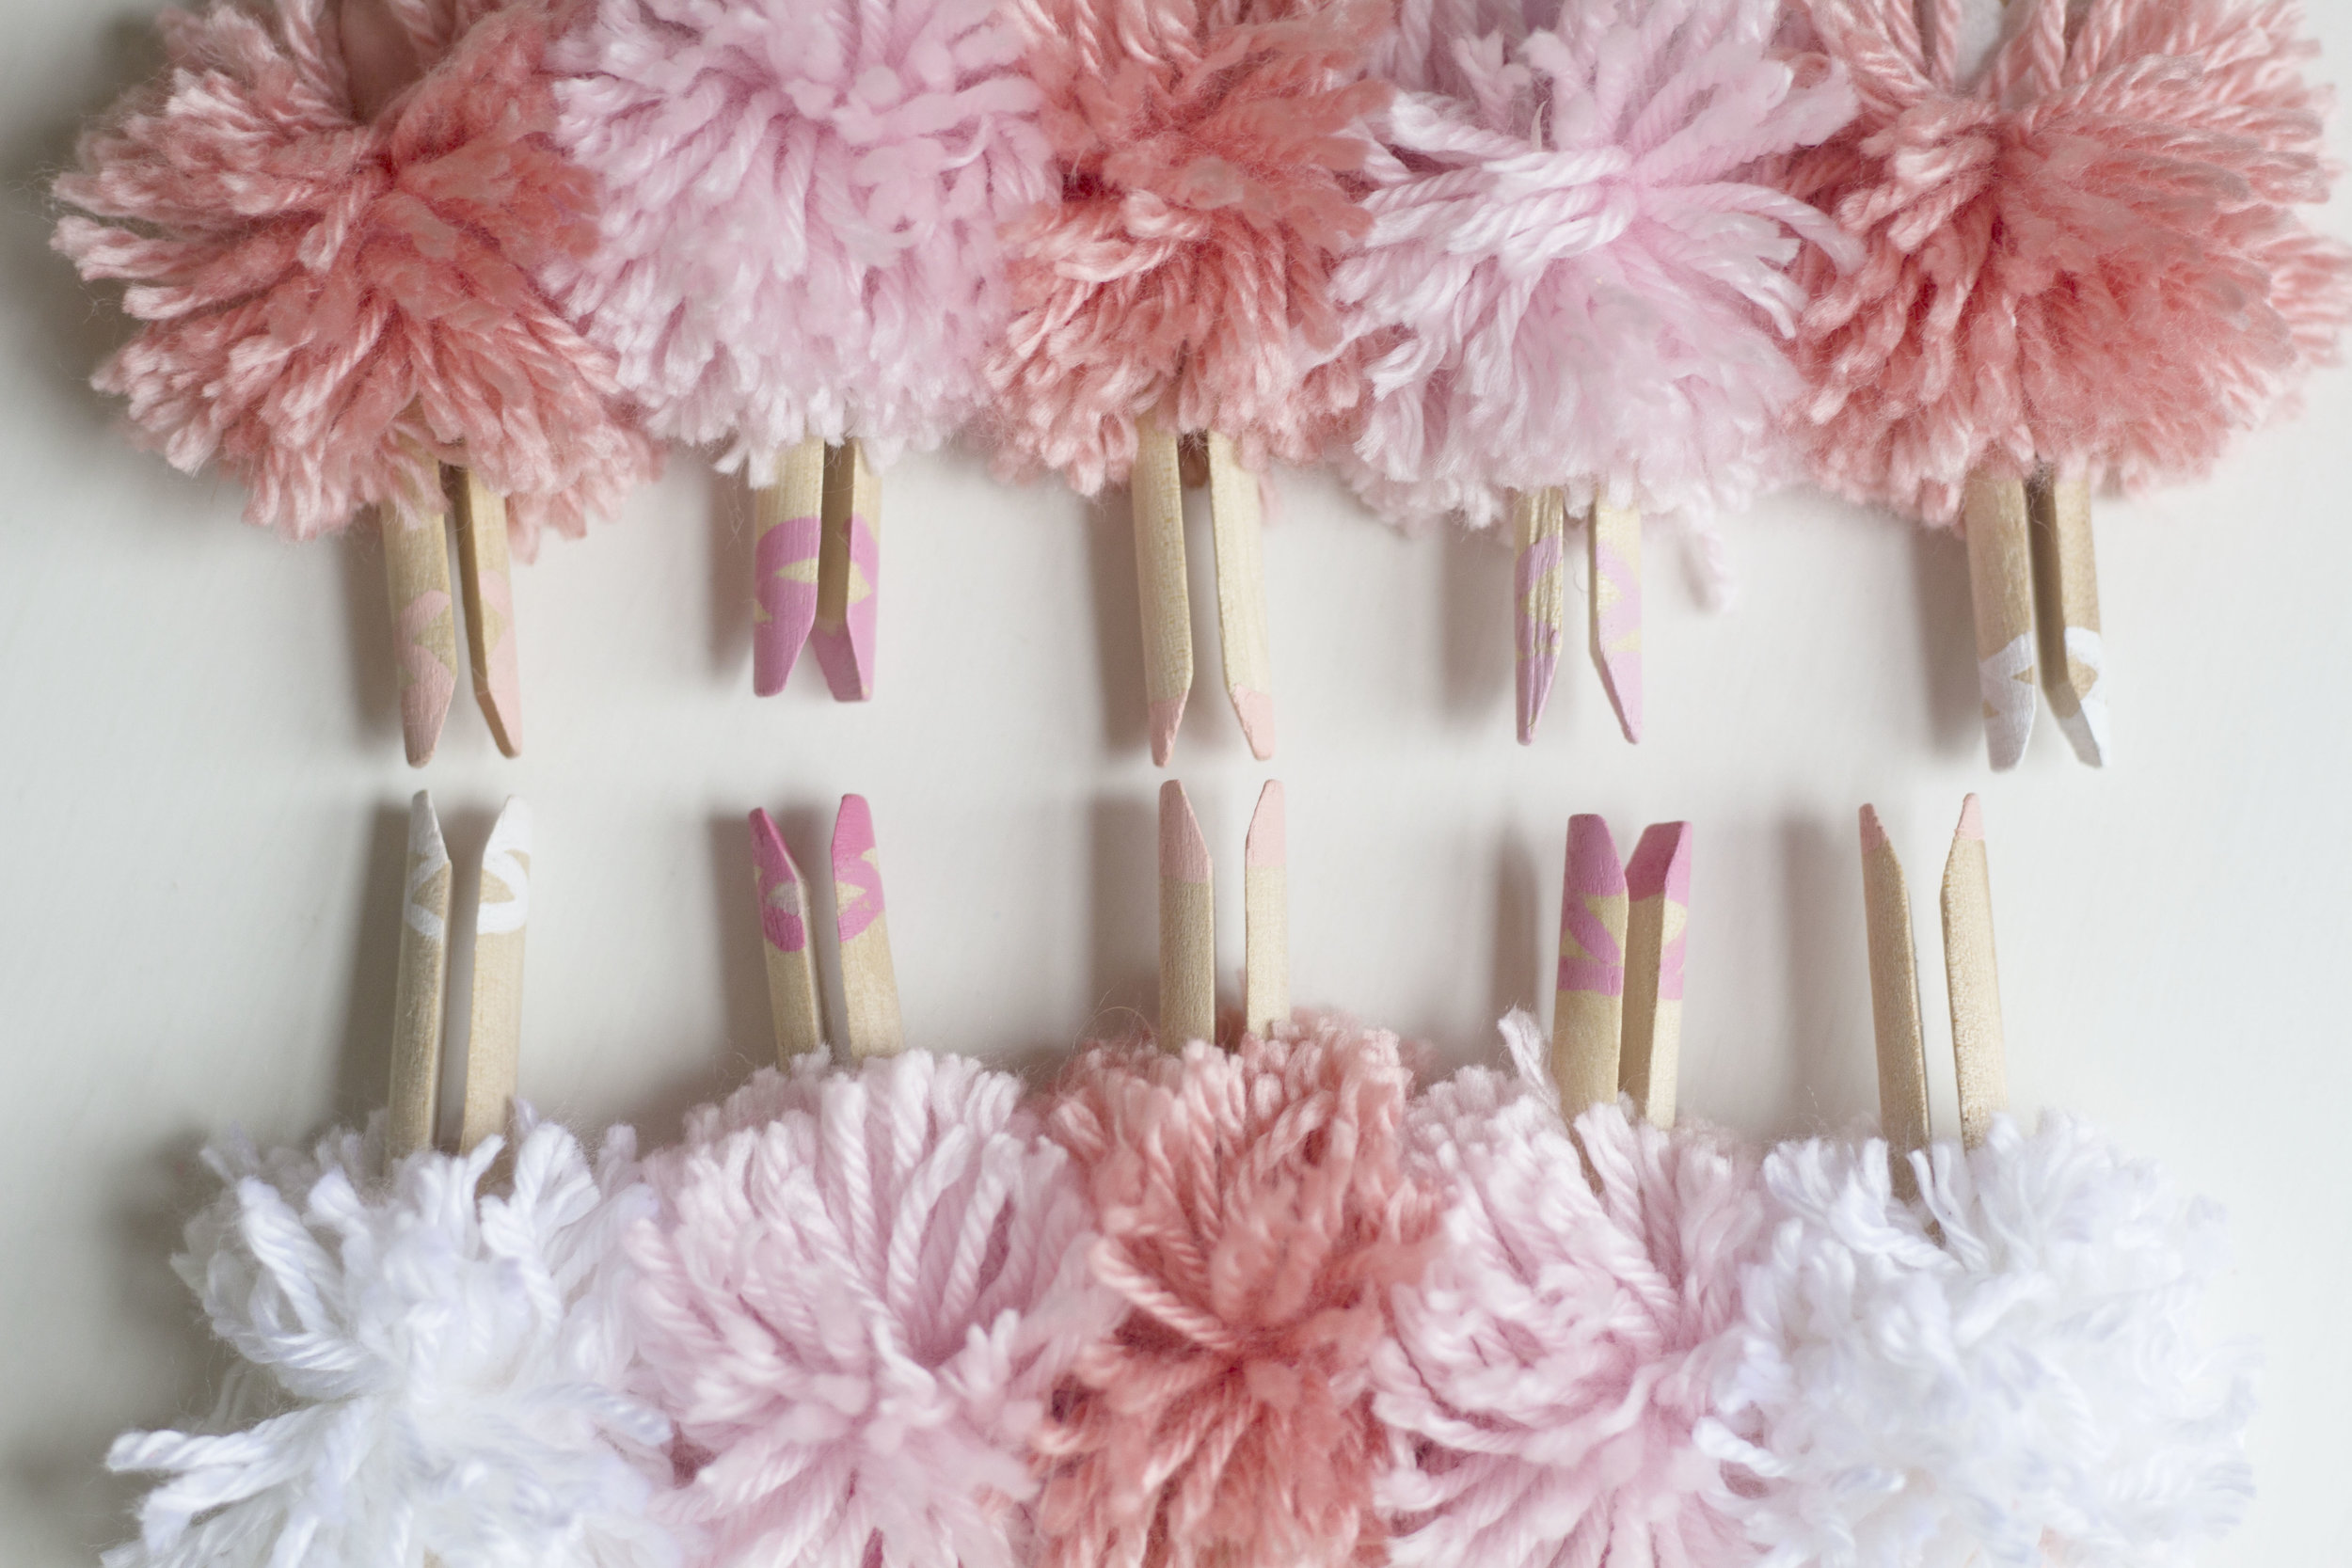
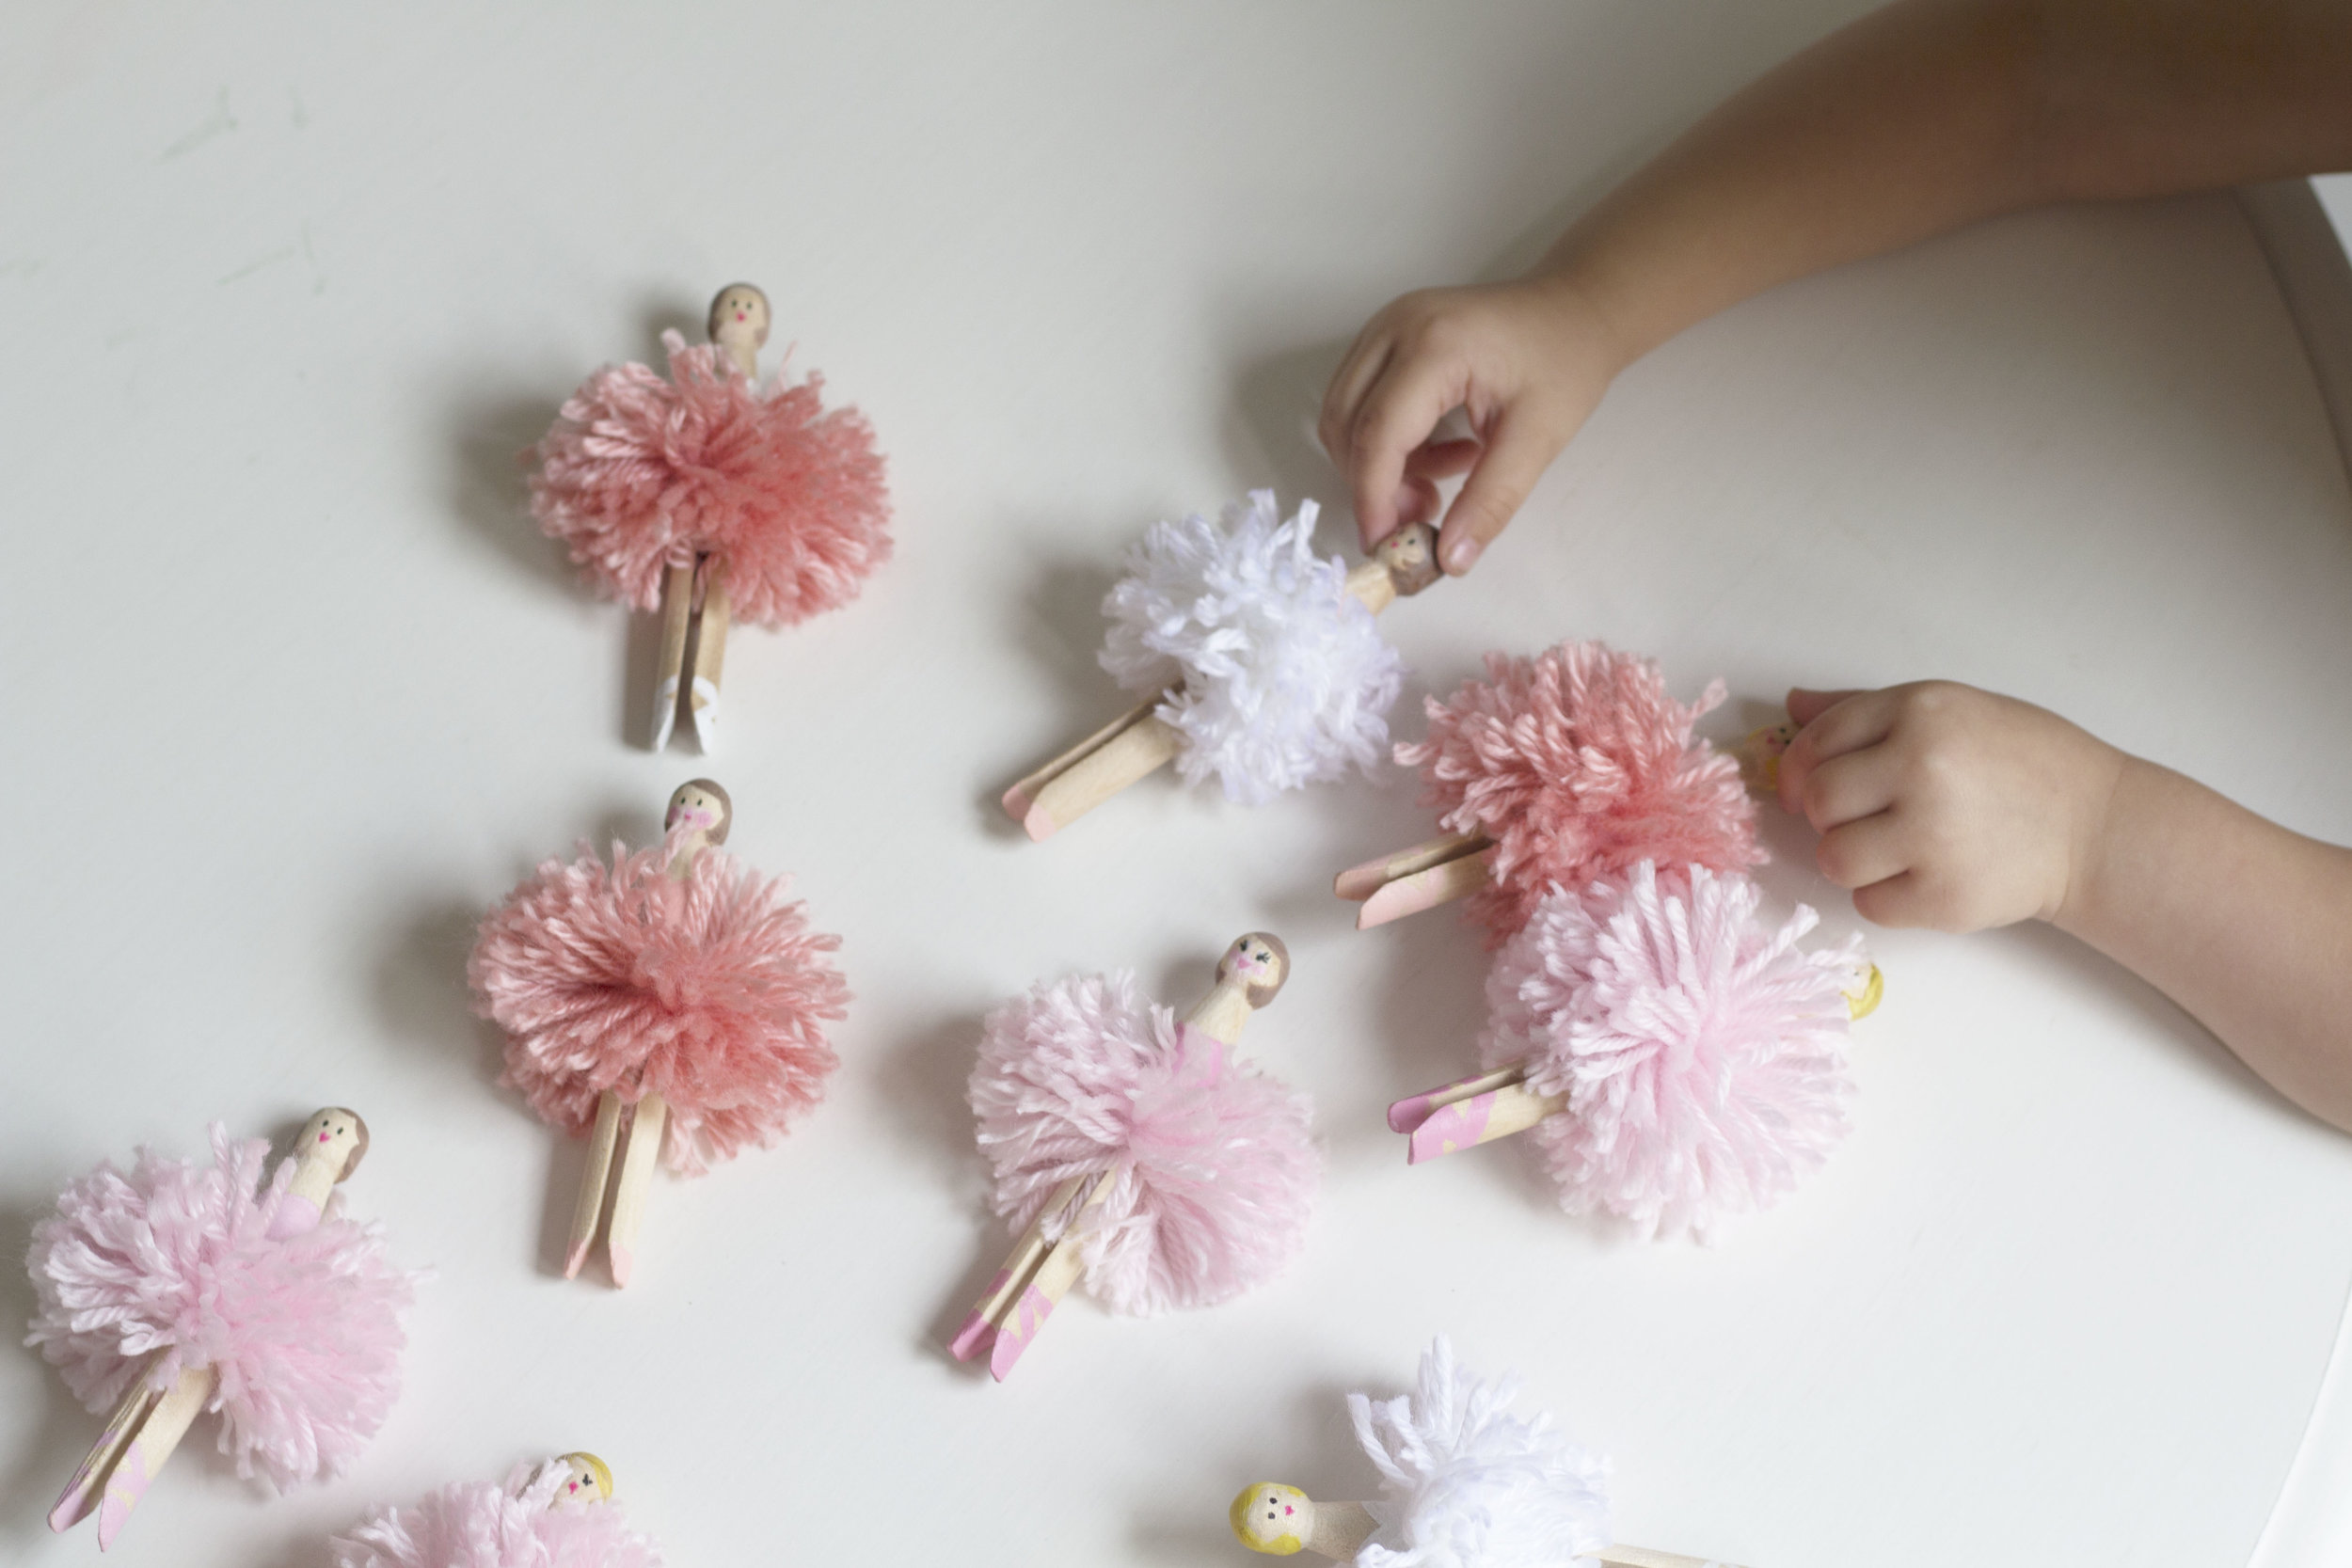
2. Paint your ballerinas! My mom did the painting on ours and goodness are they adorable! She had fun giving some of them blush, eyelashes, different colored hair. The sky is the limit on how you want to decorate them. You can use a very fine paint brush or a very fine tip pen/marker for the facial features- whichever is easier for you. We did a combination of those. After their faces are done you can move onto their bodies and create tutu tops/leotards and ballet slippers. We kept all of the outfits (and tutus) in pink and peach since those are Olivia's favorite colors. My mom is an artist and I love the faces she made! I swear the ballerinas all look like they have different personalities! :) When you are finished, let the painted clothespins sit for a minute to dry. We created a little stand out of the other paper plates to stand the ballerinas on. You can also place them on a glass, or candle jar.
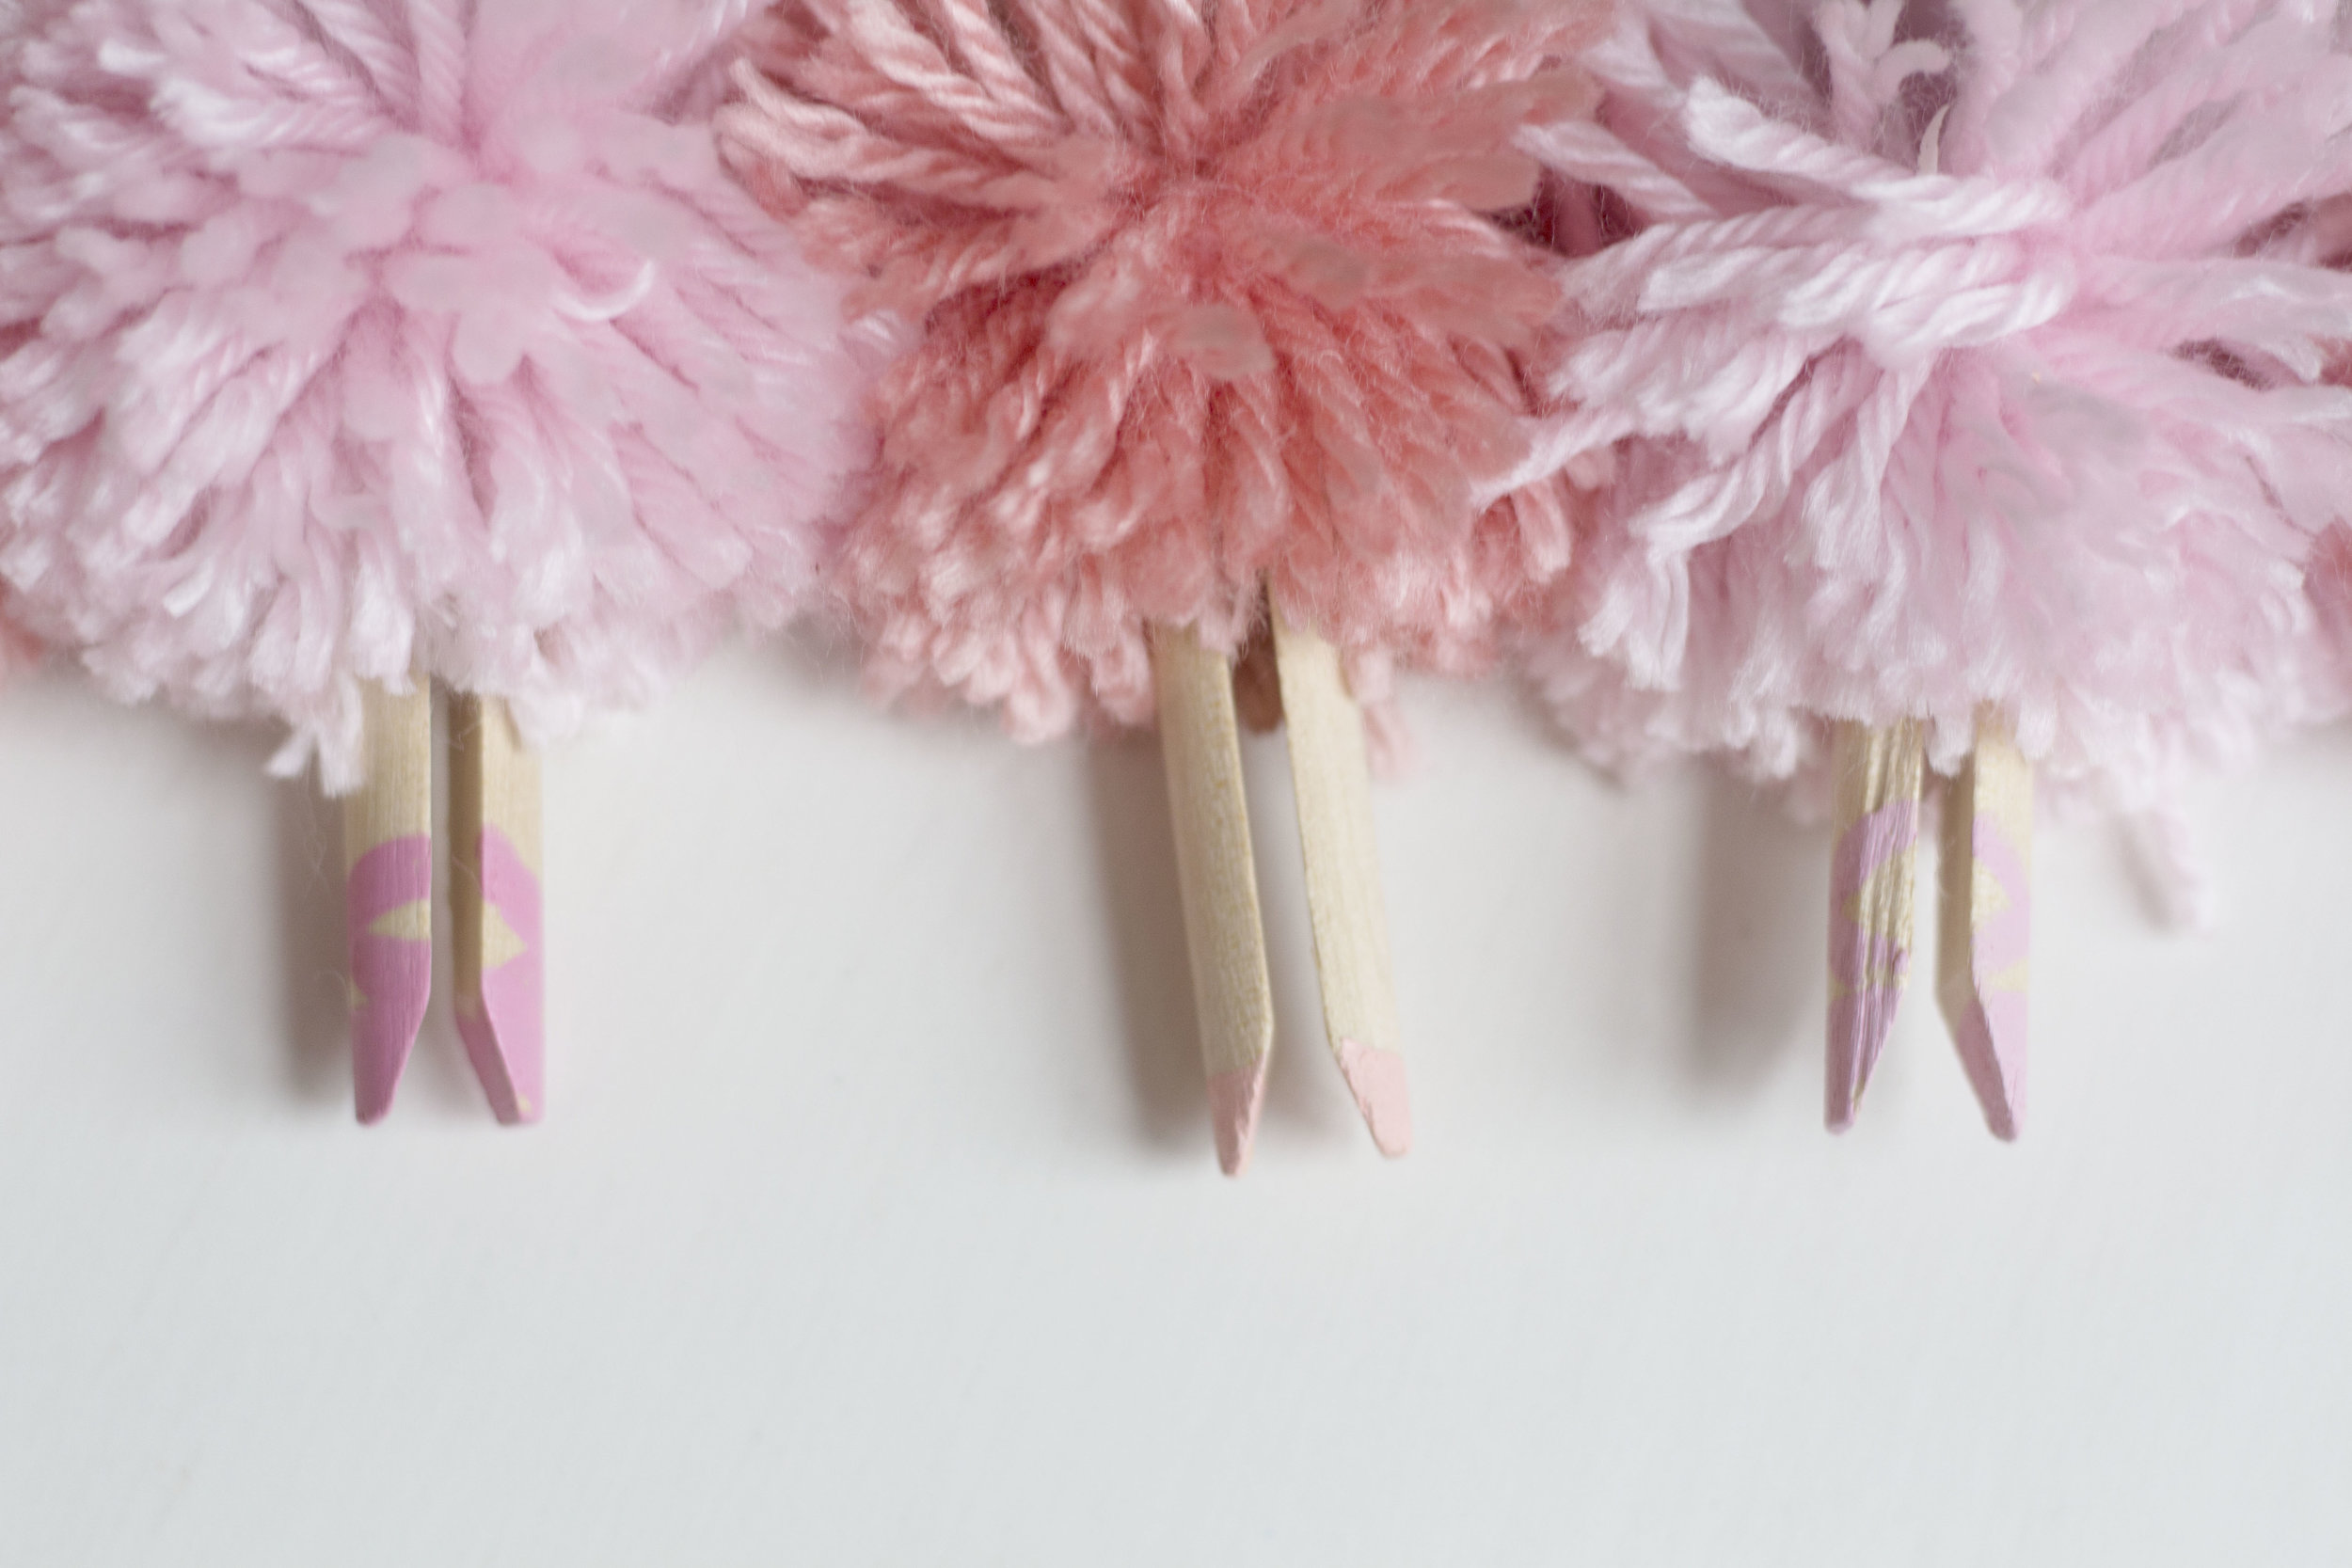
3. While your painted clothespin dries, it's time to make the pom tutu! Hold your donut circles together, placing your thumb over the slit. Start to wrap the donuts with yarn until it is completely covered. I started in the middle (opposite of my thumb) and then wrapped down all the way to the slit and then back up and around until I got to the slit on the other side, and then back again to the starting point. Doing essentially double layers was a lot of yarn and made the skirts really poufy. You can certainly do less. But I love how big these are!
4. When you are done wrapping the yarn on the donuts, cut one piece of yarn, about 10" or so and set aside. Continue to hold the sides near the slit to ensure the yarn doesn't slide off there. Using your other hand, place your painted ballerina into the center opening of the donut. Then take your scissors and carefully cut between the two round layers. Once they entire circle has been cut, take your piece of yarn, and slide it between the two layers of paper plate and tie the yarn in a double knot.
5. Voila! The cutest pom ballerina! Simply slide off the donut from the ballerina and trim any ends that need to be evened out.
It was really a fun project for me and Gigi to do for Olivia. The biggest thanks to my mom for helping me make them! I love them so much and more importantly, Olivia loves them. She slept with them that night and asked first thing the next morning if we could watch Angelina Ballerina and dance with her new ballerinas. :)
I hope you love these as much as we do! I'd love to see your if you make some! Use the hashtag #joyfulstylishliving when sharing on social media.
xoxo